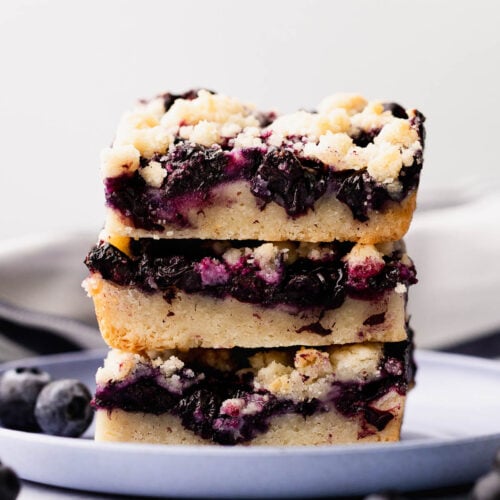
Gluten Free Blueberry Crumb Bars
Small batch gluten free blueberry crumb bars combine a bright blueberry filling with an incredibly soft sugar cookie base. Made with a flavorful almond flour blend, the dough is use for the base and crumb topping and is delicately sweetened to allow the gooey blueberries to be the star. This is an easy dessert bar recipe that fits right into spring and summer baking!
Servings: 6 Bars
Equipment
Ingredients
Gluten Free Crumb Bars
- 1 cup, plus 1 tablespoon blanched almond flour
- 6 tablespoons arrowroot flour
- ½ teaspoon salt
- 5 ½ tablespoons unsalted butter, room temperature
- 6 tablespoons powdered sugar
- ½ teaspoon vanilla extract
Blueberry Filling
- 1 cup fresh blueberries
- ¼ teaspoon lemon juice
- ¼ teaspoon lemon zest optional
- ½ teaspoon tapioca flour or cornstarch
- pinch salt
- ½ teaspoon vanilla extract
Instructions
Gluten Free Crumb Bars
- Preheat the oven to 350F degrees and adjust the oven rack to the middle position.
- Line a 6-inch square cake pan with parchment paper – Cut two strips of parchment to fit the sides of the pan, and long enough to hang over the sides. Line the pan with the paper strips crossed. This creates a sling to lift the bars out of the pan. Lightly grease any exposed areas of the pan, so the bars don't stick.
- In a small mixing bowl, whisk together the almond flour, arrowroot flour, and salt.
- In a medium mixing bowl using a hand held mixer, or stand mixer fitted with the paddle attachment, beat the butter and powdered sugar on medium speed until smooth and creamy. Scrape down the sides of the bowl as needed. Add the vanilla extract and beat until incorporated. Note – see the Notes below for using the stand mixer.
- In increments, sprinkle the dry ingredients over the butter mixture and beat on low speed until all of the flour has been added. Once all the flour is added, turn the speed up to medium and beat until all the flour is incorporated, no dry streaks remain, and a moistened dough forms. Note – The dough will seem dry as you're adding and mixing in the flour, but continue to mix and a dough will form.
- Reserve 1/2 cup of the crumb dough for the topping. Refrigerate until ready to use. Press the remaining dough into the prepared pan using your fingertips or a small measuring cup to pack tightly and into all corners. Refrigerate for at least 15 minutes to allow the dough to hydrate and develop flavor. Note - If you prefer a thicker bar base, reserve a little less dough for the crumb topping.
- Pre-bake the crumb base for 15 minutes, or until the top looks light golden brown. While the base is baking, prepare the blueberry filling.
Blueberry Filling
- In a small mixing bowl, add the blueberries, lemon juice and zest (if using), tapioca flour, salt, and vanilla extract. Toss well to combine and fully coat the blueberries. Set aside at room temperature. Note - 1 small lemon will be enough to get the juice and zest. I recommend an organic lemon because we are using the zest.
- Once the crumb base is done pre-baking, keep the oven on, and set on a wire cooling rack. Spoon the blueberry filling over the top of the base - you do not need to let the base cool because it is going right back into the oven. Drizzle any remaining liquid over the top of the blueberries.
- Sprinkle the reserved crumb dough over the top of the blueberry filling. Bake the bars for an additional 40 minutes, or until the topping is golden and the blueberry filling is bubbling.
- Cool the bars completely in the pan set on a wire cooling rack. Once cool, carefully lift the bars out of the pan and cut into desired slices. Enjoy!
Notes
- Serving Size – This is a small batch recipe and tested as a small batch. I can’t say for certain how doubling the recipe will work. However, I would recommend at least an 8-inch baking pan for a larger batch.
- Baking Pans – You can also use a 6-inch round cake pan to make bar wedges, or 9×5 inch loaf pan.
- Using A Stand Mixer – You can use a standard mixer with attachments with a smaller 3-quart mixing bowl. The standard size mixing bowl will just smear the ingredients along the side of the bowl.
- Lemon Juice and Zest - Both are entirely optional, but do add a nice vibrancy to the filling. I recommend using an organic lemon since we use the zest.
- Bar Base Thickness - You can bake a thicker bar base if you prefer. Just reserve a little less dough for the crumble topping.
- Ingredient Swaps - I have only tested the recipe as written. However, you can swap in tapioca or cornstarch in the bar base and filling.
- Freezing The Dough – The dough can be frozen for up to 2 months. Shape into a disc, wrap tightly, and freeze. Thaw in the refrigerator.
- Freezing Baked Bars – Baked bars can be frozen for up to 2 months. Wrap tightly, freeze, thaw in the refrigerator, then bring to room temperature when ready to serve.