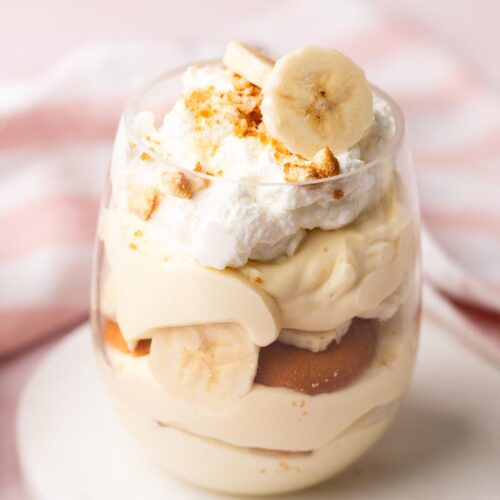
Small Batch Homemade Banana Pudding
Thick and creamy homemade banana pudding made with from-scratch vanilla pudding, lightened with whipped cream and layered with vanilla wafers and fresh banana slices. This small batch, no-bake dessert is portioned into two to four cups, then chills to give the wafers time to soften.
Servings: 4 Servings
Calories: 471kcal
Equipment
Ingredients
- 1 large egg yolk, room temperature
- 1 ½ tablespoons cornstarch
- 1 cup heavy whipping cream divided
- ¾ cup whole milk
- 3 tablespoons granulated sugar
- 1 tablespoon unsalted butter, cold and cut into cubes
- 1 teaspoon vanilla bean paste, or vanilla extract
- ⅛ teaspoon salt
- 2 medium bananas, barely ripe reserve a few slices for topping
- 14 to 18 vanilla wafers plus a couple for topping
Instructions
- In a small mixing bowl, whisk the egg yolk, 1/4 cup cream, and cornstarch until fully combined and the starch is dissolved.1 large egg yolk, room temperature, 1 ½ tablespoons cornstarch, cup heavy whipping cream
- In a small saucepan, add the milk and sugar and heat over medium heat until small bubbles start to form along the sides of the pan. This can take about 2 to 3 minutes. Do not boil.3/4 cup whole milk, 3 tablespoons granulated sugar
- While whisking constantly, slowly drizzle about half of the heated milk into the egg mixture to temper the mix. Whisking keeps the egg from scrambling. Return the tempered mix to the saucepan, keep whisking, and heat over medium until the pudding starts to bubble. This can take 2 to 3 minutes.
- Remove the pudding from the heat and add the butter, vanilla, and salt. Mix until the butter has melted.1 tablespoon unsalted butter, cold and cut into cubes, 1 teaspoon vanilla bean paste, or vanilla extract, 1/8 teaspoon salt
- Cover the pudding with plastic wrap, directly touching the top. This will keep a skin from forming on the pudding. Let the pudding sit at room temperature for 10 to 15 minutes to cool down before refrigerating. Chill for at least 3 hours, or overnight, to give it time to set.
- In a medium mixing bowl, whip the remaining 3/4 cup of cream to stiff peaks. Spoon out about 1/2 cup of the whipped cream into a bowl to use as the final topping. Cover and refrigerate until ready to serve.1 cup heavy whipping cream
- Gently fold the remaining whipped cream into the pudding until no streaks of cream remain. The mixture will be thick, creamy, and light.
- To assemble: Slice the bananas only when you're ready to start assembling to keep them from browning. Start with a couple of dollops of whipped pudding in your serving glass/dish. Top with 3 to 4 wafers, overlapping or crushing as needed, then slices of banana, and a couple more dollops of whipped pudding. Repeat at least one more time, ending with pudding. Make sure the whipped pudding is fully covering the bananas — this will help them from browning too fast.2 medium bananas, barely ripe, 14 to 18 vanilla wafers
- Immediately cover tightly with plastic wrap and refrigerate for at least 2 hours, or up to 8 hours. The chill time is needed to soften the wafers and allow all the flavors to meld together.
- When ready to serve, dollop with the reserved whipped cream, crushed wafers, and a couple of slices of banana.
Assembly is just a suggestion. The only recommendation is to start with a base of whipped pudding so the wafers can absorb its moisture.
The longer the pudding is refrigerated, the more likely the bananas will brown. I recommend enjoying it within 24 hours of assembling.
Notes
- Serving Size - This small batch recipe can be doubled.
- Serving Dishes - I used 14-ounce glasses (in the photos). You can also assemble in a 6x6-inch casserole dish, four serving glasses, or 2 to 4 ramekins.
- Bananas - Choose firm bananas with green on the stem and no brown spots. Bananas will naturally start to oxidize (brown) the minute they are exposed to air, and they will soften as they sit in the pudding. This doesn't happen as fast with barely ripe bananas. Can you stop the bananas from browning? No. You can lightly brush the slices with lemon juice or water to slow the browning, but the best thing is to use a firm banana and assemble, cover, and refrigerate quickly.
- Milk and Heavy Cream - For super creamy and rich pudding, I recommend whole milk and heavy cream. 2% milk is an option.
- Make Ahead Option - The lightened pudding can chill overnight instead of being assembled right away, which makes it easy to split the process across two days. Either way, once assembled, the pudding cups still need at least 2 hours in the fridge for the wafers to soften.
- Storage - Keep the pudding refrigerated for up to 24 hours. I do not recommend freezing it. The moisture content in the homemade pudding can make the texture icy, grainy, and even separate when thawed.
Nutrition
Calories: 471kcal | Carbohydrates: 46g | Protein: 5g | Fat: 31g | Saturated Fat: 18g | Polyunsaturated Fat: 3g | Monounsaturated Fat: 8g | Trans Fat: 0.2g | Cholesterol: 126mg | Sodium: 194mg | Potassium: 361mg | Fiber: 2g | Sugar: 27g | Vitamin A: 1135IU | Vitamin C: 5mg | Calcium: 105mg | Iron: 0.4mg