Neapolitan No-Bake Mini Cheesecake
This post may contain affiliate links. See my disclosure policy.
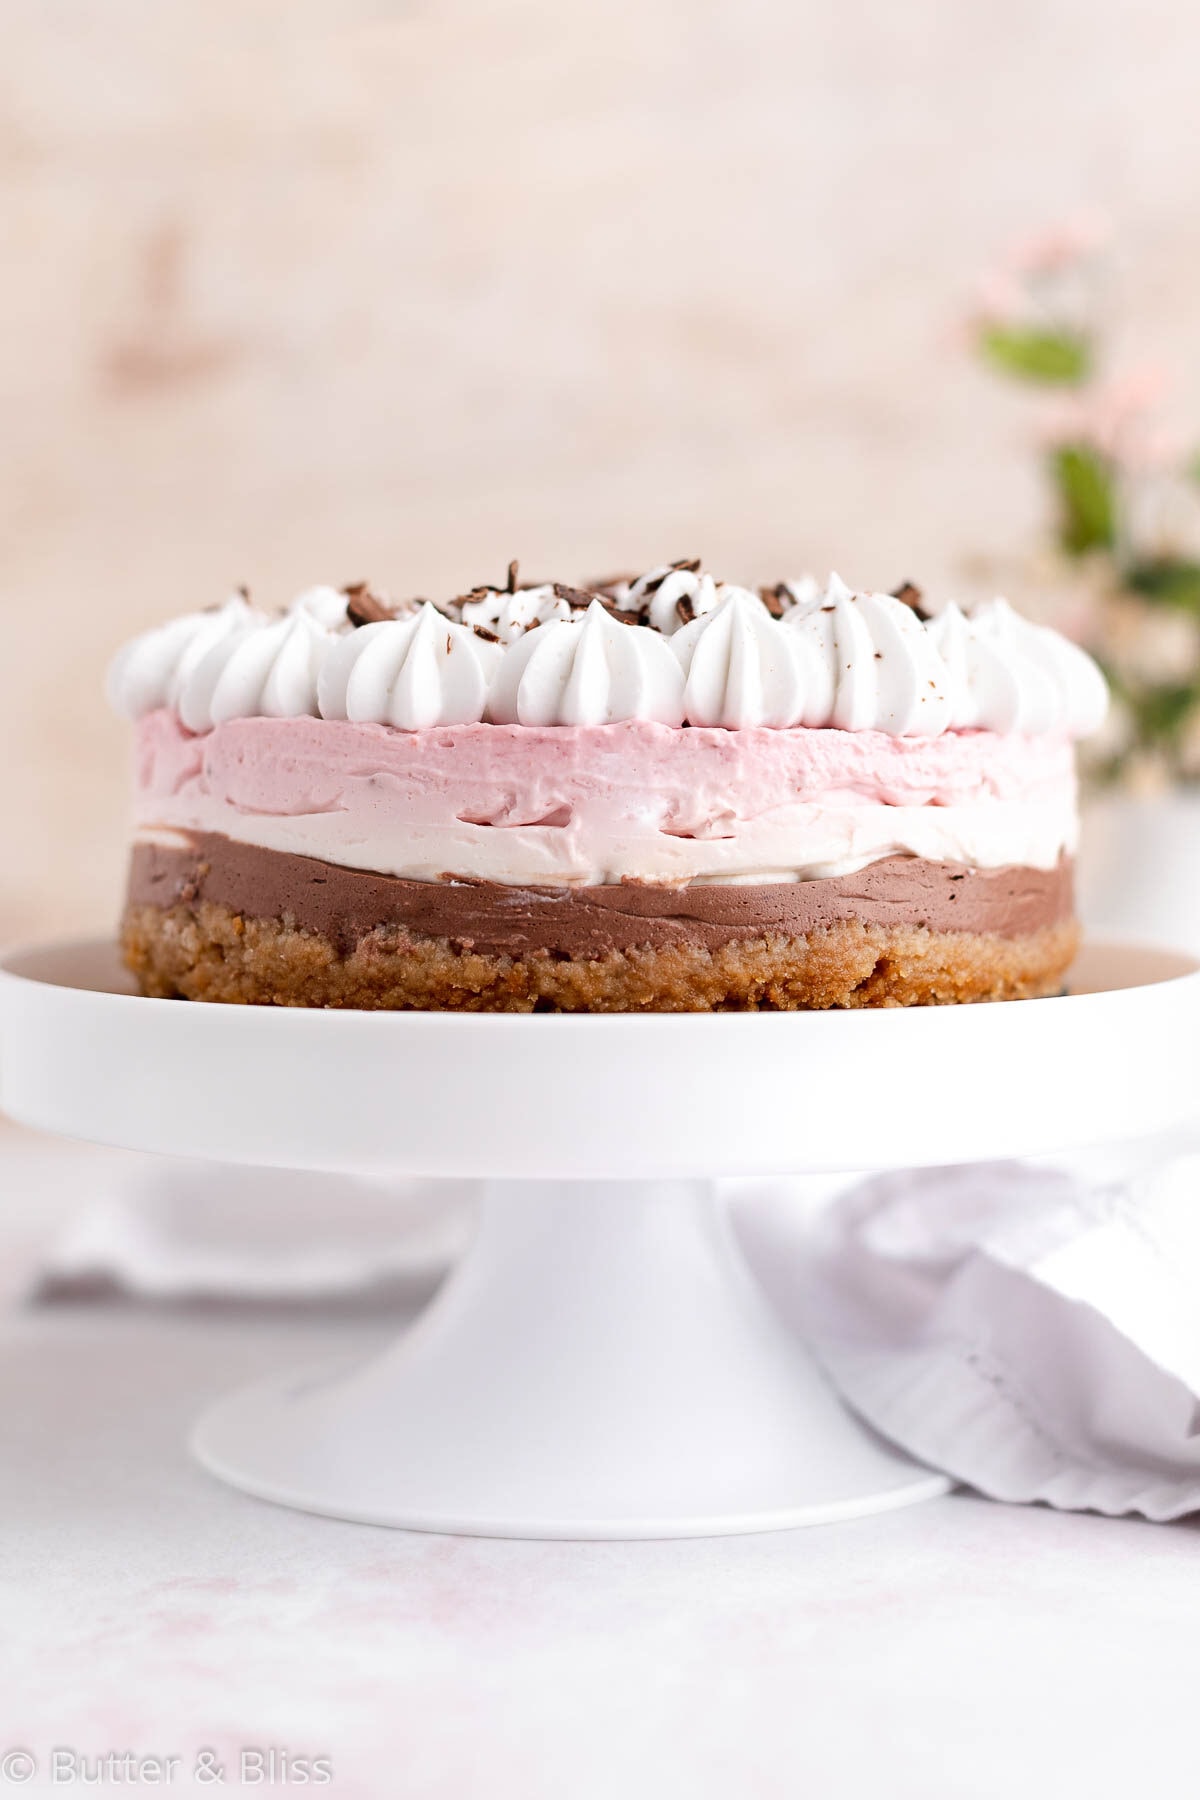
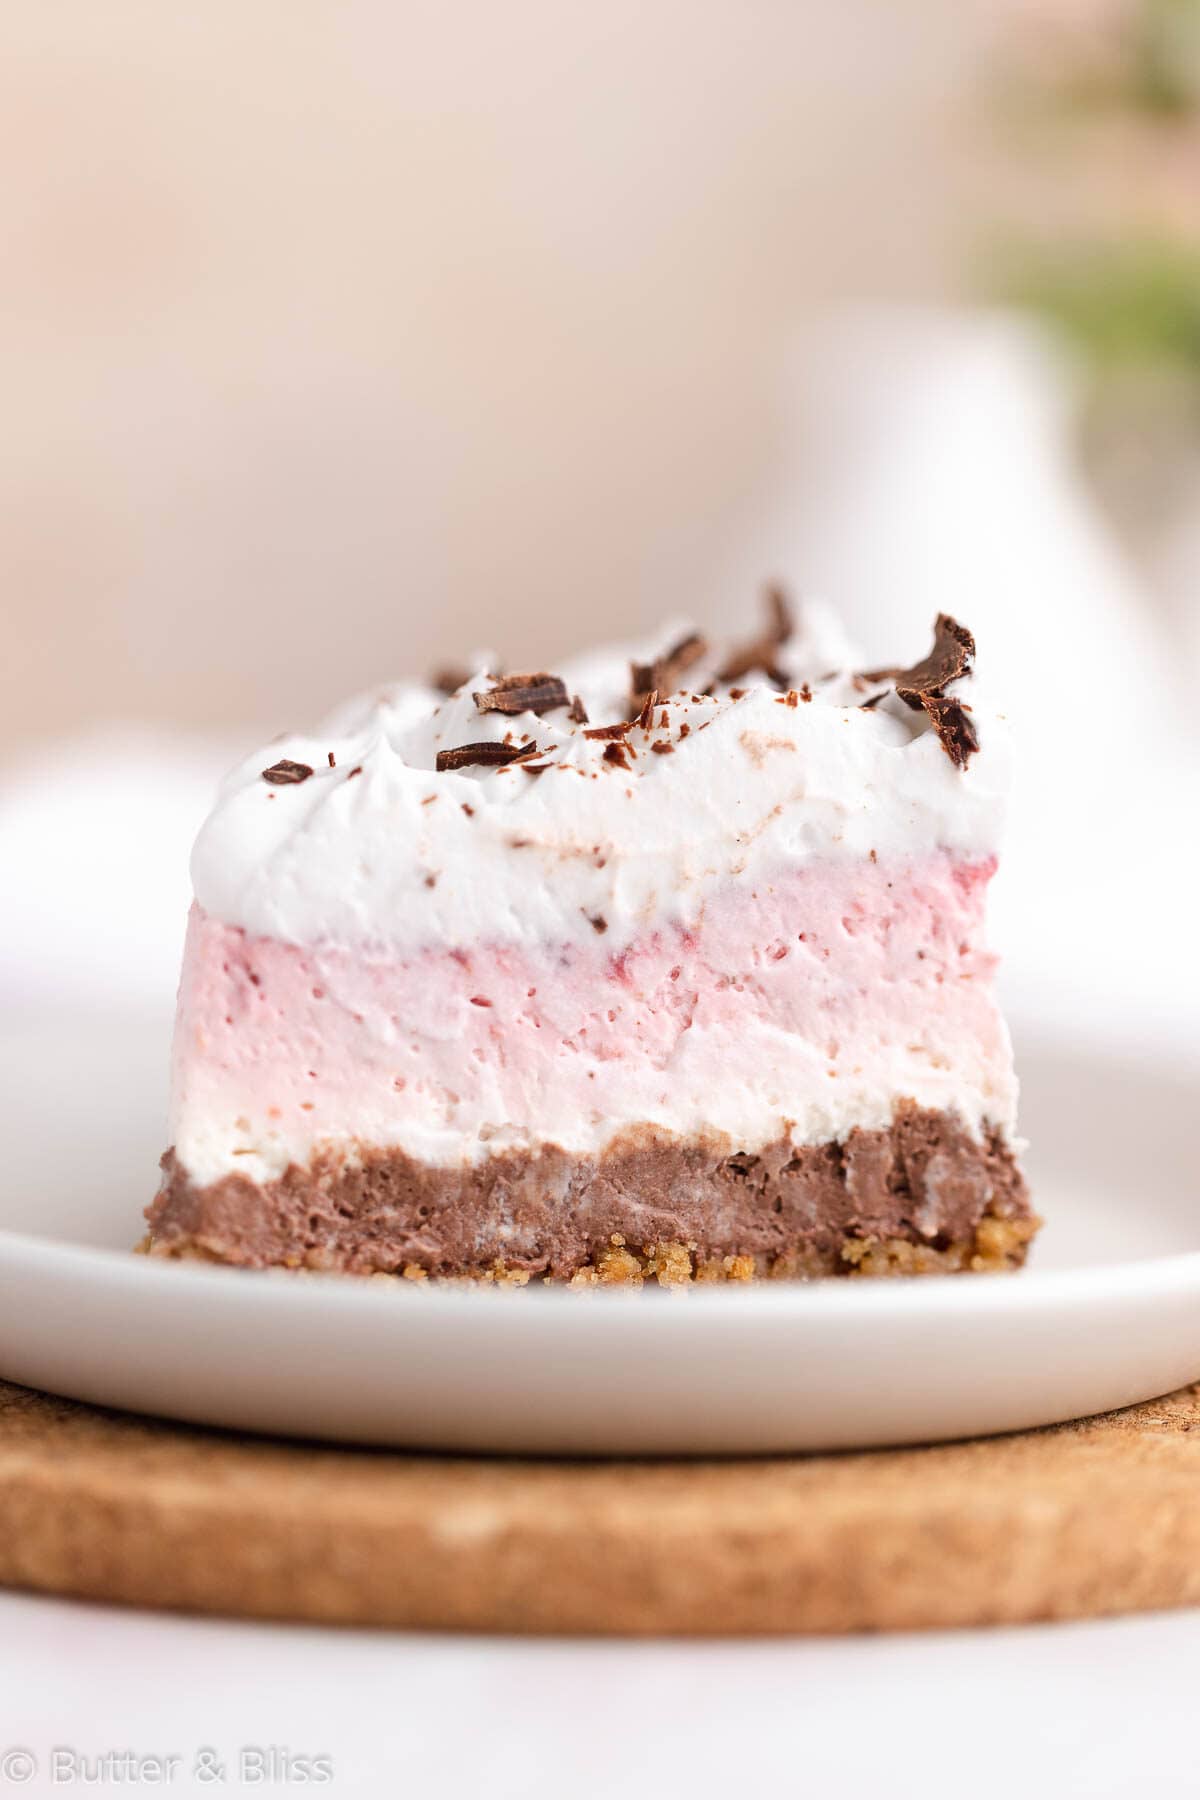
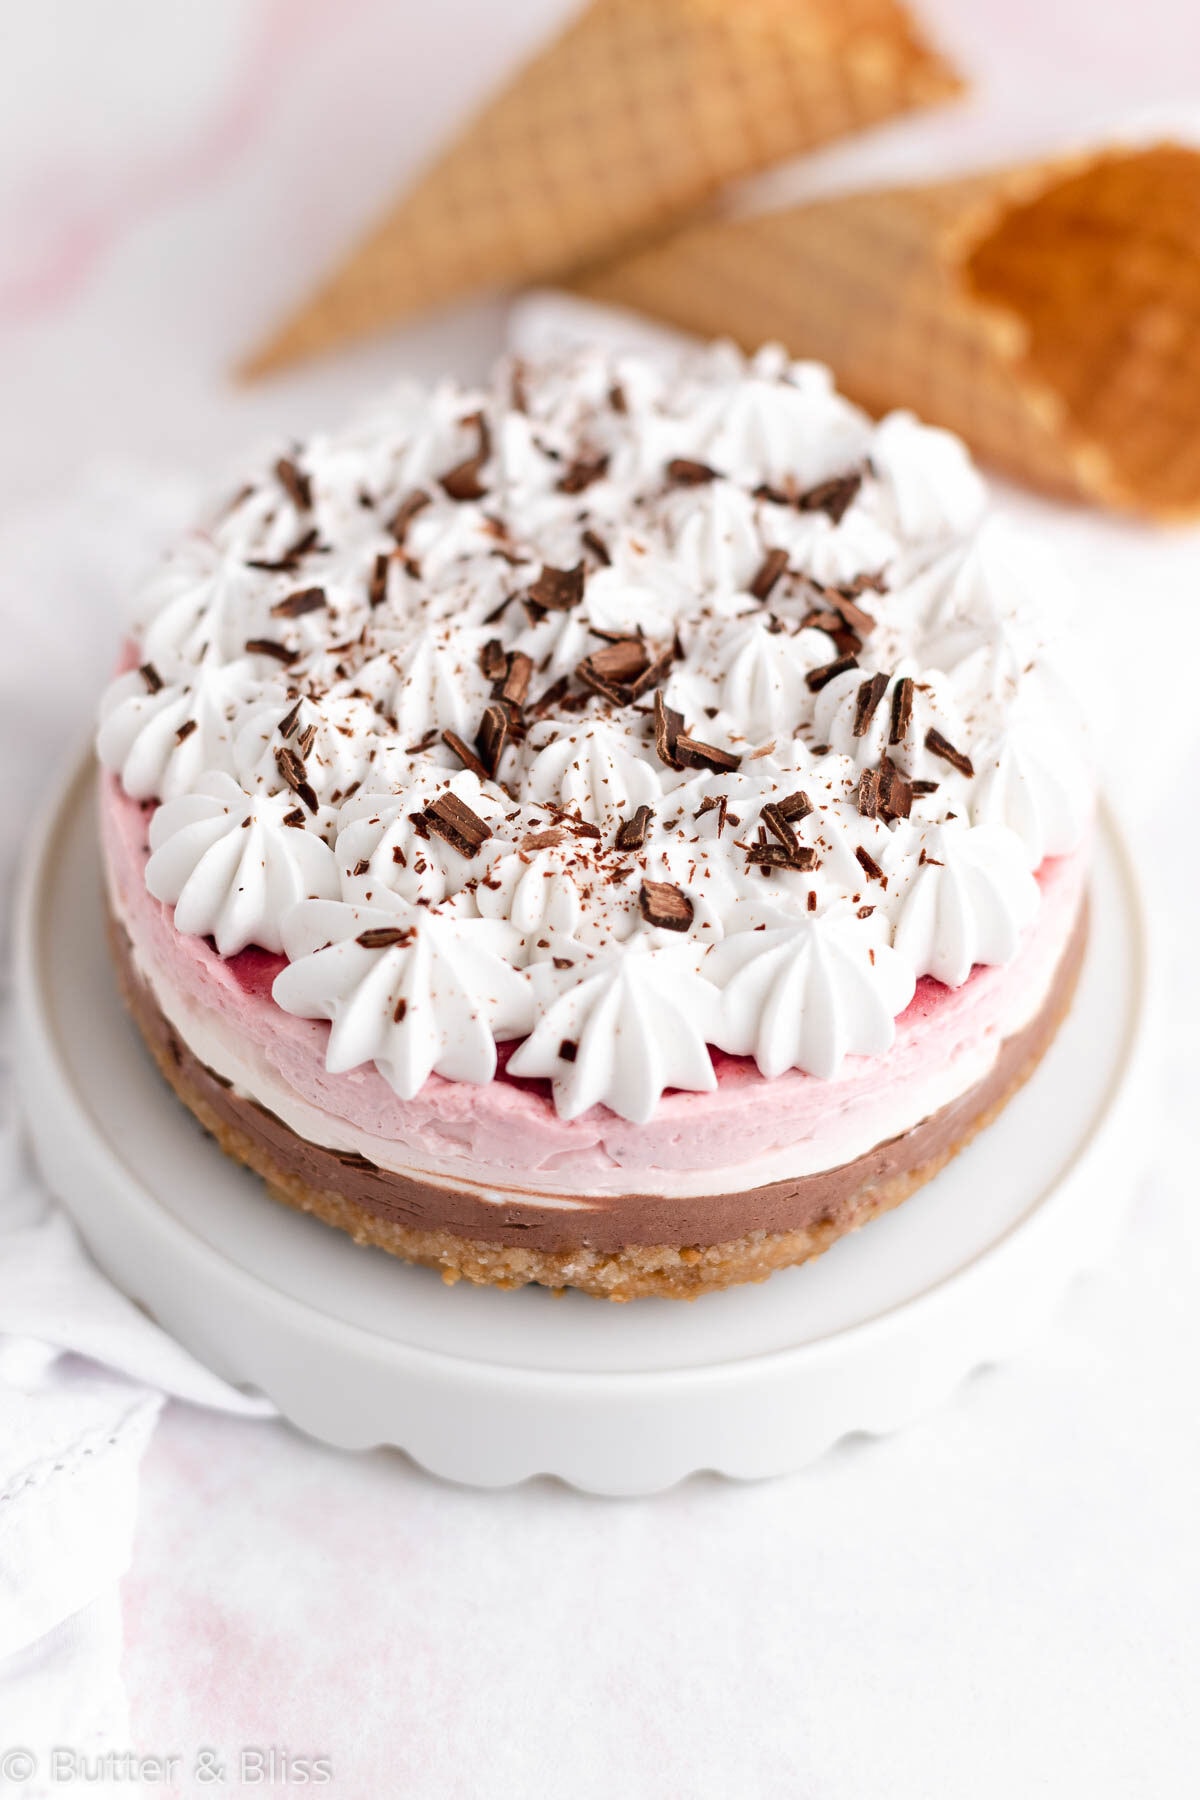
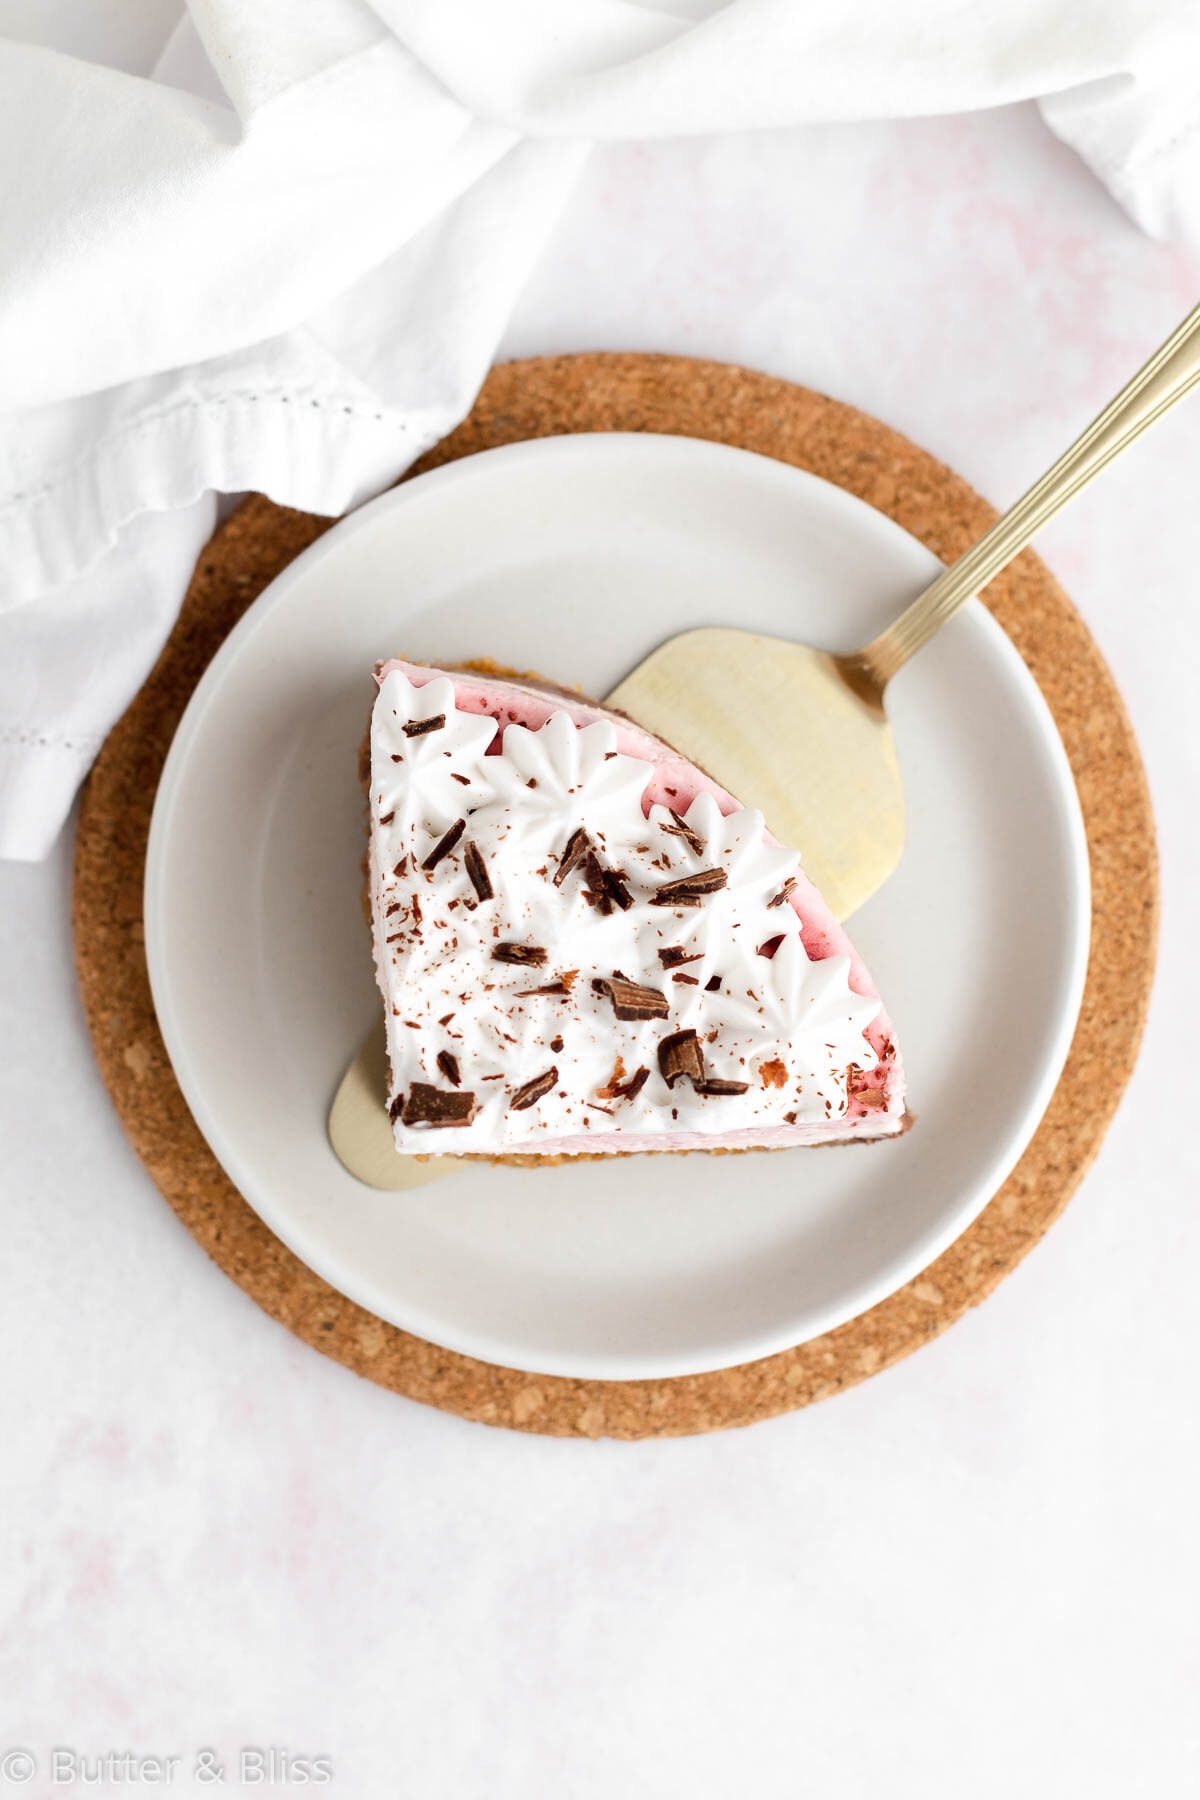
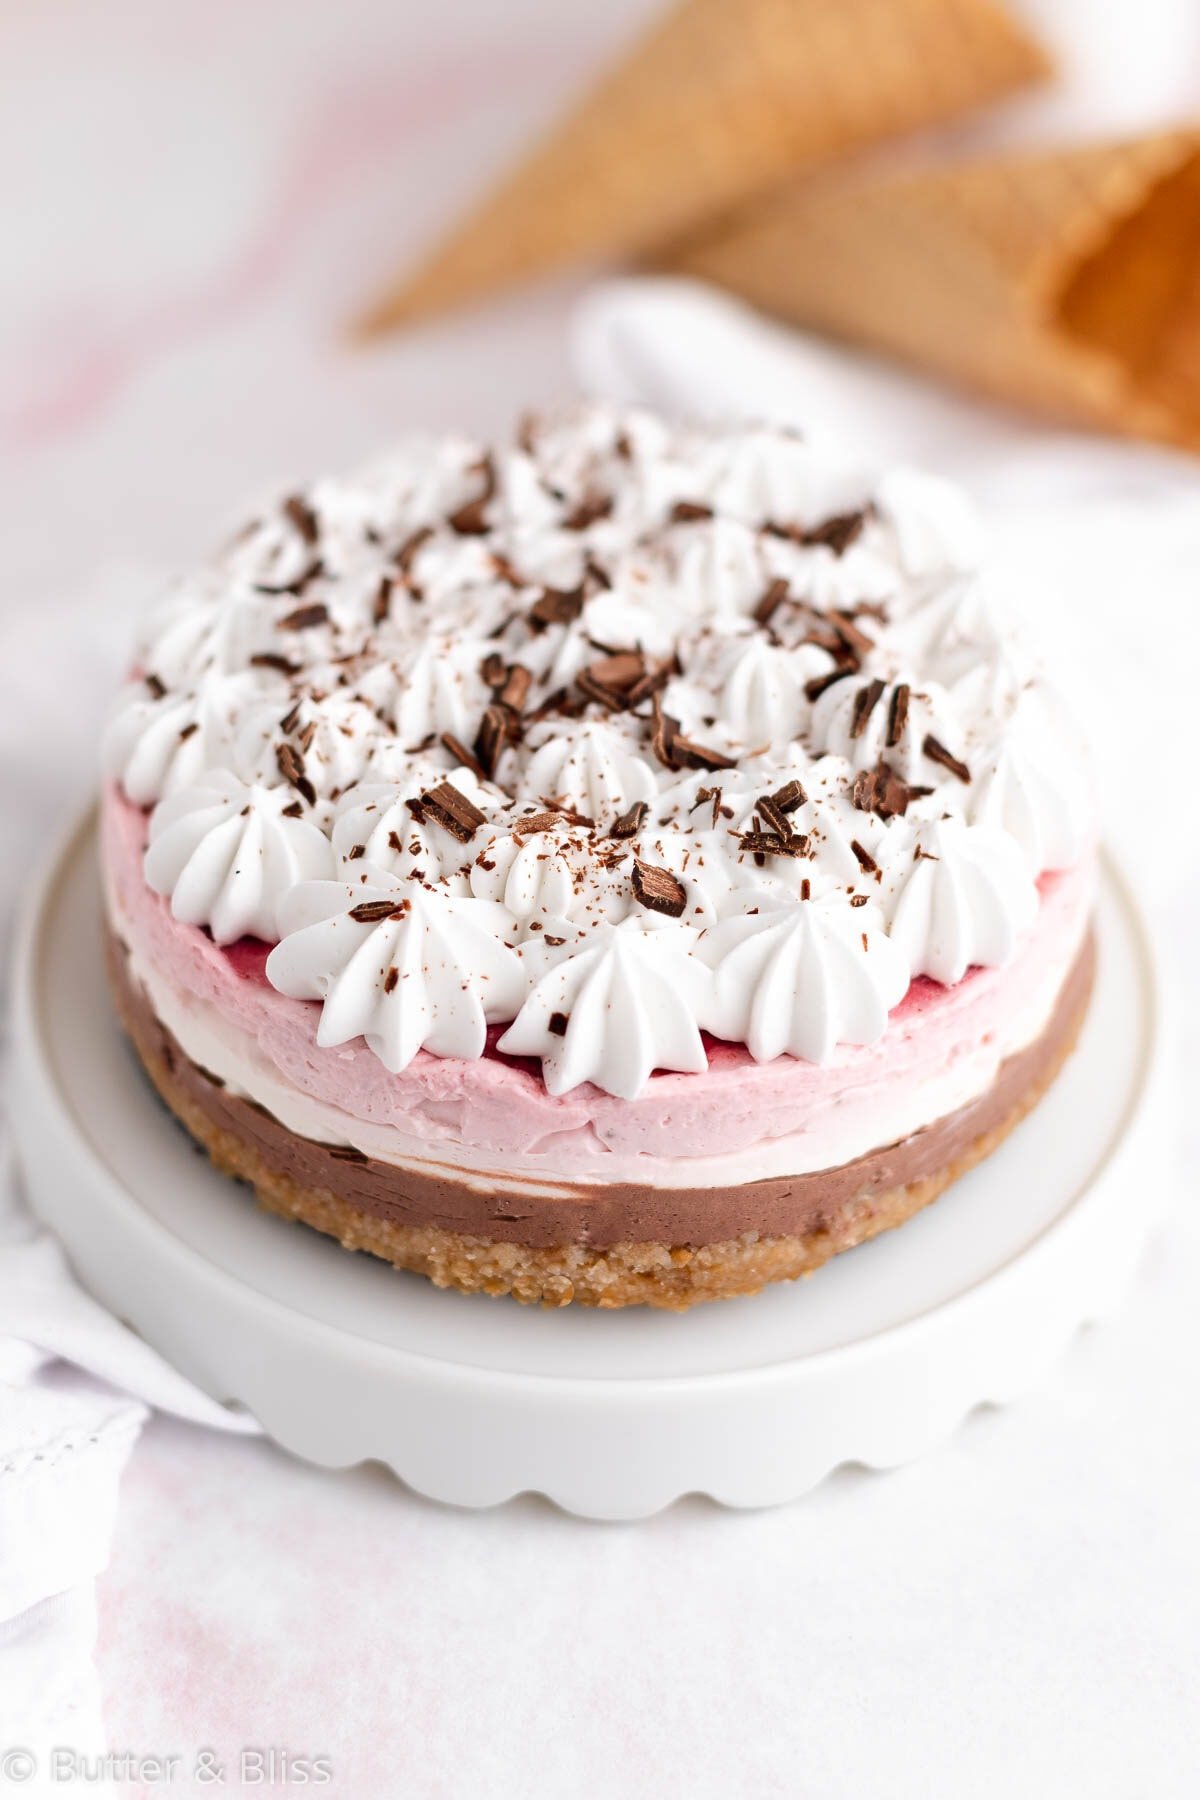
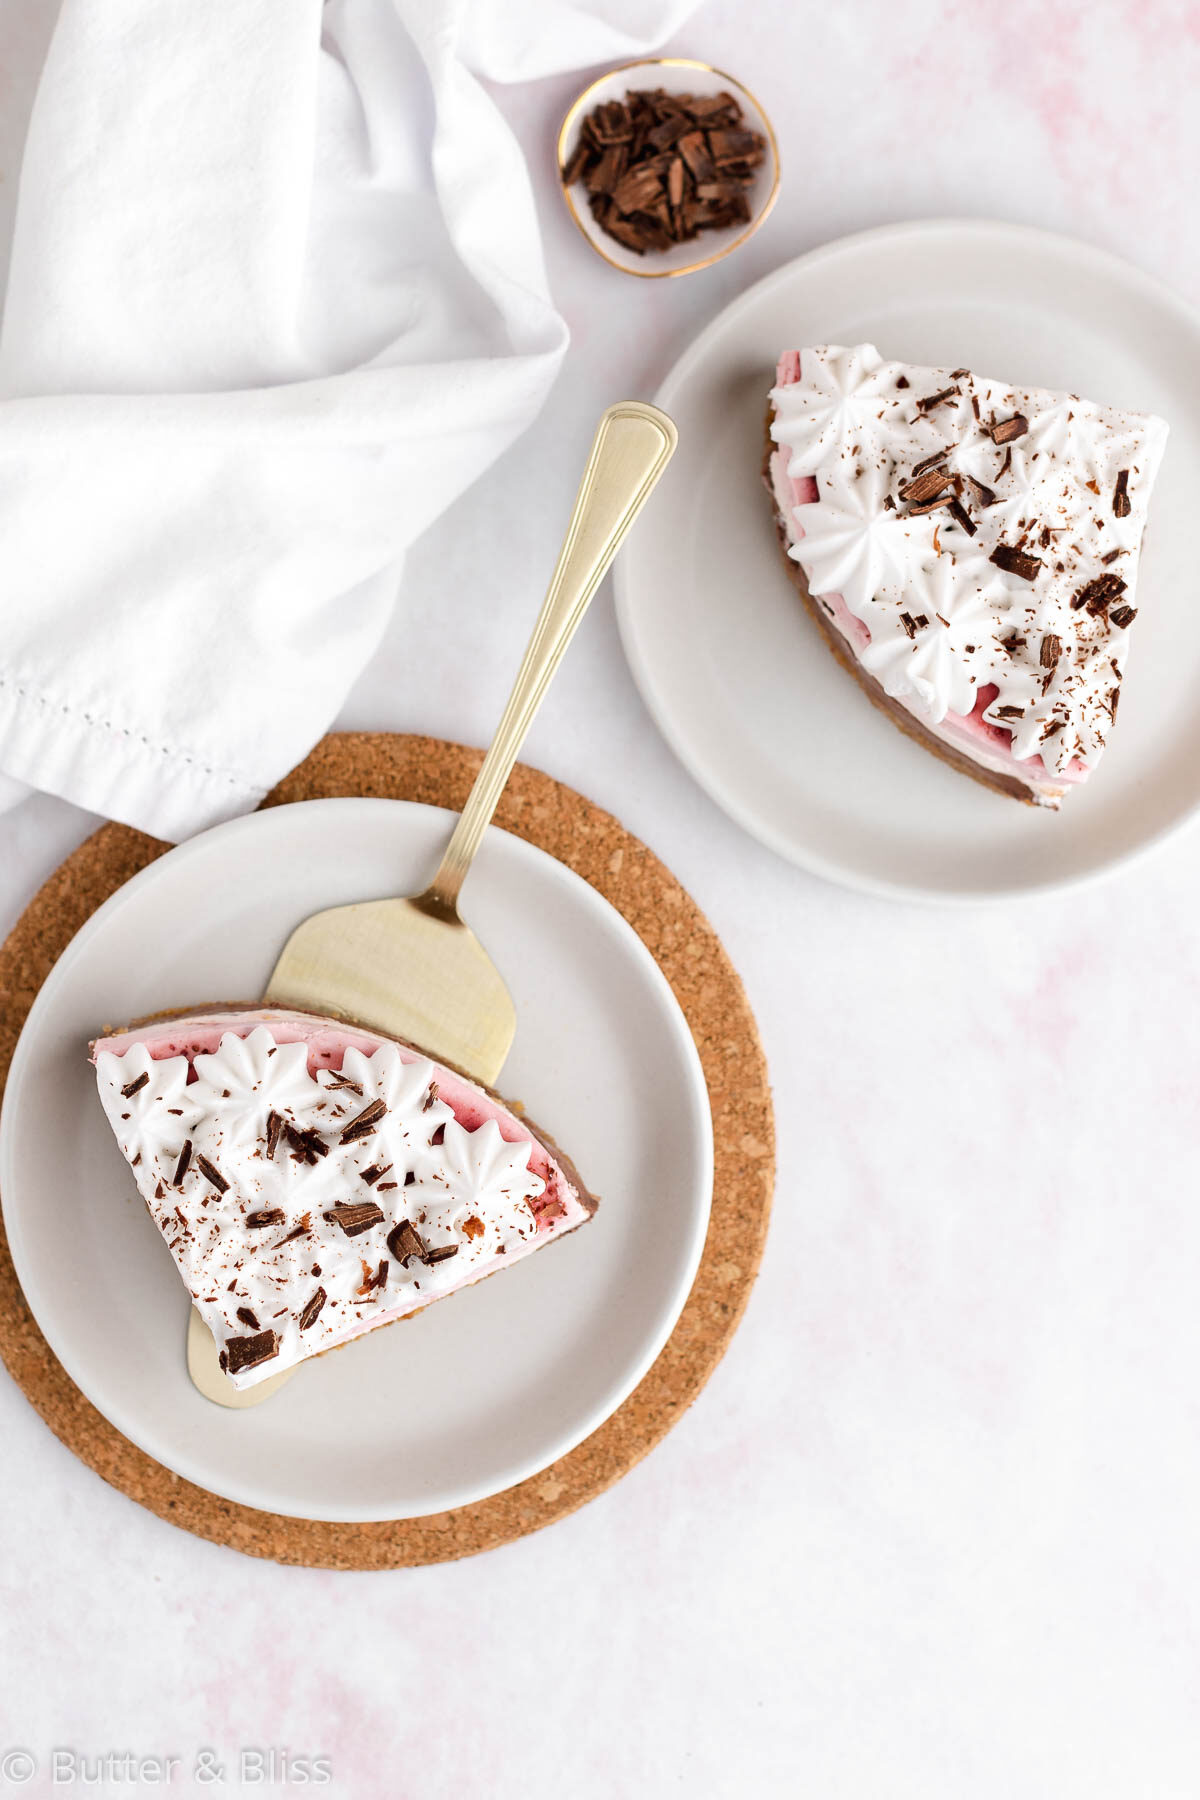
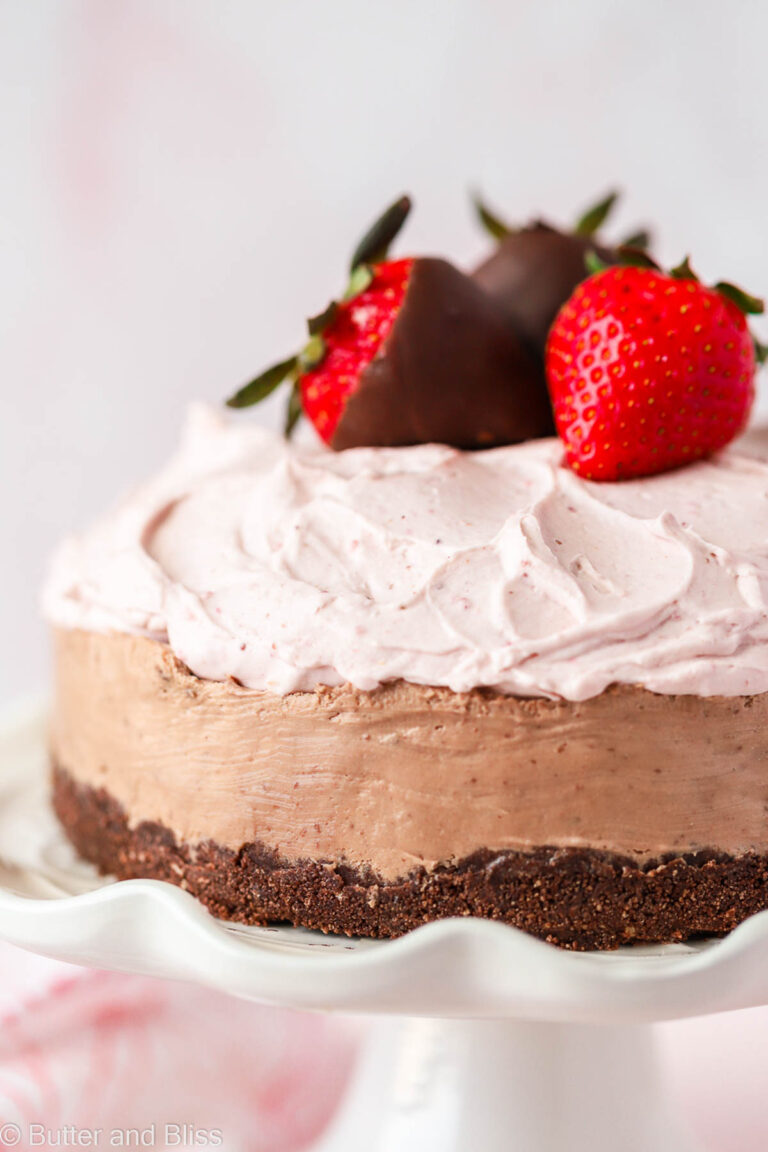
This Neapolitan No-Bake Mini Cheesecake is set on a waffle cone crust to give you all of the flavors of an ice cream cone treat! The mini cheesecake is made in a 6-inch springform pan with layers of chocolate, vanilla, and strawberry no-bake cheesecake filling. Top with whipped cream and chocolate shavings for your version of an ice cream sundae!
Neapolitan Mini Cheesecake
I love Neapolitan Ice Cream. Always have. It was my ice cream flavor of choice as a kid, and when I have a craving for ice cream as an adult, I always wind up with a gallon. Maybe it is because you get three flavors in one. Or, it could be that when you get a bite of all three flavors it is such a diverse mix of sweetness. Whatever the reason, I had to replicate the ice cream classic into a dessert.
So, I thought a cheesecake was a great vessel to deliver the trifecta of flavors. The base flavor of cheesecake typically starts with vanilla. From there, adding additional flavors works well since vanilla is like a blank canvas. Not to mention, vanilla goes with chocolate and strawberry just like peanut butter goes with jelly.
No-Bake Summer Cheesecake
This Neapolitan No-Bake Mini Cheesecake is 100 percent no-bake. Even the crust is no-bake! We pulse waffle cones with brown sugar and melted butter, then set it in the freezer to chill until ready to use.
So we have our ice cream-inspired filling flavors, a waffle cone crust, and a no-bake dessert. This sounds like all of the makings for a quintessential summer dessert! And without all of the sugary, melted ice cream cone mess. 🙂
Key INgredient Notes
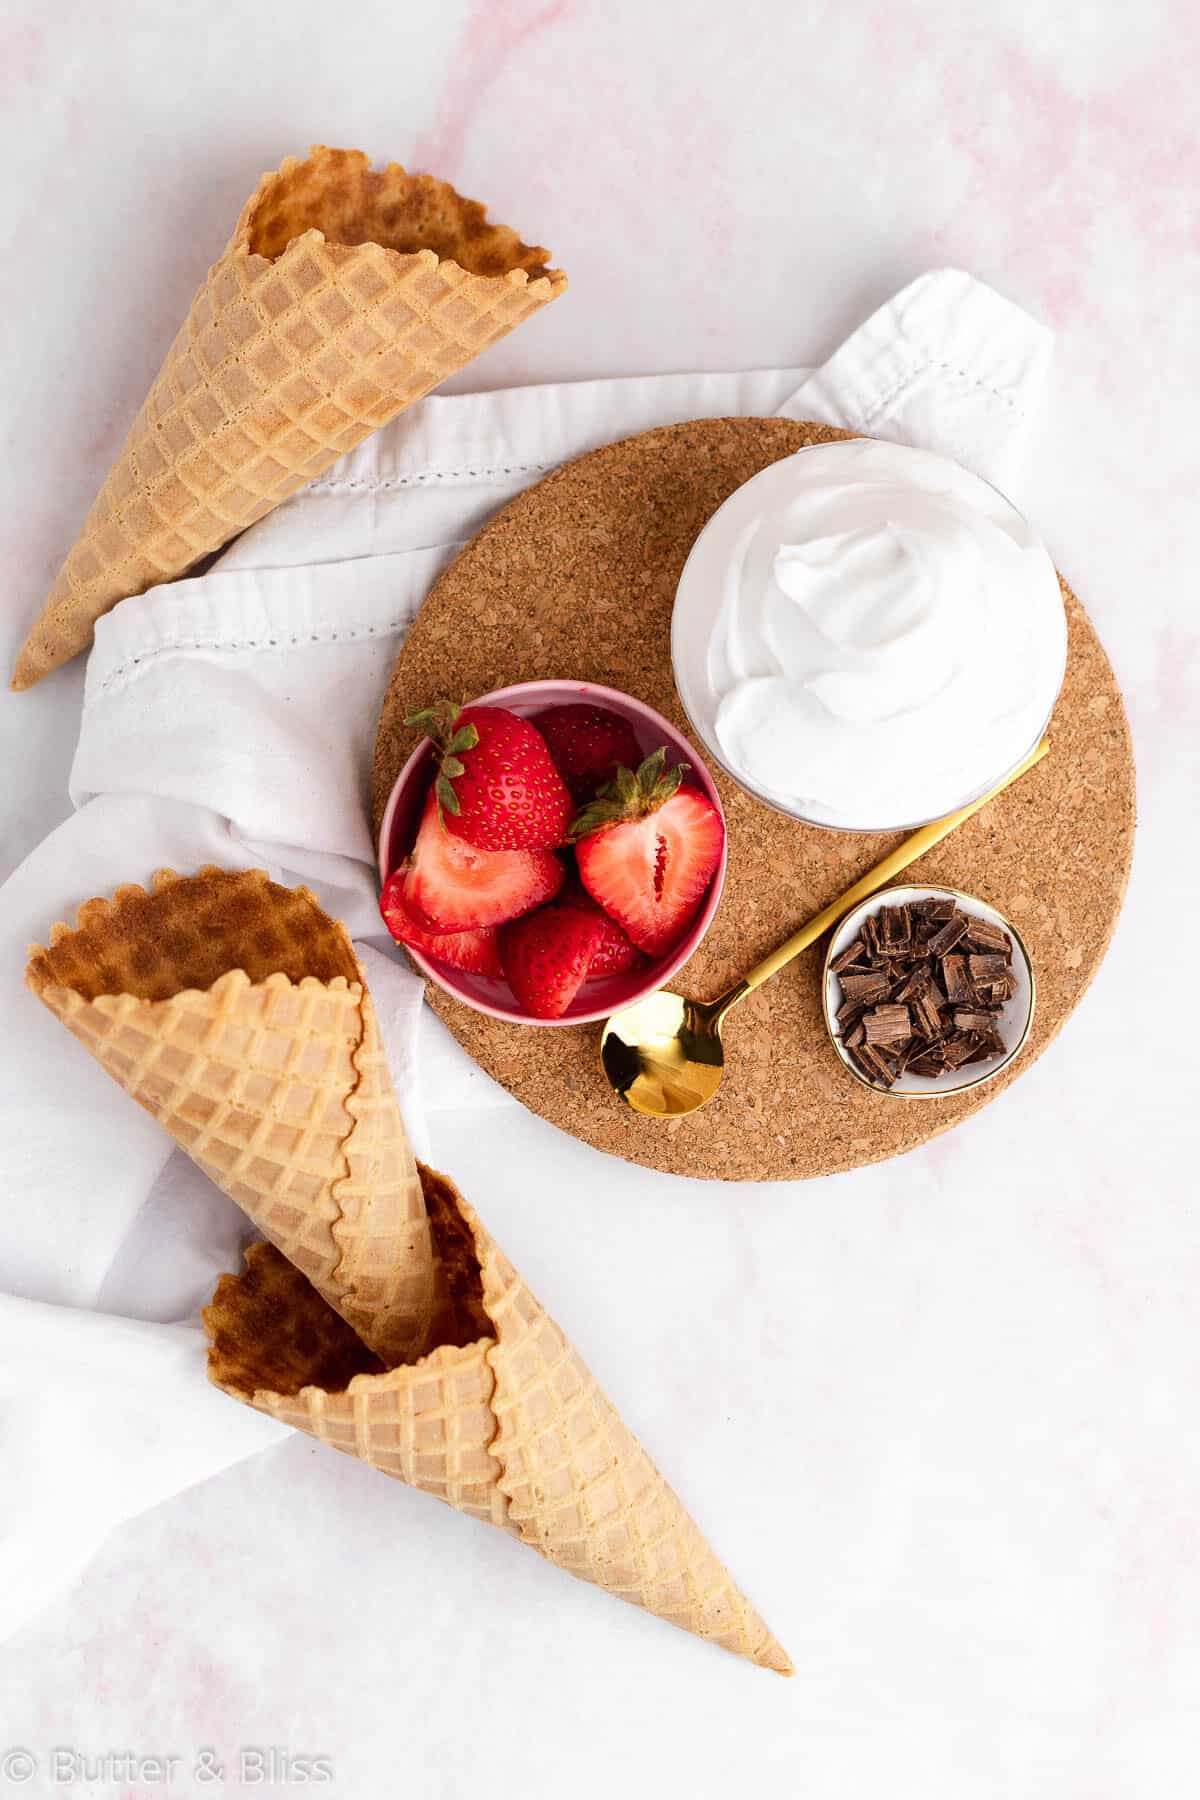
- Waffle Cones – Regular ice cream cones will also work.
- Unsalted Butter – The butter works as a binder for the crust.
- Light Brown Sugar – I recommend light brown sugar because the flavor won’t overpower the waffle cones.
- Cream Cheese – I recommend full-fat cream cheese for a rich and creamy cheesecake.
- Sour Cream – Full-fat sour cream is best for flavor and texture. You can omit, or substitute 2 teaspoons of lemon juice to achieve the tangy flavor.
- Powdered Sugar – Powdered sugar is the key sweetener in the cheesecake.
- Heavy Cream – The cream is whipped and will make the cheesecake layers light and smooth.
- Fresh Strawberries – Always fresh, especially if the strawberries are in season. Otherwise, frozen strawberries will work.
- Unsweetened Cocoa Powder – I like to use Dutch process cocoa powder because it has a strong cocoa flavor without being too acidic.
- Vanilla Extract – For an additional layer of flavor!
- Chocolate Shavings – Optional to top the cheesecake.
Helpful Tips
- Prep the ingredients – Because there are 3 flavor layers to the cheesecake, you will want to make sure you have everything out and ready to use.
- Mixing bowls – Make sure you have all the mixing bowls you will need (at least 3), to mix the cheesecake flavor layers.
- Sweeten to taste – Since this is a no-bake recipe, you can taste test every layer. Add more sweetener to any of the layers if you prefer a sweeter cheesecake.
- Line the springform pan – Lining the removable bottom of the springform pan makes getting the cheesecake off the pan easier.
Recipe FAQ’s
Yes, you can double the recipe. Use a 9-inch springform pan.
You can use a 6-inch cake pan if you don’t have a springform pan. Line the pan with 2 strips of parchment paper, long enough to hang over the sides of the pan. This way, you can use the parchment overhang to lift the cake out of the pan.
More Mini No-Bake Cheesecake Recipes
- No-Bake Chocolate Mousse Cheesecake
- No-Bake Cherry Cheesecake Parfaits
- Mini Orange Creamsicle No-Bake Cheesecake
- No-Bake Cranberry Mousse Cheesecake

Neapolitan No-Bake Mini Cheesecake
by Erin Cernich
Ingredients
Waffle Cone Crust
- ¾ cup crushed waffle cones (about 4 waffle cones)
- 2 tablespoons brown sugar
- 3 tablespoons unsalted butter, melted
Vanilla Cheesecake Filling
- ¾ cup heavy whipping cream (plus more for topping)
- 7 tablespoons powdered sugar
- 1 teaspoon vanilla extract
- 8 ounces (1 package) cream cheese, room temperature
- 3 tablespoons full fat sour cream, room temperature
Strawberry Cheesecake Filling
- ¼ cup strawberry puree (approx. 1/2 cup of chopped strawberries)
- 1 tablespoon powdered sugar
Chocolate Cheesecake Filling
- 1 tablespoon unsweetened cocoa powder
- 1 tablespoon powdered sugar
Instructions
Waffle Cone Crust
- Line the removable bottom of a 6-inch springform pan with parchment paper or aluminum foil. Assemble the pan and wrap any extra parchment or foil up the side of the pan. Lining the bottom of the pan will make getting the cake off pan bottom easier.
- Break up the waffle cones and add them to the work bowl of a food processor. Pulse 3 to 5 times to grind down. Add the brown sugar and melted butter and pulse until ground fine.3/4 cup crushed waffle cones, 3 tablespoons unsalted butter, melted, 2 tablespoons brown sugar
- Pour the crust into the prepared springform pan. Use your fingertips or a small measuring cup, and press the crust firmly into the bottom of the pan. Freeze until ready to assemble the cheesecake.
Vanilla Cheesecake Filling
- Make the whipped cream first – In a small mixing bowl, add the cream and vanilla extract. Use a hand mixer or stand mixer with whisk attachments, and beat on medium-high speed until stiff peaks form. Set aside. Note – Make extra whipped cream with powdered sugar if you want to dollop the top of your cheesecake.3/4 cup heavy whipping cream, 1 teaspoon vanilla extract
- This is the base for all 3 of the cheesecake layers – In a medium mixing bowl, add the cream cheese, sour cream, and powdered sugar. Beat on medium speed until the filling is smooth and creamy.7 tablespoons powdered sugar, 8 ounces (1 package) cream cheese, room temperature, 3 tablespoons full fat sour cream, room temperature
- Add the whipped cream to the cream cheese and beat on medium speed until incorporated and smooth. Taste, and add more sweetener if preferred. Keeping in mind the chocolate and strawberry layers will also have extra powdered sugar.
- Divide the cheesecake filling between 3 bowls. Note: The strawberry layer will be larger because of the 1/4 cup of strawberry puree. To make equal layers, reduce the vanilla vheesecake in the strawberry bowl by 2 to 3 tablespoons.
Strawberry Cheesecake Filling
- In a blender or food processor, puree at least a 1/2 cup of fresh or frozen strawberries with 1 tablespoon of powdered sugar. I prefer fresh strawberries when in season. Optional – Strain the puree to remove the seeds.1/4 cup strawberry puree, 1 tablespoon powdered sugar
- Fold 1/4 cup of the strawberry puree into one of the bowls with the vanilla cheesecake. If you have extra puree, you can drizzle over the top of the cheesecake. Taste, and add more sweetener or strawberry puree if preferred.
Chocolate Cheesecake Filling
- In the last bowl of the vanilla filling, sprinkle the cocoa powder and powdered sugar over the top. Fold until no dry streaks of cocoa remain. Taste, and add more sweetener or cocoa if preferred.1 tablespoon unsweetened cocoa powder, 1 tablespoon powdered sugar
- Assemble – Remove the crust from the freezer. Spoon the chocolate filling on top of the crust. Spread evenly to the edges. Follow with the vanilla layer and spread evenly to the edges. Finish with the strawberry layer, smooth evenly to the edges, and drizzle any remaining strawberry puree over the top (optional). Note: Your cheesecake layer order is entirely up to you!
- Cover the cheesecake with plastic wrap and refrigerate to allow the cheesecake fillings to set. 4 to 6 hours, or overnight.
- When ready to serve – Carefully remove the cheesecake from the pan, and place on a serving platter. Top with whipped cream and chocolate shavings.
Notes
- Mixer – You can use a hand mixer with whisk attachments. Or, a smaller 3-quart mixing bowl will work on a standard tilt-head mixer with the standard attachments. The smaller bowl is great for small batch batter.
- Springform Pan – Lining the removable bottom from the springform pan makes getting the cheesecake off the bottom easier.
- Whipped Cream – Homemade, store-bought, and even whipped coconut cream will work. If using store-bought, you many want to add 1/4 to 1/2 cup more since it isn’t as dense as homemade.
- Cocoa Powder – Dutch process cocoa works great because it has a strong cocoa flavor and is not as bitter as natural cocoa. Either will work.
- Flavor to Taste -Add more strawberry or cocoa powder for a stronger flavor. Keep in mind too much cocoa powder can come off as bitter.
- Sweeten to Taste – Taste-test the fillings as you go. Add more powdered sugar if you prefer a sweeter filling.
- Storage – Cover and refrigerate the cheesecake for up to 3 days.
Nutrition Estimates


About the Author …
Hi, I’m Erin! With years of experience baking for two in my own small household, I know about the love for desserts without the leftovers. I’ve tested, written, and photographed every one of the 300+ recipes on my website. And even had some of my desserts featured on Taste of Home, The Spruce Eats, ELLE, Parade, and more! From traditional to gluten free desserts for two, I have the recipe for you.
Click here to learn more about me →
There is a real simple ratio for chocolate dipped ice cream, I cannot remember
But I think 2 parts coconut oil and 1 part shortening? Do you know this simple recipe?
Virginia Gailllynn Bradford Christian
Hi Virginia – Are you referring to the chocolate shell you can dip or drizzle over ice cream? If so, I have a recipe on the site – about 3.5 to 4 ounces of chocolate melted with a tablespoon of coconut oil. Otherwise, I’ve not heard of a recipe that combines coconut oil and shortening? https://butterandbliss.net/creamy-watermelon-popsicles-magic-shell/
If I use a store bought whipped cream for the base, to save myself some time, should I use just a cup or will I need a little more?
Hi Jessica – I’d start with a cup. If you feel like it needs more for either taste or texture, I think adding another 1/4 to 1/2 cup would be fine.