Homemade Chewy Granola Bars
This post may contain affiliate links. See my disclosure policy.
Tired of paying over $5 a box for granola bars? I certainly am and these Homemade Chewy Granola Bars are probably one of the easiest grocery store swaps you can make at home, and flavor just the way you like them!
Homemade Chewy Granola Bars
We were driving home from the mountains after a day of skiing (or falling :)), and I forgot to pack snacks for the ride home. Husband commented we should buy granola bars for the next trip, and it hit me. Why buy them when I can just make them. I can flavor them exactly how I want and the ingredients should be healthy pantry staples anyway!
The first batch I made was no bueno – I added too many ingredients and and it was a very confused little bar. So, that is one of my recommendations – keep your add-in ingredients to a minimum otherwise you will not taste anything, or the mash up of flavors may just taste unpleasant.
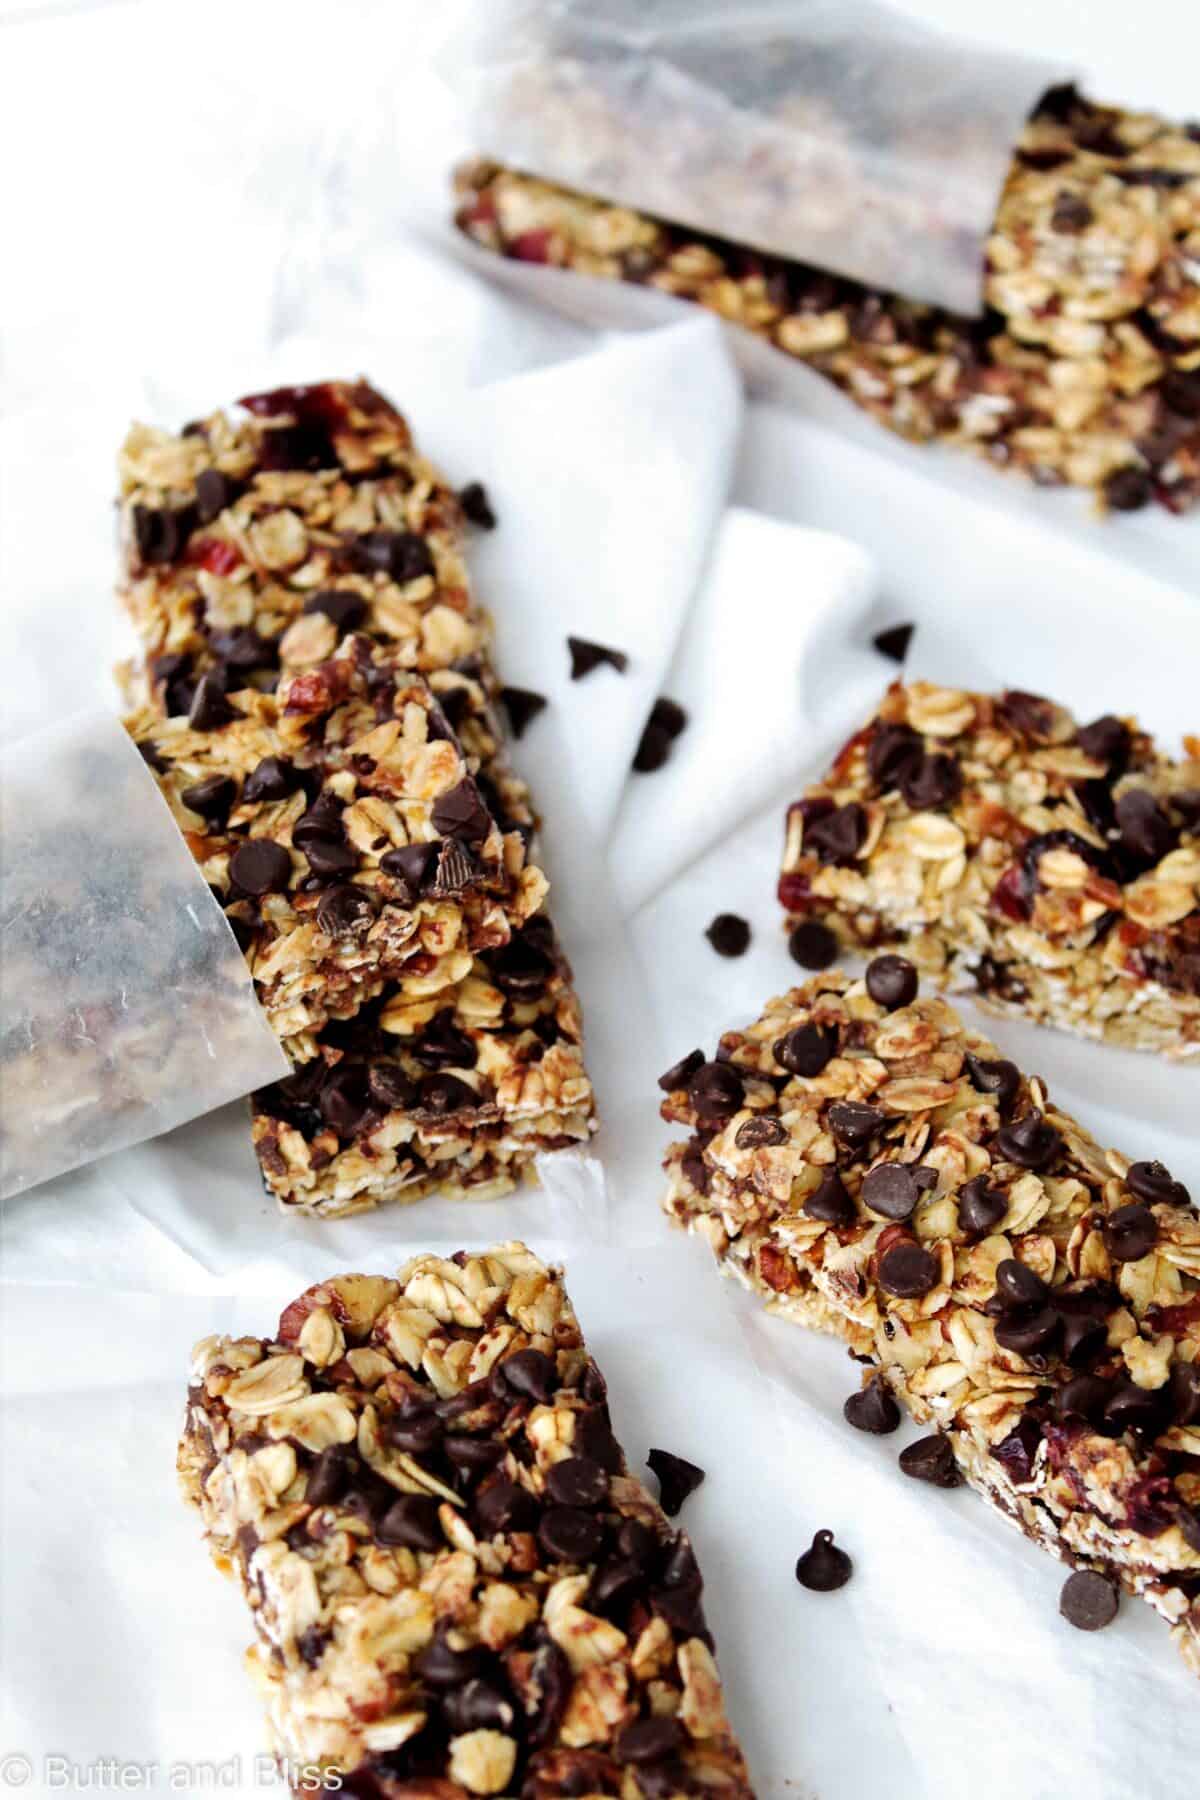
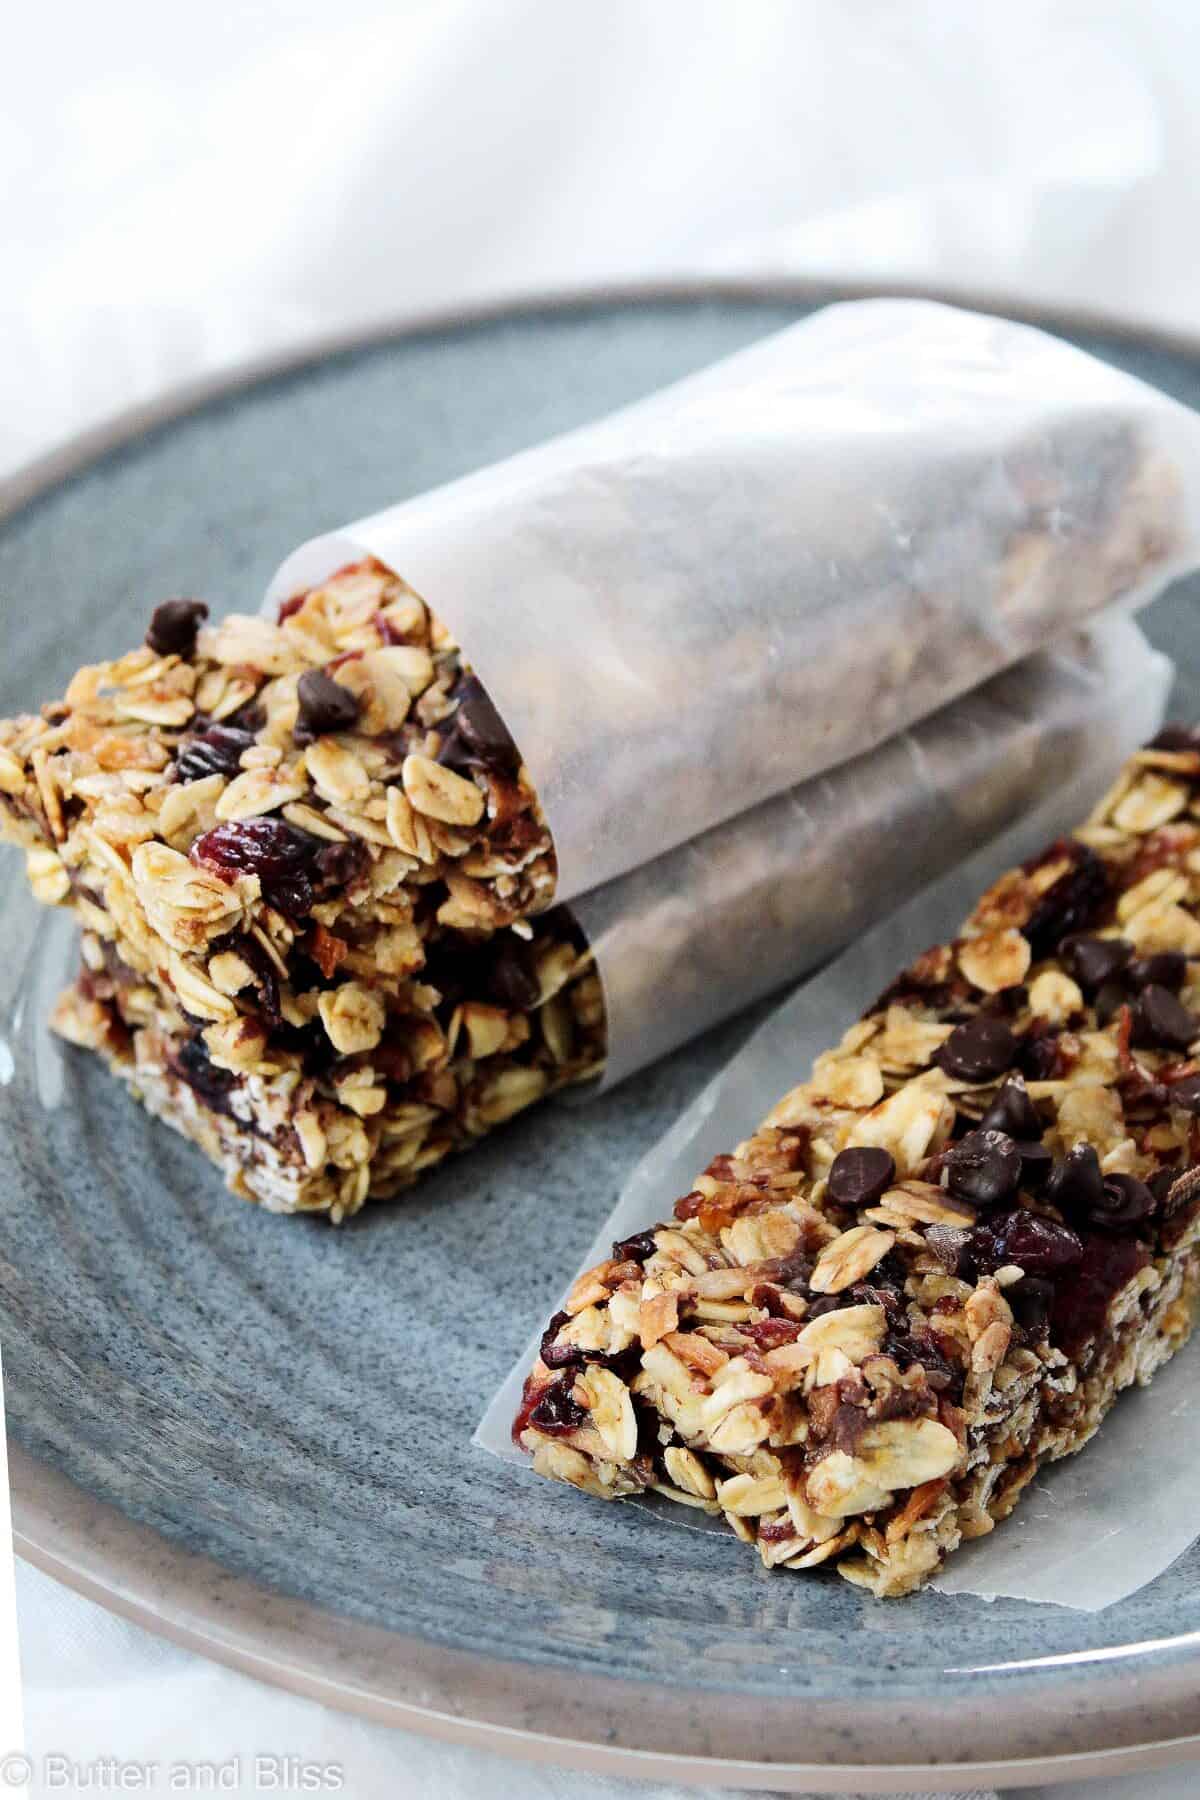
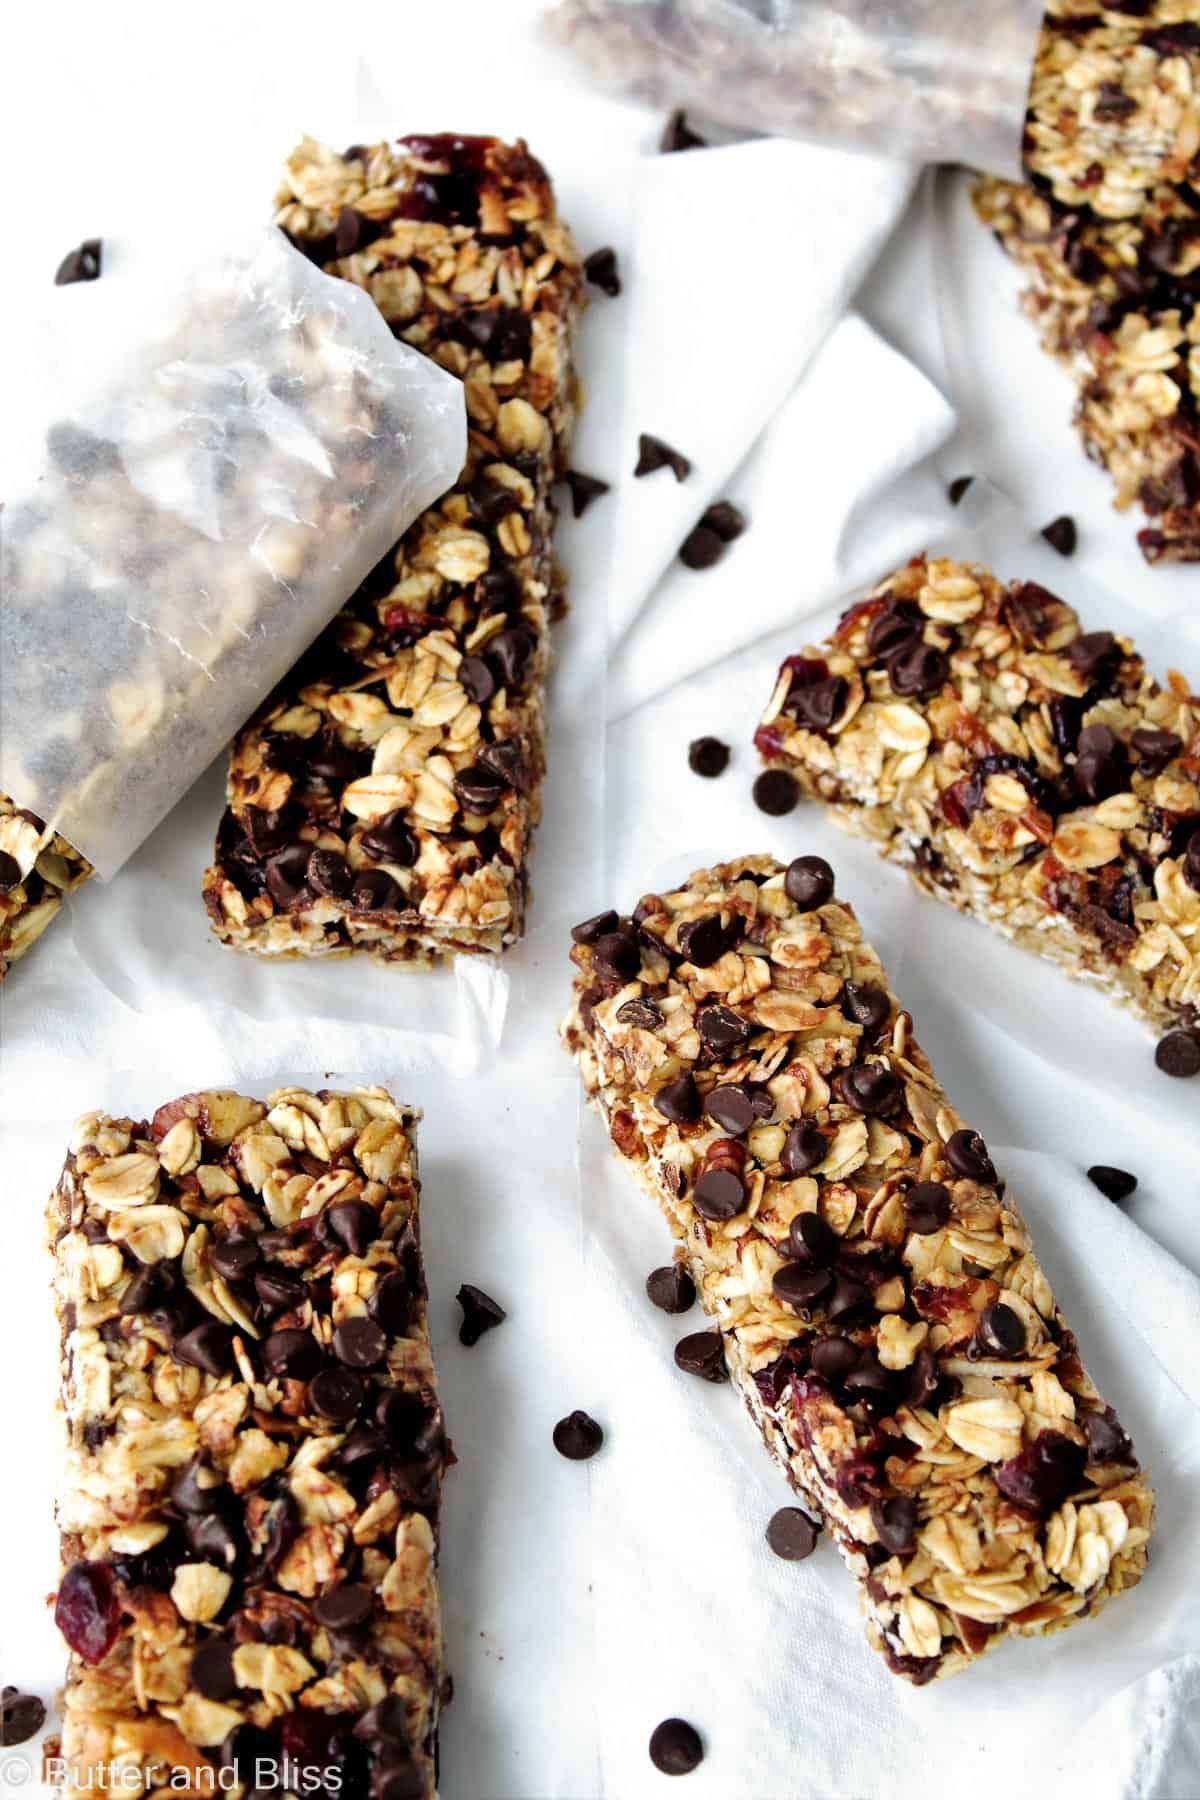
The hardest part of this recipe is toasting the coconut and oats. Second hardest is deciding which add-in’s to use. For this recipe, I kept it pretty traditional with a nut (pecan), fruit (dried cranberries), coconut, and of course, chocolate chips. I could see changing it up to be dried pineapple and and ginger (my fav!), chocolate and peanut butter, just nuts, M&M candies, or good ol’ plain. Whatever you chose for your add-in, the base of the granola bar is a great foundation to build on.

Tips For Making Homemade Chewy Granola Bars
If you do decide to use coconut, you will want to keep an eye on it because coconut flakes can burn pretty quickly and it could be a minute from going to nice and toasted to bitter and burned. The nice thing about the coconut flakes is they keep well in the fridge in a Ziploc bag for a few weeks. Making it nice to sprinkle on yogurt or oatmeal in the morning. Or just eating by the handful. That’s what I do.
Another recommendation – make sure you firmly pack the granola mixture into your pan so the bars actually cut into bars. My first attempt and I just made granola. The second attempt was a little better, so by my third, I used sheer determination to spend enough time making sure the granola mix was firmly in the pan. It also helps to cut them when they are still cool to avoid any stray add-in from popping out. I also learned to wrap each with a piece of wax paper so they don’t stick to each other.
I love that these snacks are quick and easy and I love that I don’t have to spend a half-hour in the granola bar snack aisle trying to determine which flavor is semi-tolerable. What I don’t love about these granola bars is they do not seem to be working to make me a better skier. 🙂

Homemade Granola Bars
by Erin Cernich
Ingredients
Granola Bars
- 3 cups rolled oats
- 4 tablespoons unsalted butter
- ⅓ cup dark brown sugar
- ¼ cup honey
- 2 tablespoons water
- ½ teaspoon salt
- 1 teaspoon vanilla extract
Optional Mix-Ins
- ½ cup sweetened or unsweetened shredded coconut, toasted
- ½ cup coarsely chopped nuts (I use pecans, but any nut will do)
- ¼ cup dried cranberries, lightly chopped
- ¼ cup mini chocolate chips
Instructions
Toasted coconut
- Preheat the oven to 325F degrees. Evenly spread the coconut flakes on a small baking sheet that is lined with parchment paper or a silicone mat. Toast for 5 – 7 minutes, stirring the coconut with a spatula half-way through. The coconut will toast very quickly, so stay close to the oven to make sure it does not burn!
Granola Bars
- Heat the oven to 350F degrees. Line a large rimmed baking sheet with parchment paper or a silicone mat.
- Spread the oats and nuts (if you are using) evenly on the baking sheet and bake for 8 – 10 minutes, until lightly toasted. Transfer to a large mixing bowl.
- While the oats and nuts are toasting, combine the butter, brown sugar, honey, water (which helps the sugar to dissolve), and salt in a medium saucepan. Cook on medium heat until the butter is melted and the sugar dissolves. Remove from the heat and stir in the vanilla.
- Pour the mixture over the oats and nuts and stir with a wooden spoon or spatula until all of the oats are covered. Then mix in any of the other mix-ins, except for chocolate chips. If you are using chocolate chips, let the mixture cool for 10 – 15 minutes before adding, so the chocolate doesn’t completely melt. You may have a little melt, but that is ok as it acts as an extra binder for the oats!
- Line an 8-inch square baking pan with parchment paper or wax paper (my preference is wax paper, but if you use parchment paper, spray lightly with cooking spray). Use enough paper so that it reaches the top of the pan. This makes it easy to lift the granola mixture out of the pan to slice.
- Pour the oat mixture into the prepared baking pan. Using a spatula or the bottom of a lightly greased measuring cup, firmly press the mixture into the pan evenly. Do not skimp on this process! This makes sure the mixture can be cut into bars that stay together and don’t fall apart!
- Chill the granola bars for at least 2 hours. Lift the bars from the pan using the edges of the paper and place them on a cutting board to cut. Use a very sharp chef’s knife to cut the bars. You can cut evenly into 12, 4-inch long bars, or any other shape or size you prefer. Serve and enjoy!
Notes
- The bars store well in an airtight container in the refrigerator for 7 – 10 days. I recommend wrapping each bar in a small piece of wax paper or parchment paper so they don’t stick together.
- This recipe is so versatile that any mix-in combination of your preference can work. I recommend keeping the total amount of mix-ins to 1 and 1/2 cups.
- I use water in the syrup mixture to help the brown sugar dissolve. The mixture will still be nice and syrupy when done!
- Press, press, press the mixture into the baking dish! I cannot stress this enough so that your bars stay bars, and not loose granola.
Nutrition Estimates


About the Author …
Hi, I’m Erin! With years of experience baking for two in my own small household, I know about the love for desserts without the leftovers. I’ve tested, written, and photographed every one of the 300+ recipes on my website. And even had some of my desserts featured on Taste of Home, The Spruce Eats, ELLE, Parade, and more! From traditional to gluten free desserts for two, I have the recipe for you.
Click here to learn more about me →
I used dried cranberries, pepitas (pumpkin seeds), and choc chips as my mix ins and oh my god is it good. This recipe is so easy and delicious. Maybe the best new treat I’ve made this year. Thank you!
Love to hear this – thank you Jess! So glad you enjoyed the recipe and thank you for visiting the blog!