Berry and Chocolate Custard Slab Pie
This post may contain affiliate links. See my disclosure policy.
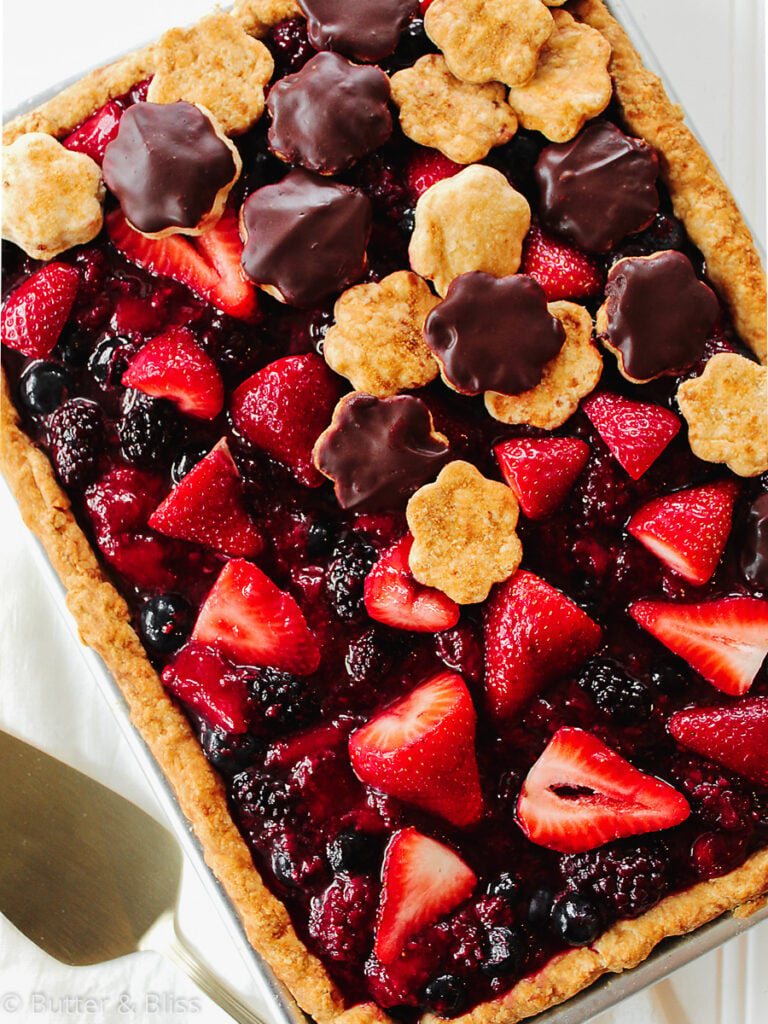
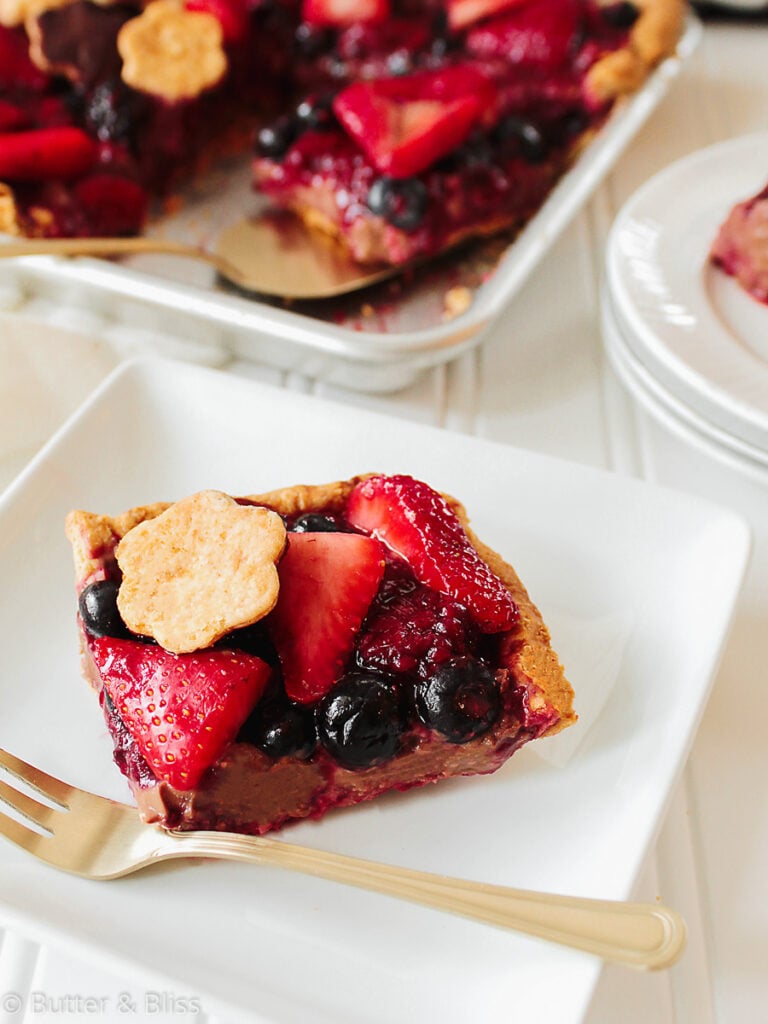
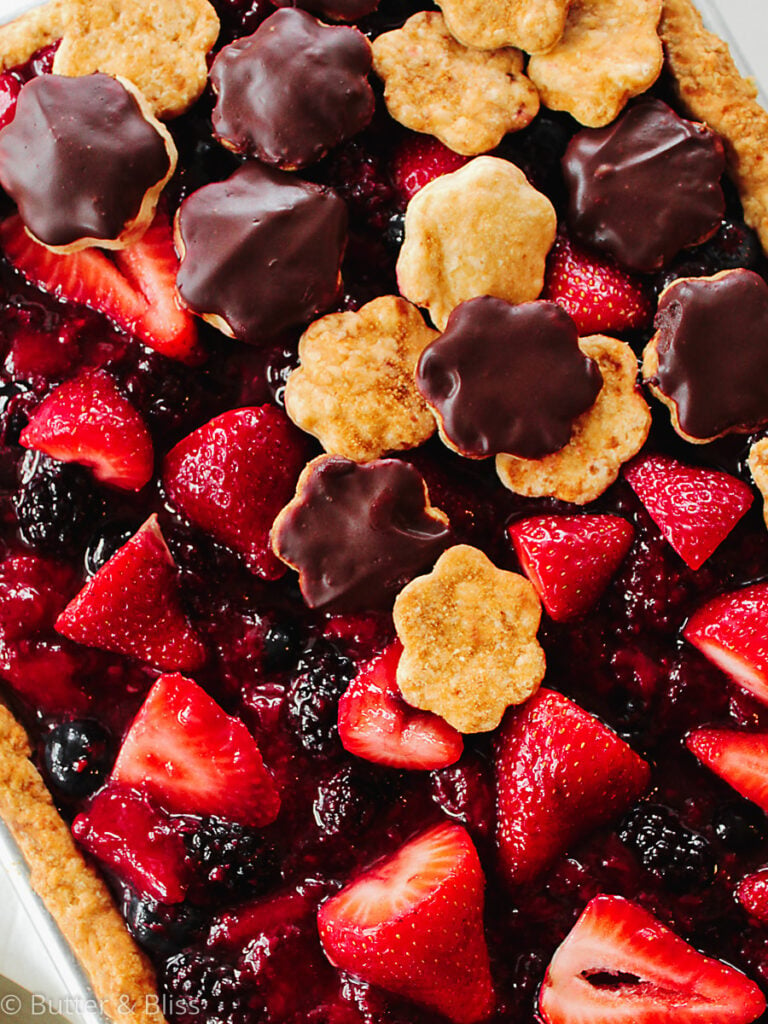
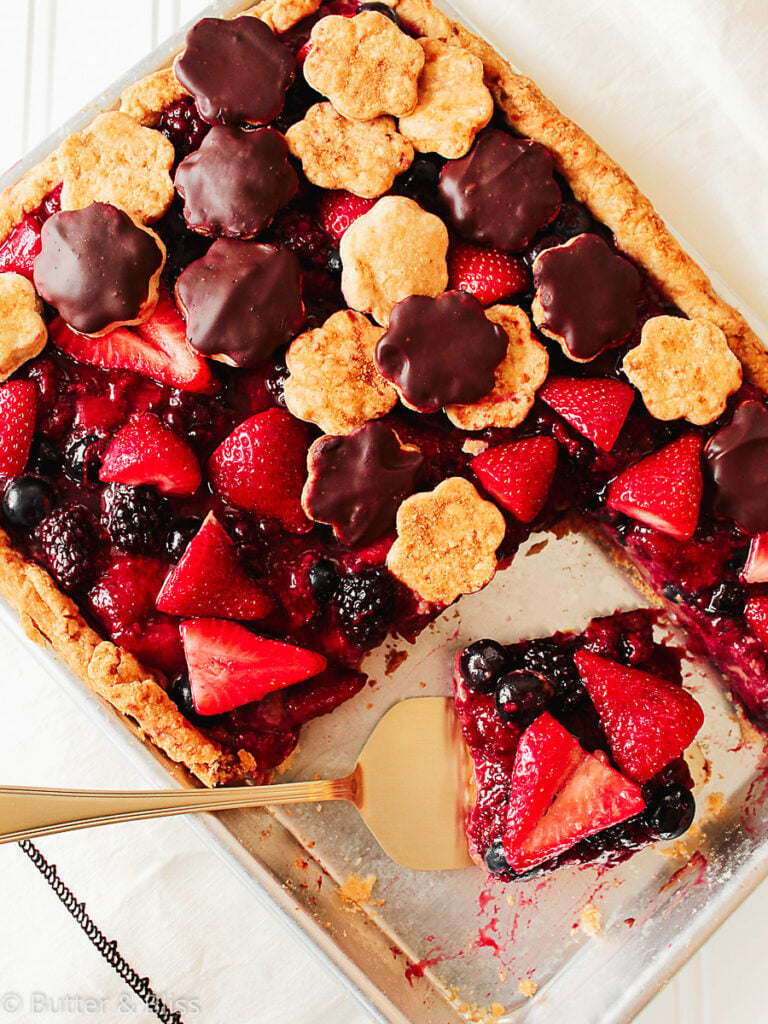
A sweet Berry and Chocolate Custard Slab Pie – perfect for Spring! A buttery and flaky pie crust holds fresh mixed berries that sit on top of a perfectly creamy chocolate custard. Then the pie is baked in a small baking sheet!
Berry and Chocolate Custard Slab Pie
If you haven’t noticed by now, I like to amp up my recipes. I love berry pie, but I wanted to do something different with this one. Enter the chocolate custard filling, and to change it up, even more, I made it a slab pie. It is now reminiscent of chocolate covered strawberries and I couldn’t think of anything more delightful.
There are a few steps with this recipe for berry and chocolate custard slab pie. Such as making the pie crust and the custard, but even those components are relatively simple. The hardest part of this recipe is the cooling time because you do not want to add creamy mousse to a hot pie shell or it will just melt. Just sayin’.
Pie Crust
Now, I have looked far and wide for a pie crust recipe that I like. Unfortunately, I do not have a family recipe that could be handed down. Sorry ladies in my family, but they either turned out too dry or just reminded me of a store-bought pie crust. Don’t worry though, the ladies in my family know this to be true. Also, I have nothing against a store-bought pie crust and I am not above using one!
Then I stumbled upon a recipe from Food Network that has been and will continue to be my go-to pie crust recipe. What attracted me to it was the apple cider vinegar and the fact that I always have a jar of Bragg’s in my refrigerator. The vinegar is what keeps the crust tender, but I also liked the idea that it gives the crust flavor. Not a vinegar, apple, or cider flavor; just flavor. Add in the sugar and the result is a buttery, flaky pie crust that compliments the fillings.

Chocolate Custard Pie Filling
Is there a lot to say about chocolate custard, other than it is one of the most magical baking creations to exist? When I made the custard, I had husband test it and his response was, ‘can I have a bowl of it?’ I think that is a pretty good endorsement (of course, he is biased), and to answer that question, you certainly can!
The chocolate custard in Berry and Chocolate Custard Slab Pie thicker than a pudding. We want it to hold up with all of the berries that are going to be piled on top of it. It will remain firm with the berries on top and the chocolate flavors still punch through.
Mixed Berry Pie Filling
I do recommend fresh berries, but you can certainly use frozen berries if you prefer. Simply because fresh berries are, well, fresh. I have found that sometimes the frozen berries can get a little too tart, but that is not anything that a little sugar can fix.
I also recommend cooking down a cup of the berries to give you some juices for the topping. This also releases the sweet pectin from fruit, acting as another layer of sweetness. You can omit this step if you like and just sprinkle the top of the mousse with handfuls of bright berries.
I still haven’t decided if I am a traditional round pie or slab pie girl. They each have their merits, but what I do love about the slab pie is it doesn’t feel like I am making something for Thanksgiving :). It is also a pie that I think is unexpected, plus you have a lot of edges to get the perfect piece of crust!

Berry and Chocolate Custard Slab Pie
by Erin Cernich
Equipment
Ingredients
Pie Crust
- 1 ¾ cups all-purpose flour (plus more for dusting)
- 2 tablespoons granulated sugar
- ½ teaspoon salt
- 8 tablespoons (1 stick) unsalted butter, cold and cut into cubes
- 1 teaspoon apple cider vinegar (or white distilled vinegar)
- 4 to 6 tablespoons ice water
Chocolate Custard Filling
- 1 cup whole milk
- 1 cup heavy whipping cream
- ¼ teaspoon salt
- 3 tablespoons granulated sugar
- 2 tablespoons cornstarch
- 3 large egg yolks (room temperature)
- 2 ounces bittersweet chocolate chips
- 4 ounces semi-sweet chocolate chips
- 2 tablespoons unsalted butter
- 1 teaspoon vanilla extract
Mixed Berry Topping
- 5 cups fresh mixed berries (strawberries, blueberries, blackberries, raspberries)
- ¼ cup granulated sugar
- 2 teaspoons lemon juice
Instructions
Pie Crust
- Note -The butter needs to be cold. Before you begin making the dough, cut the butter into cubes and place in the freezer for about 10 to 15 minutes ahead of time.
- In a medium mixing bowl, whisk together the flour, sugar, and salt. Add the butter cubes to the flour and press the butter cubes into small flat, flaky discs (about the size of a nickel) – making sure they are all coated with flour.
- Fill a small liquid measuring cup with ice water – as long as you have at least 1/2 cup of water. Make a well in the center of the flour and add the vinegar and 4 tablespoons of ice water to the well. Using a fork or spatula, stir the flour around the water, and continue to add water 1 tablespoon at a time until you start to get larger clumps of dough. To check if you have added enough water, grab some of the dough in your hand and squeeze it. If it sticks together without crumbling apart, you have added enough water. If it still crumbles apart, add another tablespoon of water, and check again. Note – The dough is supposed to be rough and not overly moist. Adding too much water will likely result in a tough dough. So will overmixing the dough. Work the dough gently when mixing in the water.
- Note – Weather and humidity can impact how much water you need to bring the dough together. You may find that you need more water than the recipe states.
- Pour the dough out onto a sheet of plastic wrap and shape into a rough square. Wrap tightly and refrigerate for at least 1 hour.
- Preheat the oven to 350F degrees and adjust the oven rack to the middle position.
- Remove the chilled dough from the refrigerator and bring it to room temperature for at least 15 minutes. Lightly flour your work surface. Roll the dough into a rectangle at least 2-inches larger than the quarter size (13×10-inches) sheet pan. Ease into the baking sheet, making sure to get the dough tucked into the bottom and corners of the pan. Fold the dough overhang under itself and crimp the edges all around with your fingertips.
- To keep the bottom of the dough from puffing up when it is baking, poke rows of holes into the dough with a fork. This is called 'docking' the dough.
- Bake for 40 minutes, or until the crust is golden brown. Cover any edges that are cooking faster with aluminum foil to prevent burning.
- Cool (in the pan) on a wire rack. Make sure the crust is completely cool before adding the chocolate custard filling.
Chocolate Custard Filling
- In a medium saucepan, bring the milk, cream, and salt to a simmer over medium heat. Do not boil.
- While the liquid is heating, in a medium mixing bowl, whisk the egg yolks, sugar, and cornstarch until well combined. Once the milk mixture is heated, slowly drizzle about 1 cup of the liquid to the egg mixture, whisking constantly, to temper the eggs.
- Return the tempered mixture back to the saucepan and cook over medium heat until the custard starts to get thick and bubbly – about 2-3 minutes.
- Remove the saucepan from the heat and add the chocolate chips and vanilla. Mix with the whisk or rubber spatula until the chocolate has melted, making sure to scrape the bottom and corners of the pan. Once the chocolate has melted, stir in the butter and mix until melted.
- Strain the custard through a fine-mesh strainer set over a medium bowl – scraping the bottom of the strainer to make sure you have all of the custard.
- Transfer the custard to the cooled pie shell and spread evenly into all corners with a spatula. Cover with plastic wrap and let the chocolate pie cool in the refrigerator for at least 2 hours, for the custard to set.
Mixed Berry Topping
- Wash the fresh berries. Cut the tops off of the strawberries and slice in half, or thirds for very large strawberries.
- Take one cup of the mixed berries and place them in a small saucepan with the lemon juice. Cook the berries for a few minutes until they begin to break down and release their juices – about 3 minutes.
- With the remaining berries, place them in a medium bowl. Add the cooked berries and toss the mix with the sugar. Cover and set aside in the refrigerator until ready to assemble the pie. Note – For pie, I like the variation of cooked berries and fresh berries. You can do one or the other if you prefer.
- Once the chocolate custard has chilled and set, spoon on the mixed berries and enjoy.
Notes
- Berries – I like the mix of fresh and cooked berries. You can certainly do all of either if you prefer.
- Make Ahead – I have also made this by making all of the components ahead of time and then assembling the next day. The mousse will thicken and set in the fridge but is easy to spread into the pie shell with a rubber spatula.
- Decorations – The ‘flower’ decorations on top are leftover pie dough that has been rolled and cut out with a cookie cutter. This recipe will not yield much leftover, so if you would like to adorn your slab pie with pie crust decor, you can halve the pie crust recipe and make a smaller batch.
Nutrition Estimates


About the Author …
Hi, I’m Erin! With years of experience baking for two in my own small household, I know about the love for desserts without the leftovers. I’ve tested, written, and photographed every one of the 300+ recipes on my website. And even had some of my desserts featured on Taste of Home, The Spruce Eats, ELLE, Parade, and more! From traditional to gluten free desserts for two, I have the recipe for you.
Click here to learn more about me →