Small & Creamy Strawberry Icebox Cake
This post may contain affiliate links. See my disclosure policy.
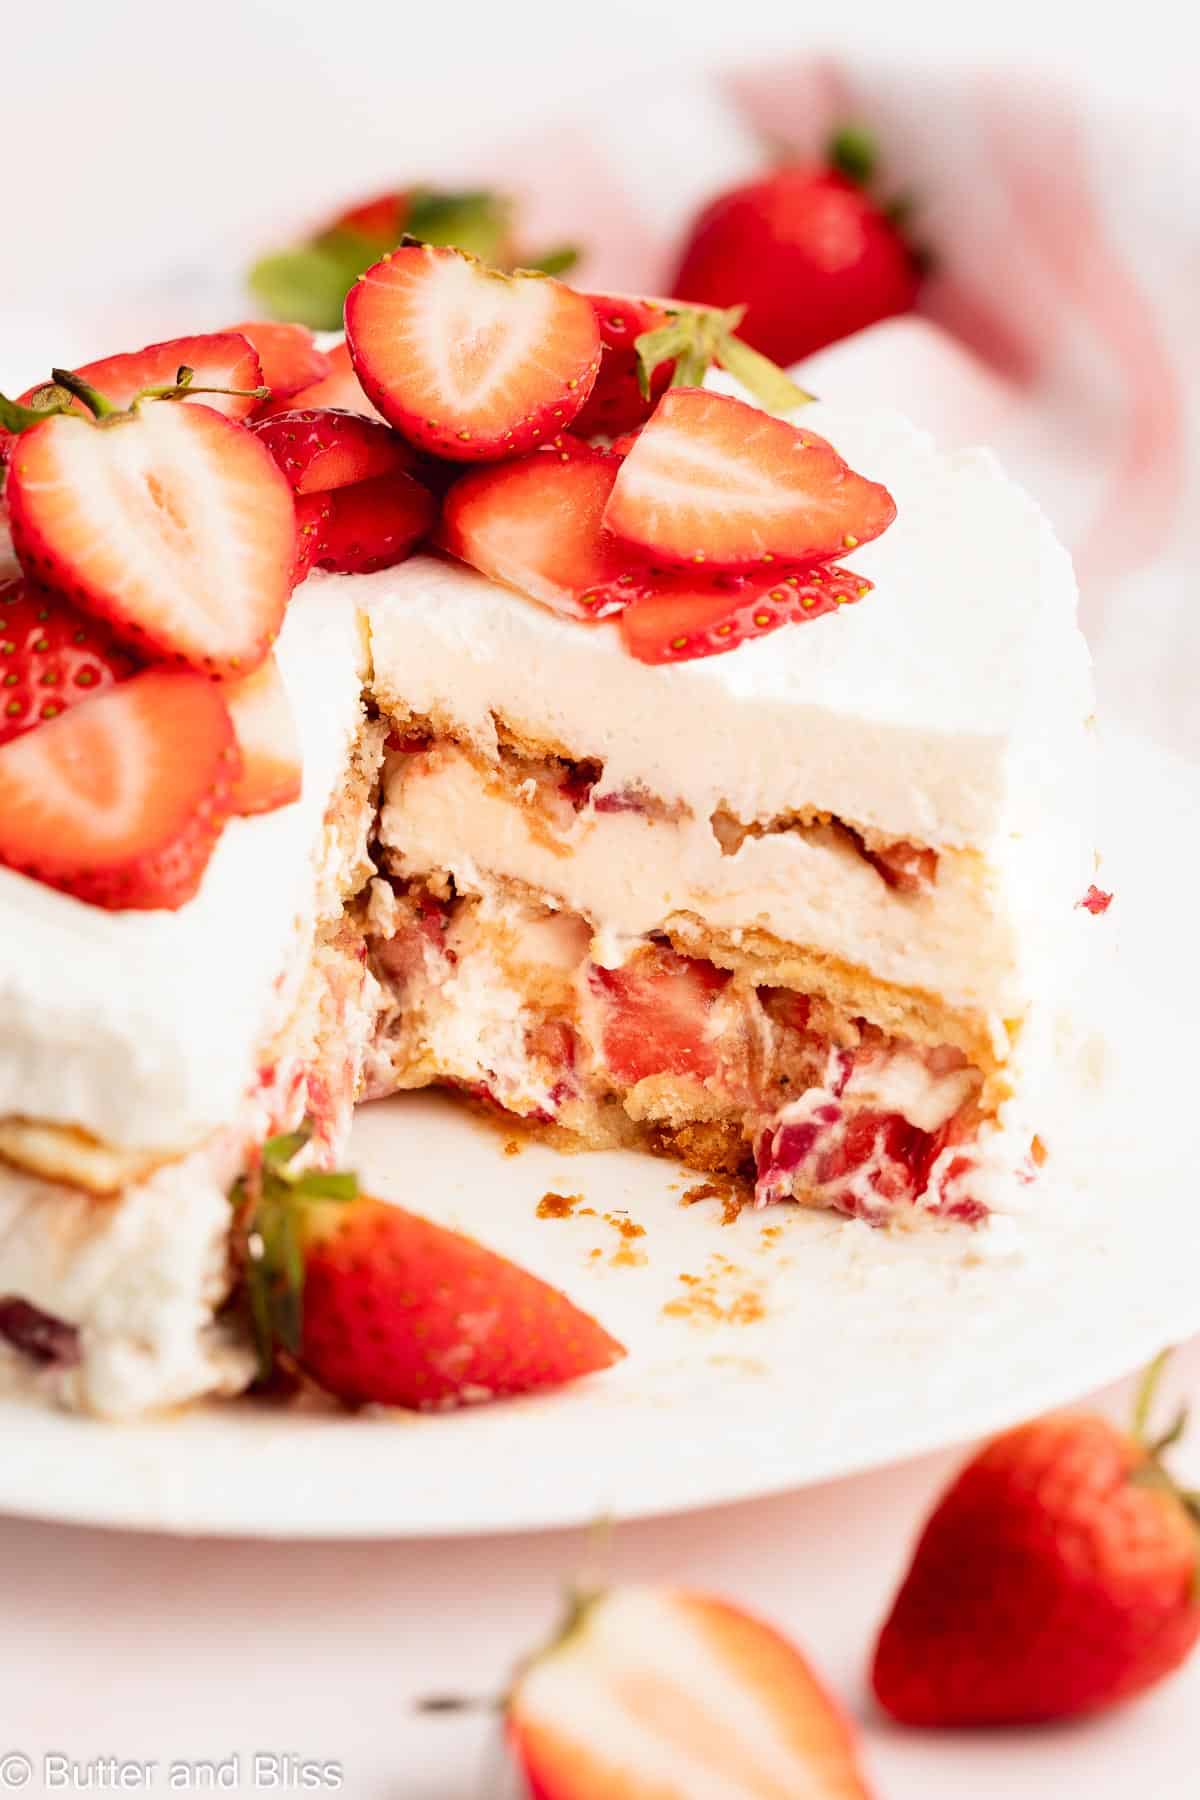
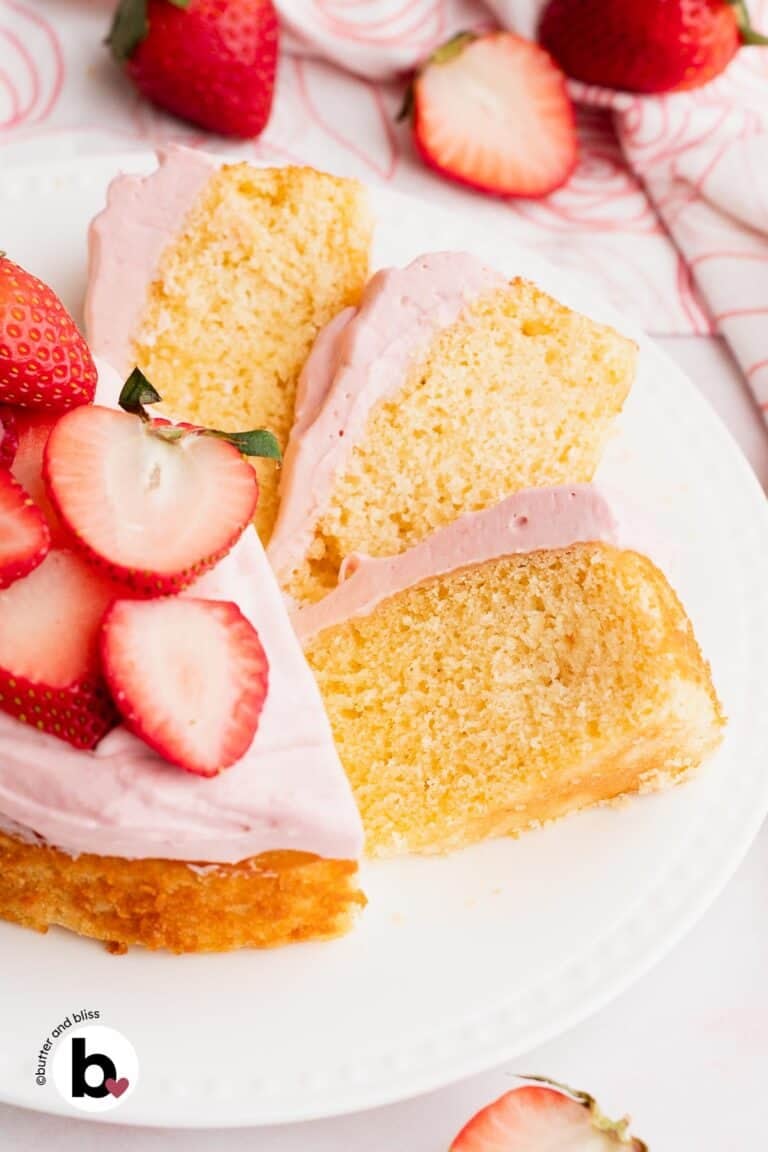
It’s too hot to turn on the oven, but you have a hankering for cake. I’ve got you covered with this easy no-bake strawberry icebox cake. Layers of fresh strawberry slices and vanilla wafers are nestled in fluffy whipped cream stable enough to slice.
The magic of this small icebox cake – I make it in a cute 6-inch springform pan that makes pretty cake slices. And, the make-ahead dessert gets better overnight as the flavors develop and the wafers turn cake-like. A retro summer dessert that will make your oven jealous!

When the clock hits spring, this house goes into a strawberry frenzy. Ok, maybe that’s just me, but it doesn’t take much to bring my husband along for the ride. 🙂 If you have seen my strawberry biscuit strawberry shortcake recipe, you already understand my love for the bright fruit.
Curious what I love even more than a sweet strawberry dessert? One that doesn’t need to be baked. But, I couldn’t simply layer fresh berries with pudding or cream (I still love you strawberry and chocolate s’mores parfait!).
After a few trials to master sliceable whipped cream, everything else about this cake is effortless (I show you just how easy in step-by-step photos below). Which is good, because I want to spend my spring and summer days running through (sitting by) the sprinklers (misters).
If it’s a true summer showstopper – that you don’t mind baking – try my strawberry shortcake layer cake made with almond flour. The layer cake is beautifully assembled with fluffy whipped cream and piles of fresh strawberries.
Step-By-Step Photos

1. Prepare the strawberries – Chop, slice, or both. Then toss with the honey, lemon zest, and vanilla.
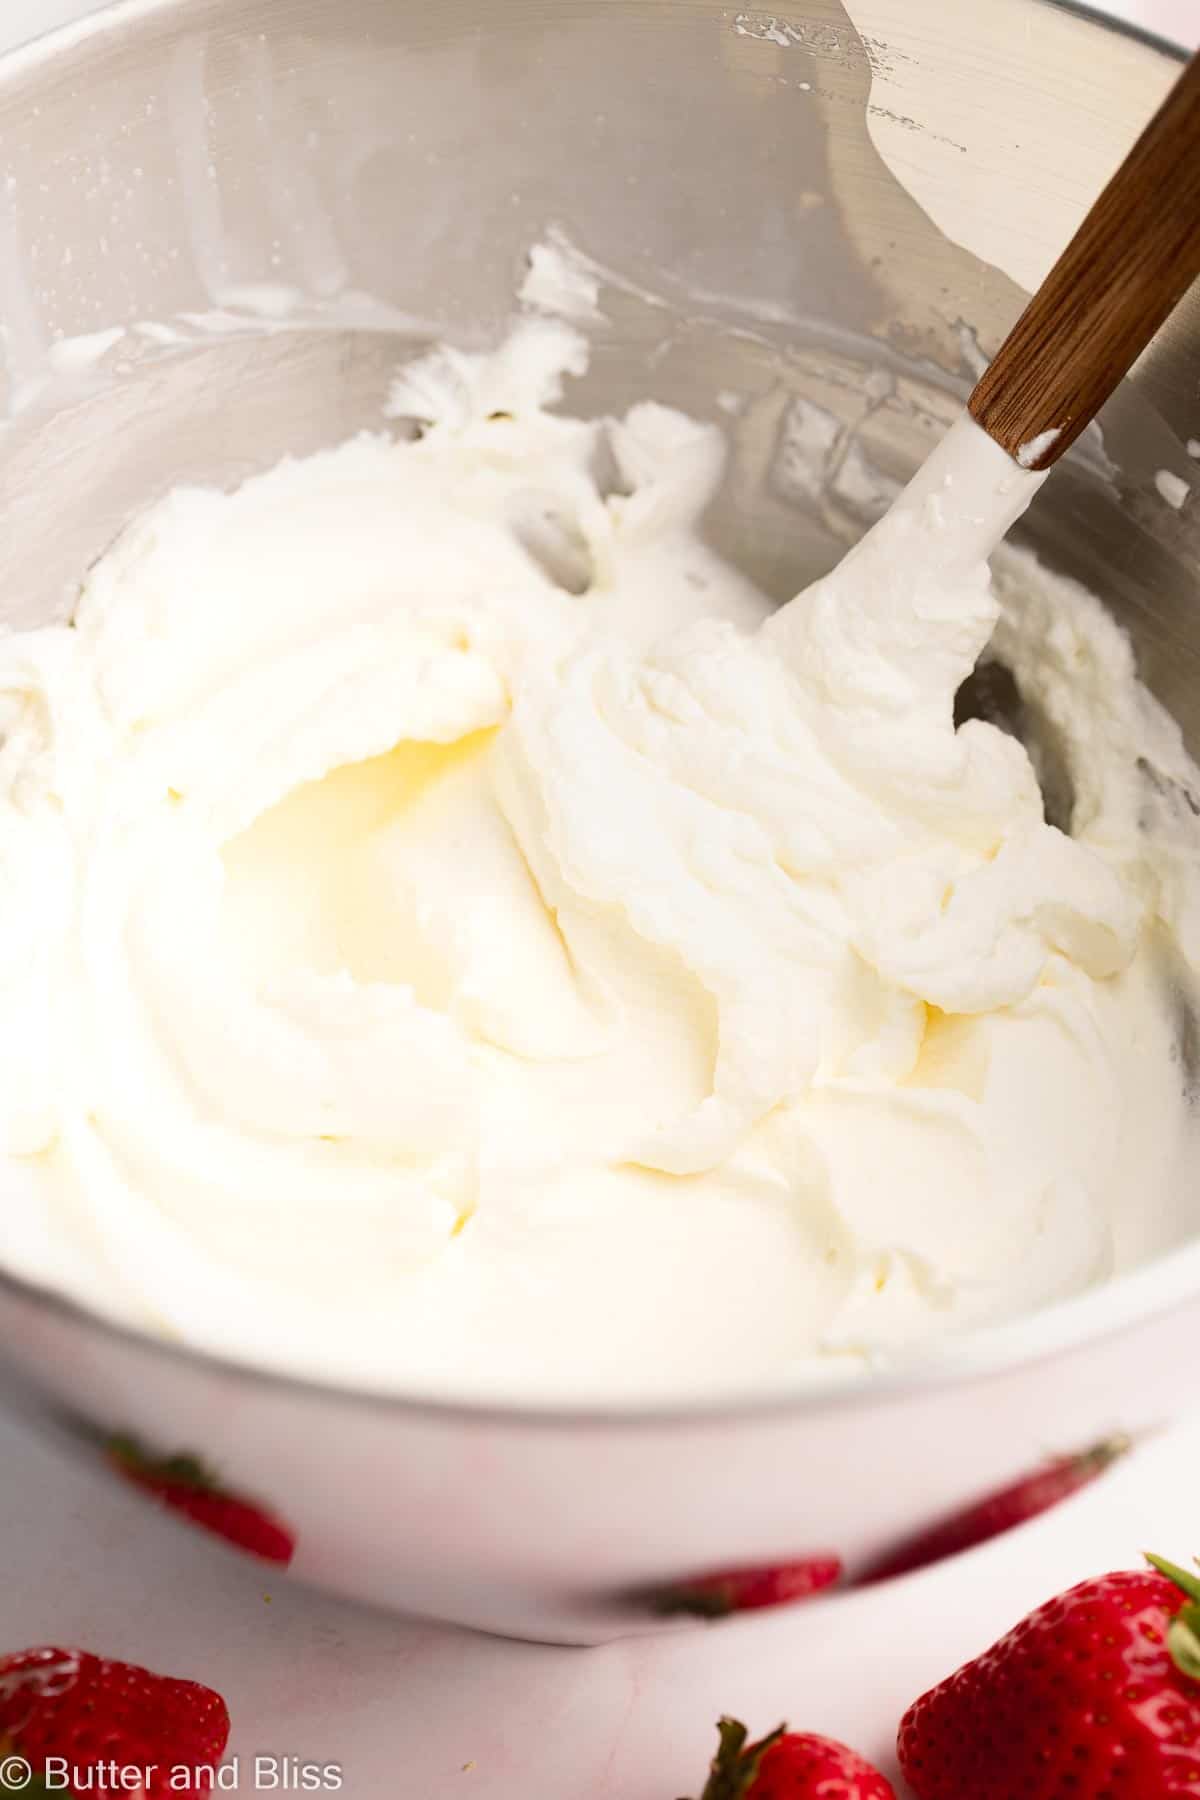
2. Make the whipped cream – Add heavy cream and marshmallow cream to your mixing bowl. Start on low until it starts to thicken – this will avoid splatter – then turn up to high and beat until you have stiff peaks.
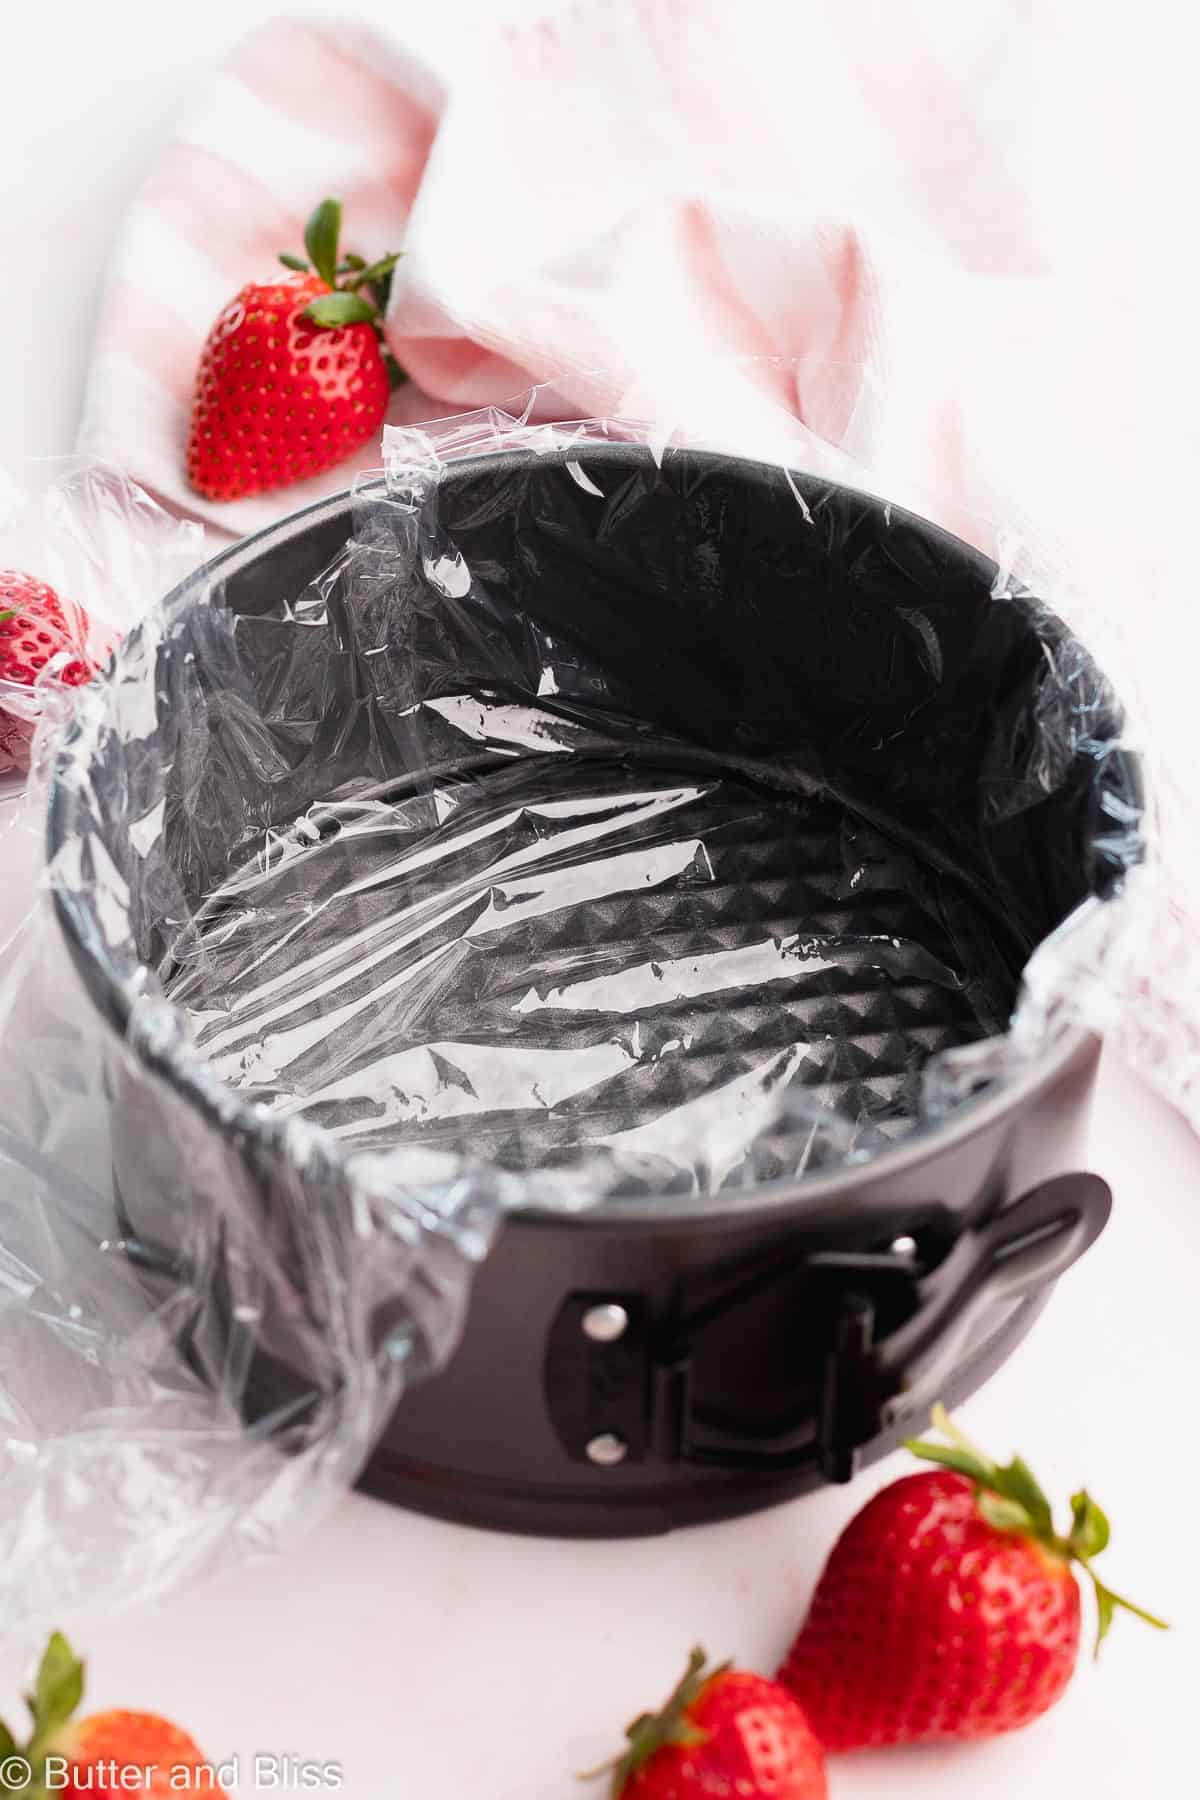
3. Line the springform pan – I like to do it because I transfer my cake to a serving plate. Otherwise, the cake will be next to impossible to get off the removable pan bottom. But, you can serve it off the pan bottom if you don’t want to line the pan.
Tip! No springform pan, no problem! Make the cake in a small round cake pan or casserole dish and cut and serve directly from the pan.
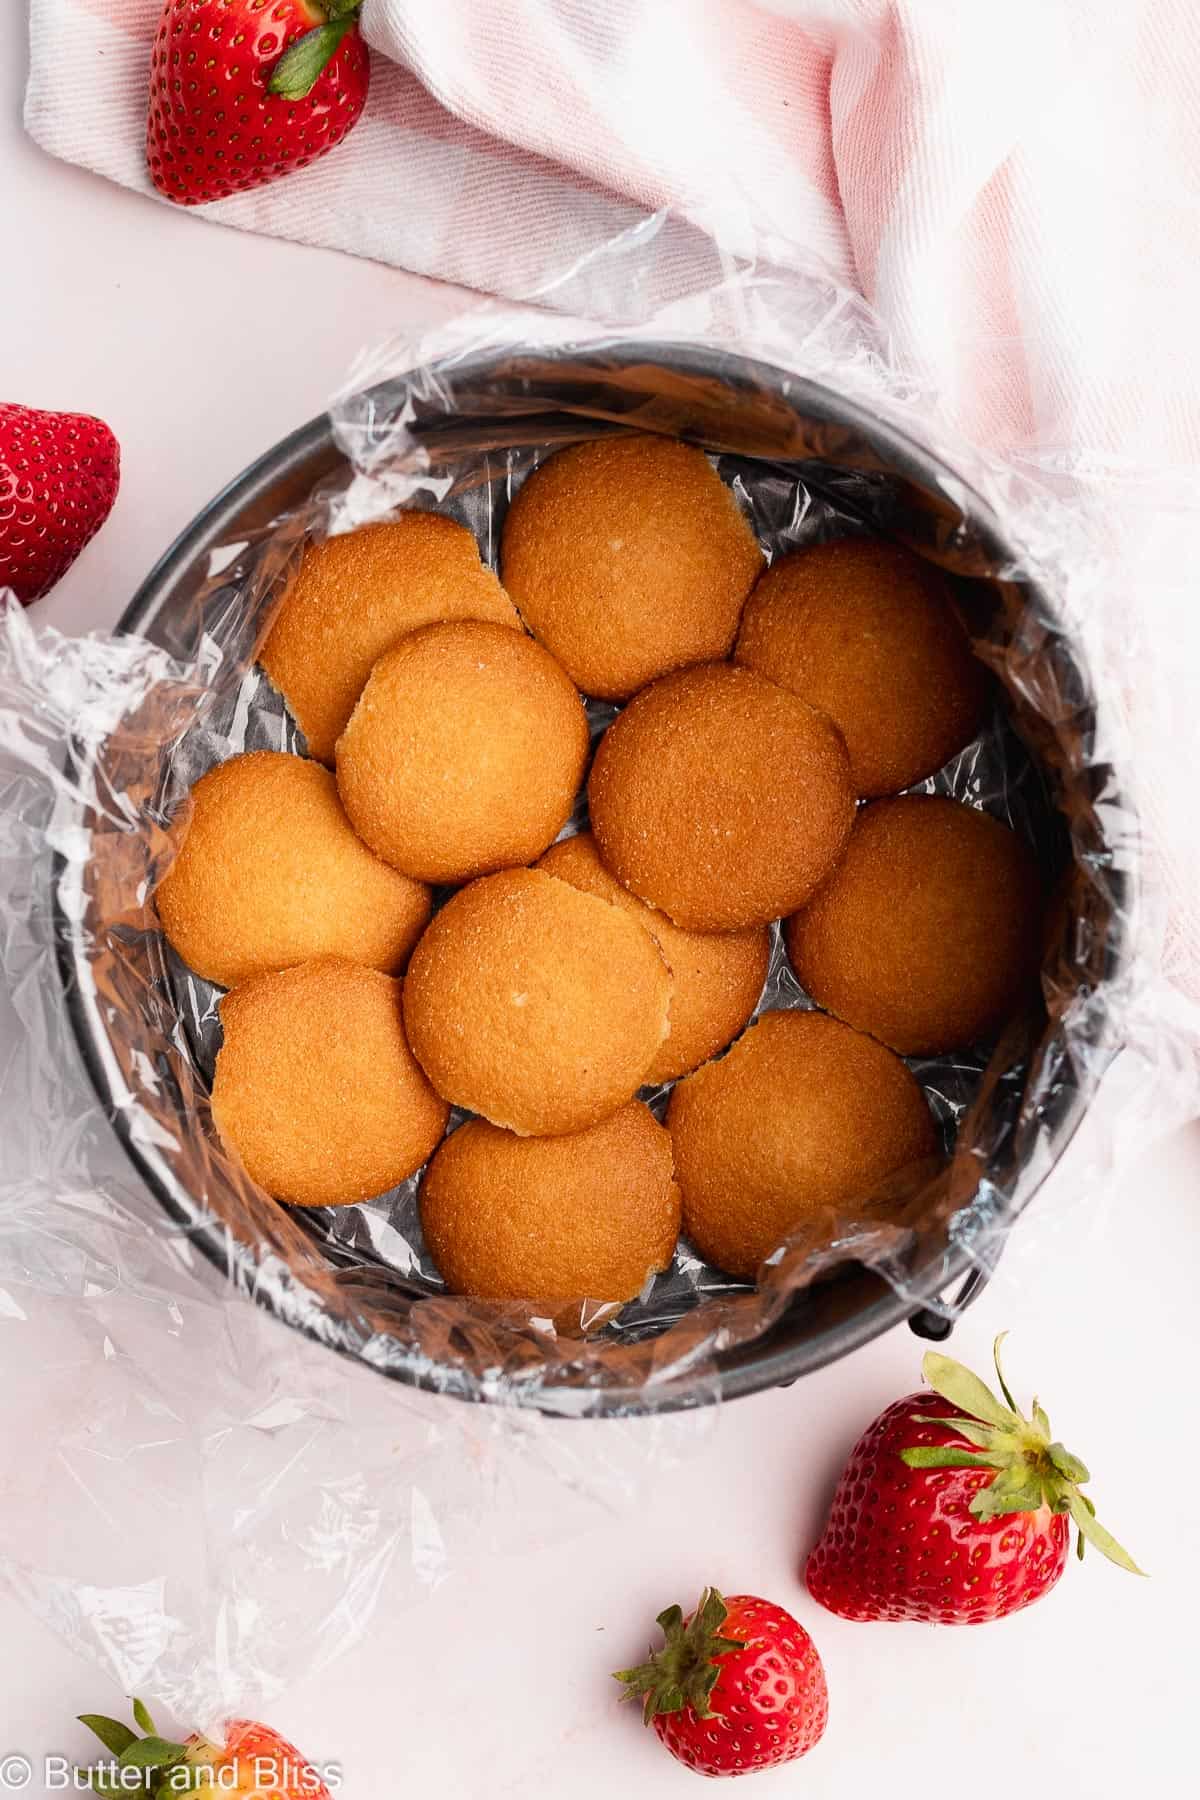
4. Arrange your first layer of wafers – Fit the wafers as snugly as possible in the first layer since this is the base of the strawberry shortcake icebox cake. It is ok if they overlap a little.
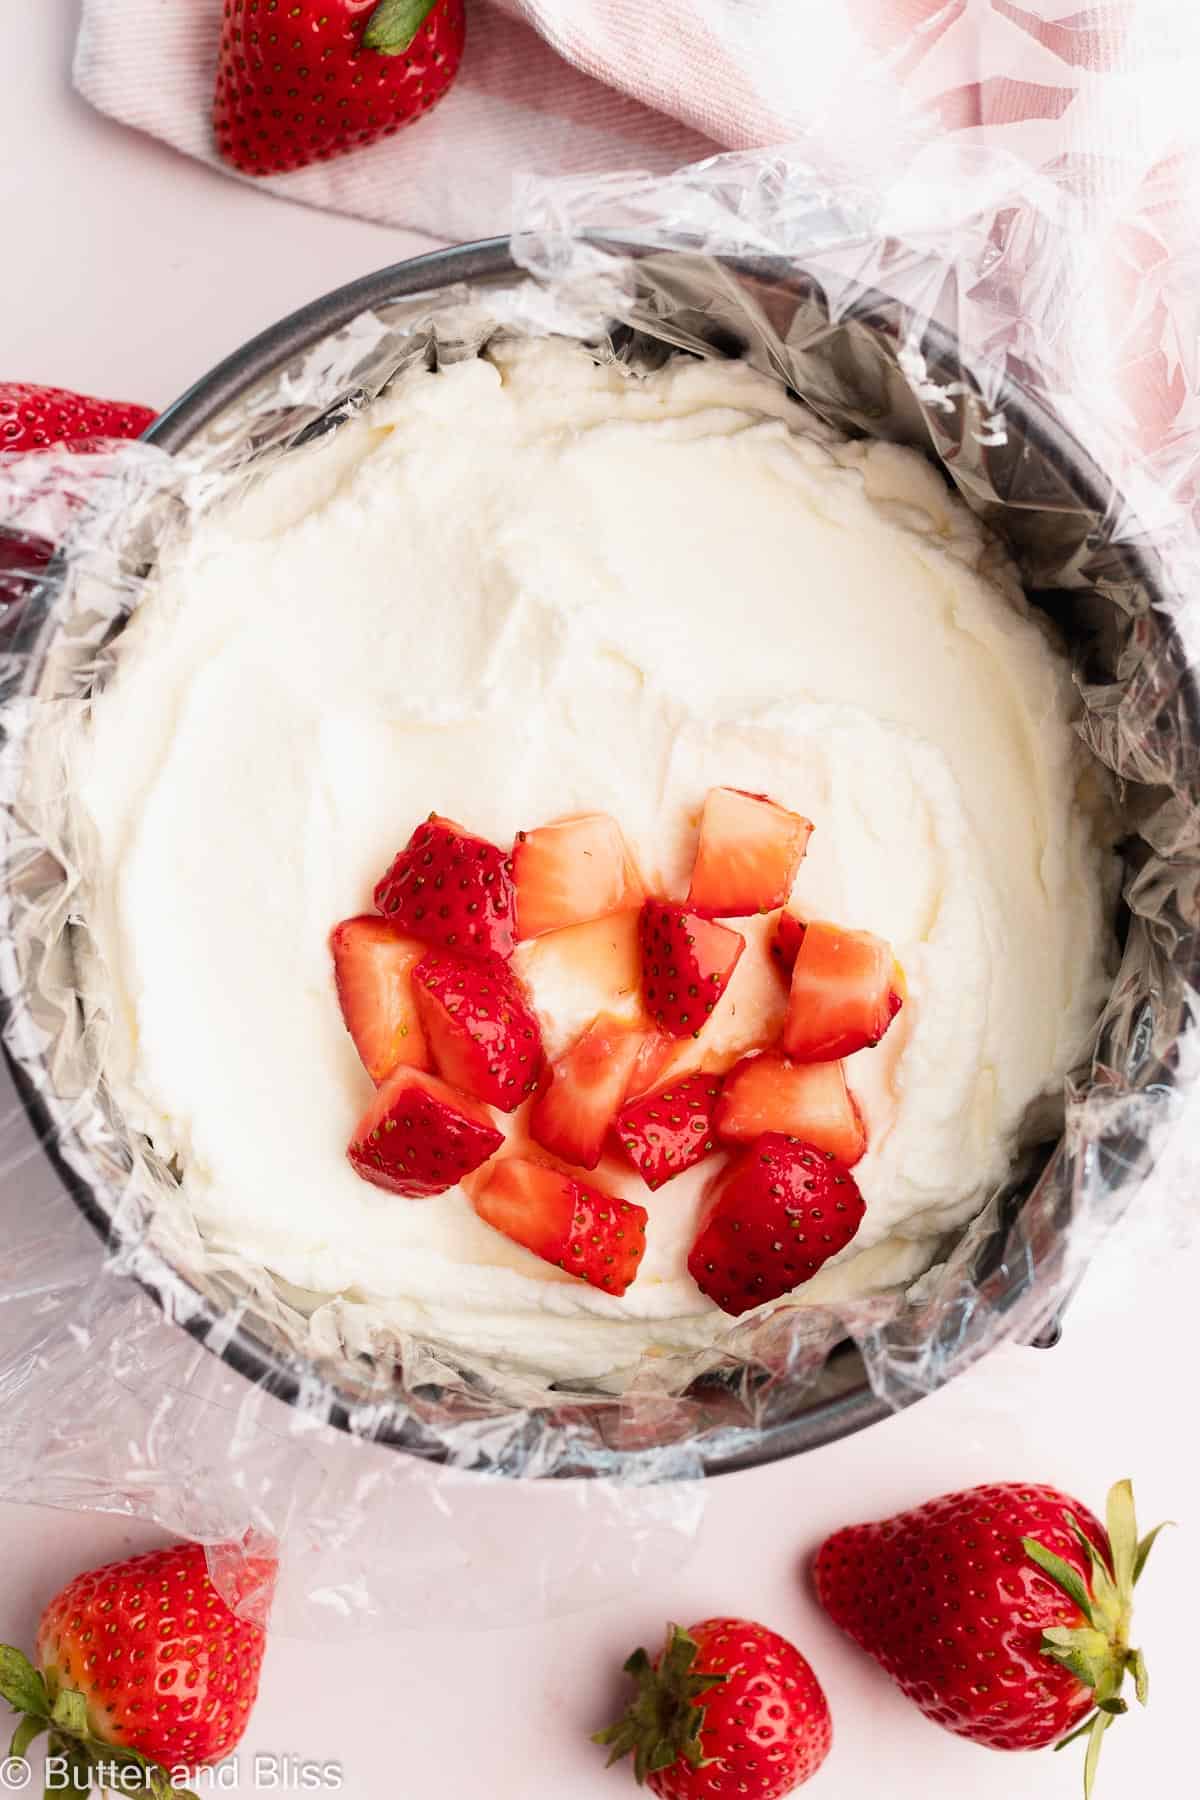
5. Dollop on the whipped cream layer – Take 1/3 of the cream and spread evenly over the wafers and to the edge of the pan.
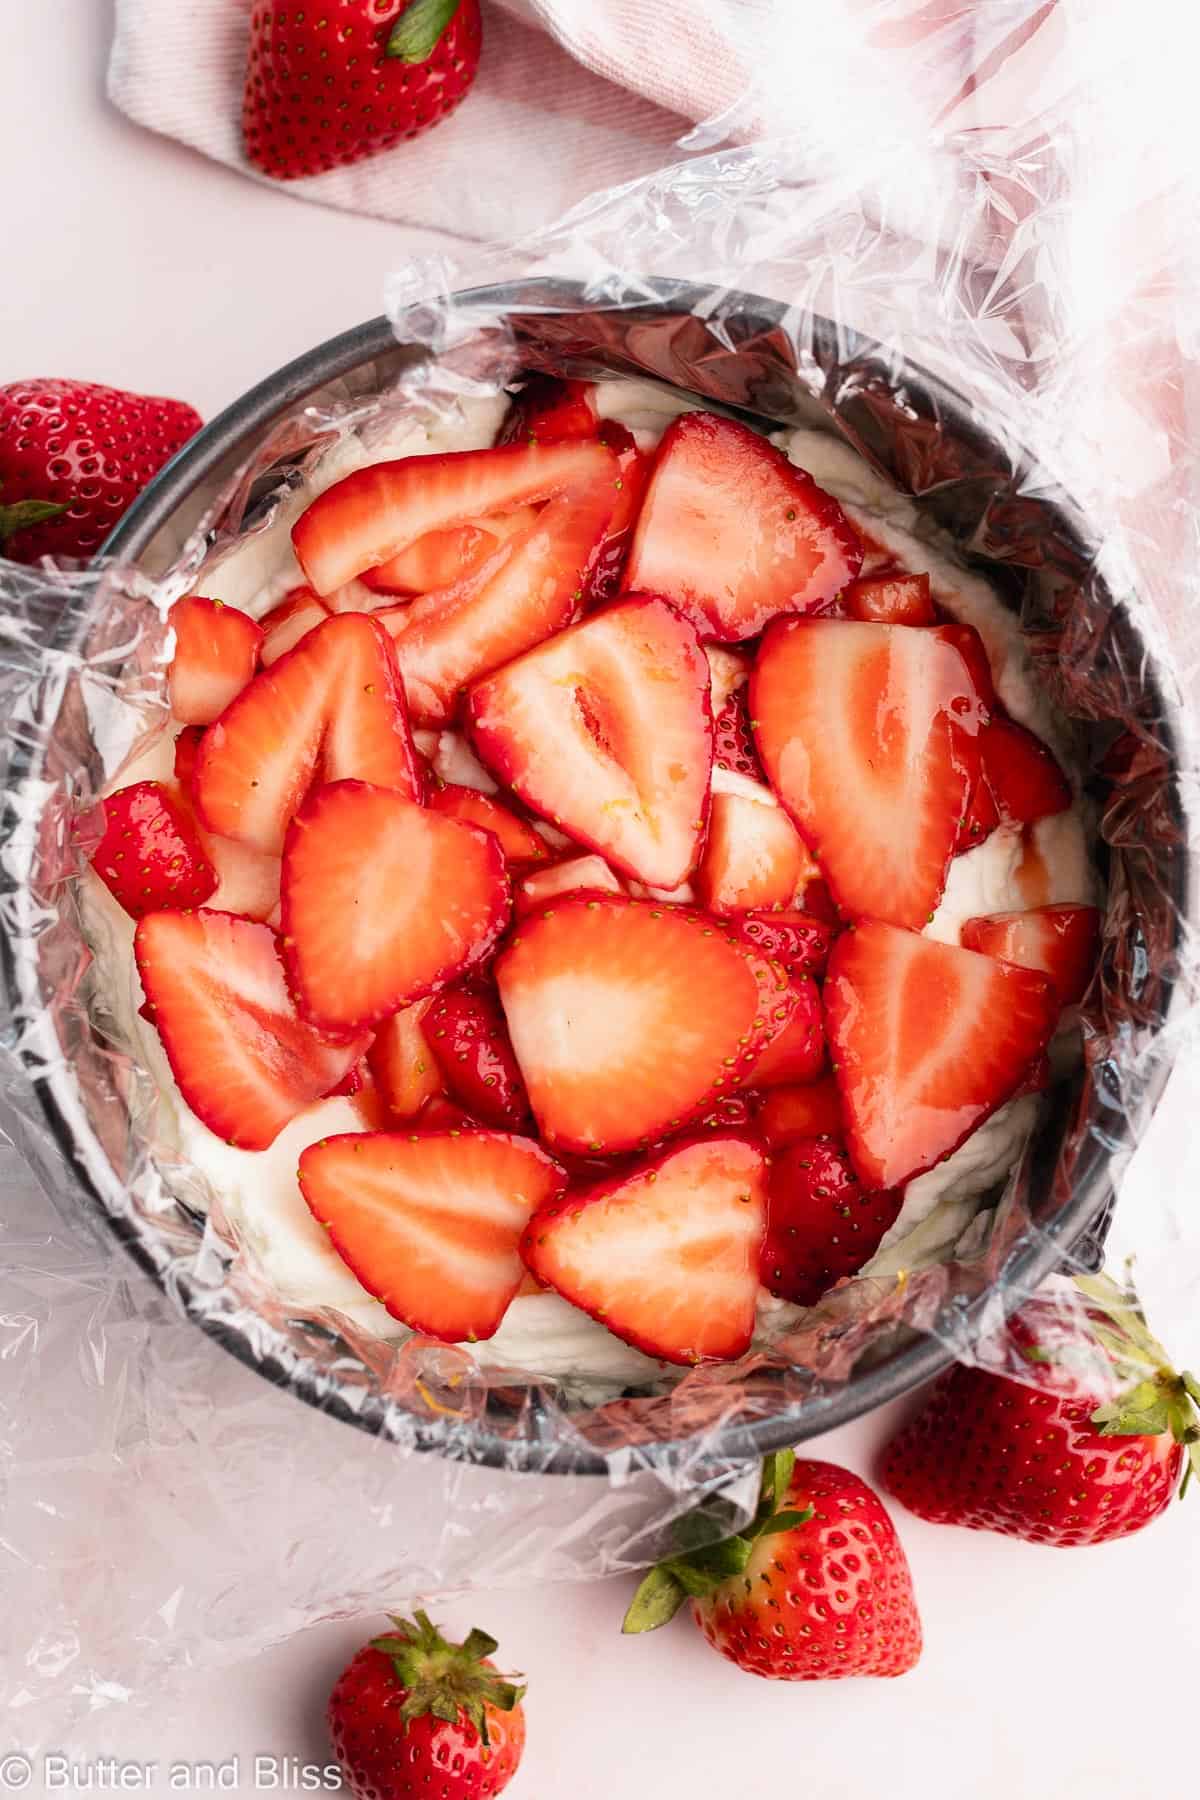
6. Pile on the strawberries – I start with some strawberry chunks then top those with strawberry slices. Assures me that I will get strawberry in every bite.
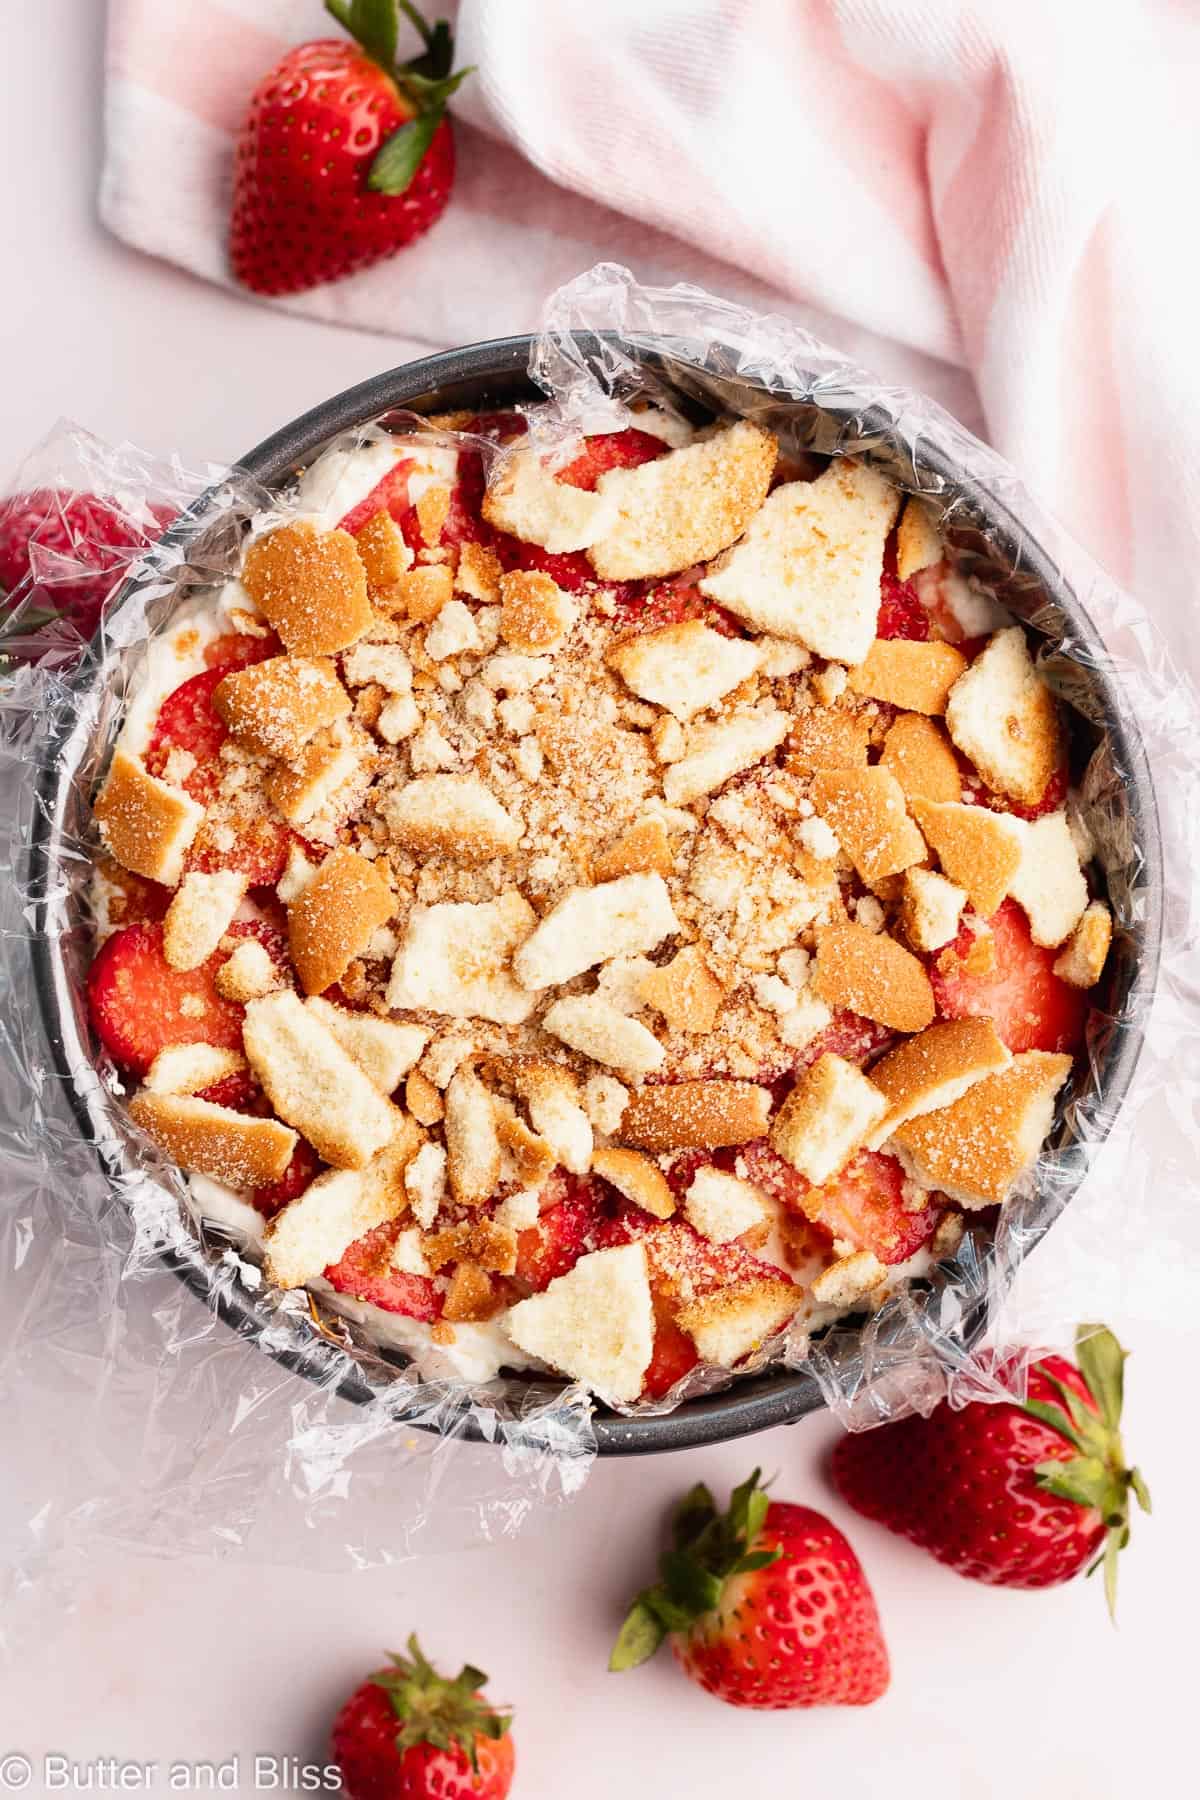
7. Repeat your layers 2 more times – I like to finish my wafer layer by crushing them up. For great distribution at the top, and a slightly thinner layer.
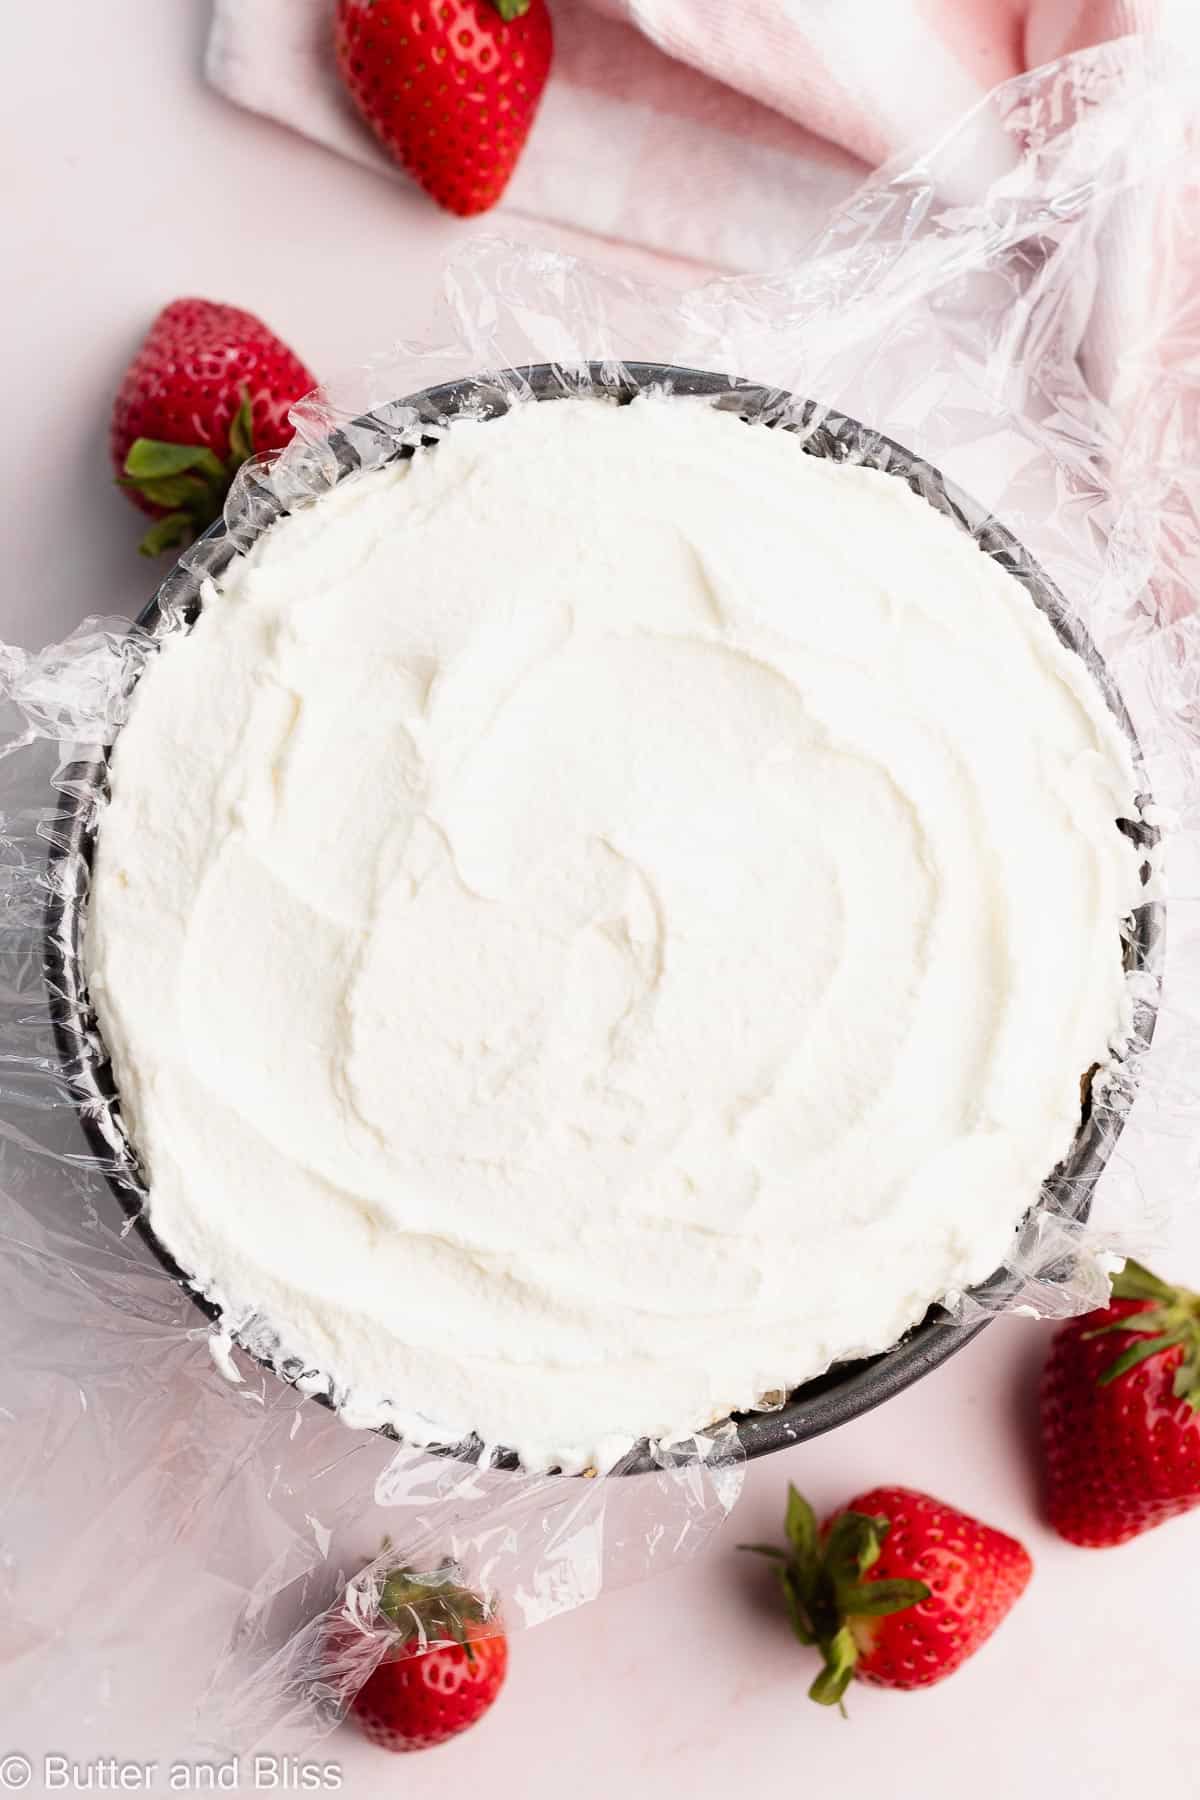
8. Finish with the remaining 1/3 of whipped cream – Smooth the final layer nice and even. After all, this will be the top of your cake!
9. Chill the cake overnight – Cover with plastic wrap and refrigerate for at least 8 hours (overnight). This gives the whipped cream time to set and the wafers time to soften.
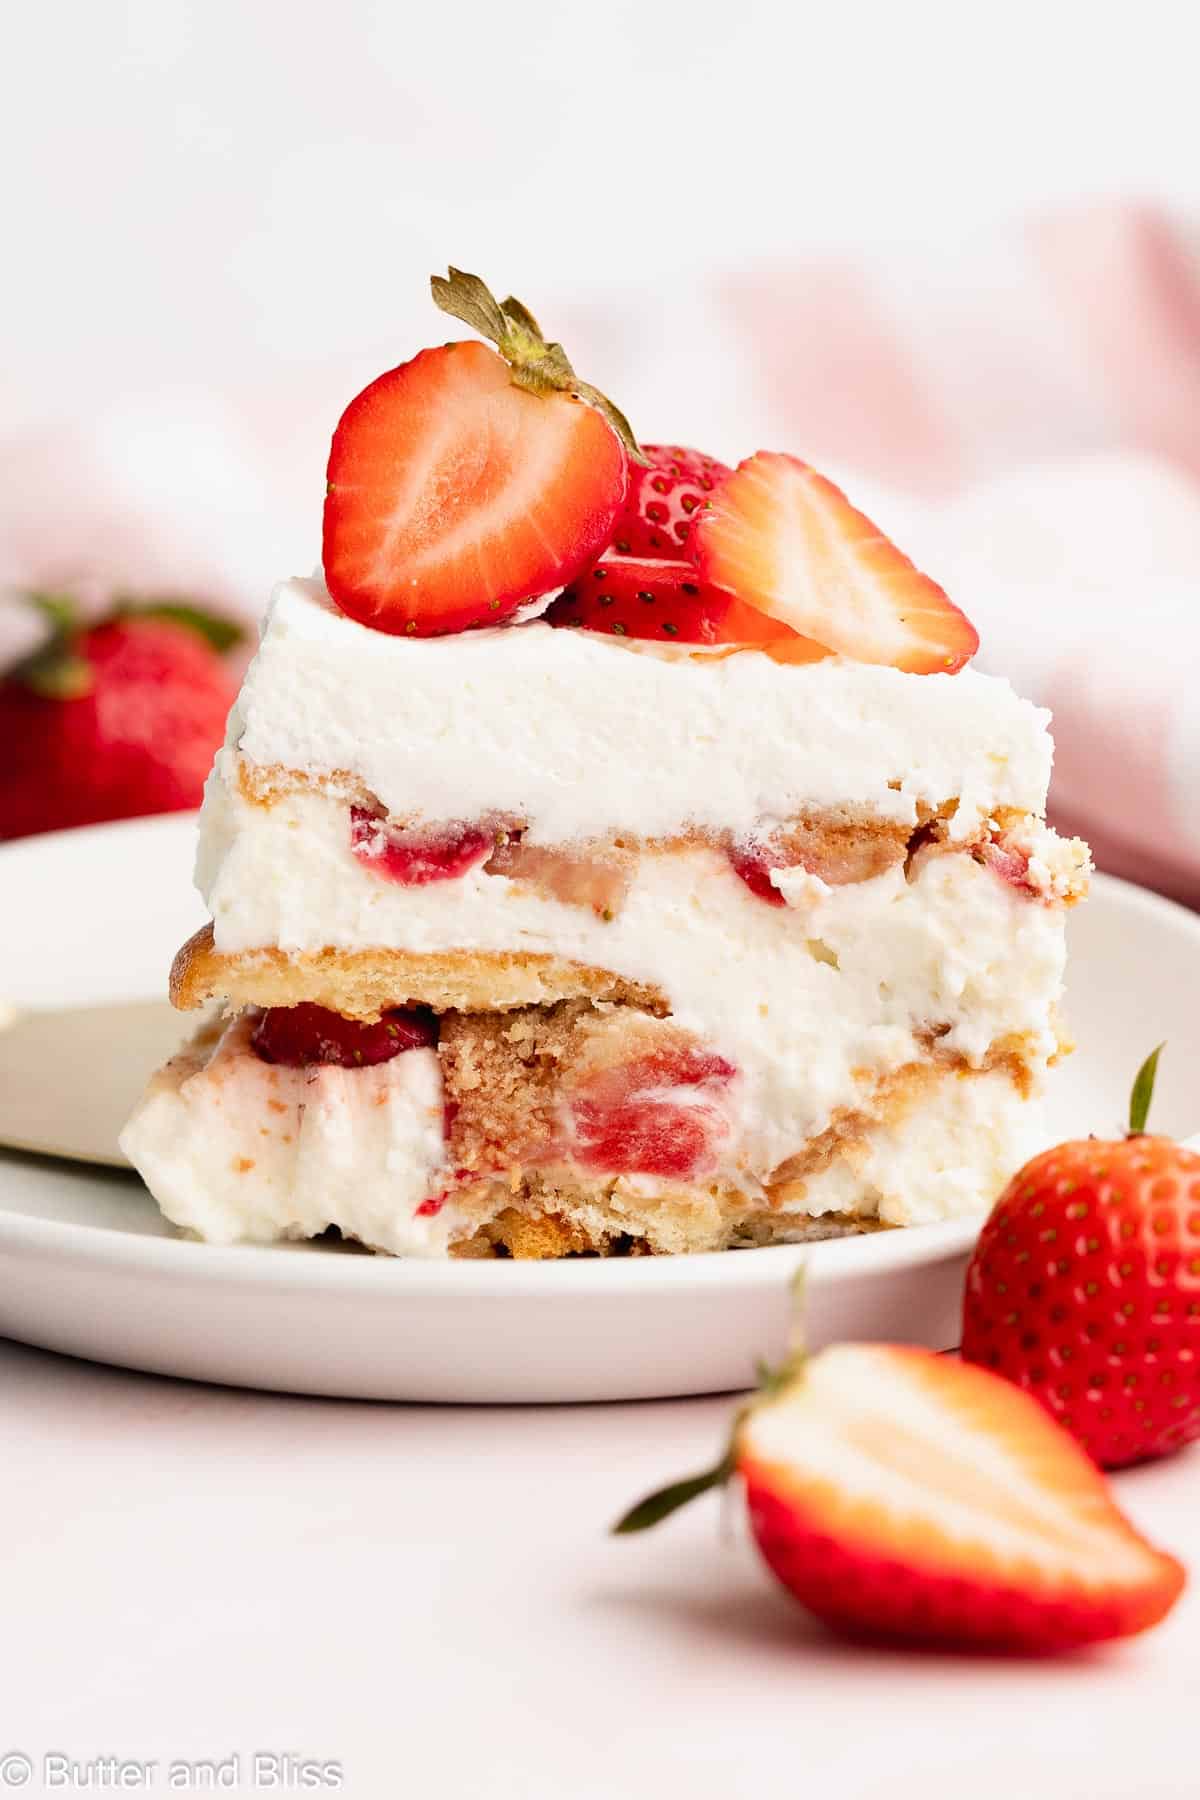
When you’re ready to serve, add a few more strawberry slices on top. Happy Spring Not-Baking!
As much as I want to hear about how you enjoyed the cake in the comments below, I’d rather hear if you’re a sprinkler or mister person like me! 🤗
Small and Creamy Strawberry Icebox Cake
by Erin Cernich
Equipment
Ingredients
- 10 ounces fresh strawberries (chopped or sliced)
- 1 tablespoon honey (optional)
- ½ teaspoon lemon zest (optional)
- ¼ teaspoon vanilla extract (optional)
- 1 ½ cups heavy whipping cream, cold
- 1 ½ cups marshmallow cream
- 1 pinch salt (optional)
- 30 vanilla wafers
Instructions
- Line a 6-inch springform pan with a sheet of plastic wrap. This will keep the bottom of the cake from sticking to the removable bottom of the pan. If you are going to serve directly from the pan, you don't have to line it. Alternatively, you can use a 6-inch square or 6-inch round cake pan and either line it with plastic, or serve directly from it.
- Prepare the strawberries – Either slice the strawberries or chop them into 1/4 inch chunks. I did a mixture of both. Add the cut strawberries to a medium mixing bowl. Add the honey, lemon zest, and vanilla and stir to coat the strawberries. Set aside.10 ounces fresh strawberries, 1 tablespoon honey, ½ teaspoon lemon zest, ¼ teaspoon vanilla extract
- Prepare the whipped cream – In a medium mixing bowl, add the heavy cream, marshmallow, and salt. Using a hand held mixer with whisk attachments, beat on high until stiff peaks form. Tip – start the mixer on low speed and slowly increase as the cream thickens – otherwise, you may splatter cream everywhere!1 ½ cups heavy whipping cream, cold, 1 ½ cups marshmallow cream, 1 pinch salt
- Assemble the cake – Line the bottom of the pan with a layer of vanilla wafers. For a 6-inch pan, you can fit at least 12 wafers. Dollop on 1/3 of the whipped cream and spread evenly to all sides of the pan. Then, spoon on a layer of strawberries. It is ok to have some of the juice. Repeat 2 more times, ending with a layer of whipped cream. Note – for my last layer of vanilla wafers, I crushed them to get different texture and a thinner layer.30 vanilla wafers
- Cover the cake with plastic wrap and refrigerate overnight. This will allow the whipped cream to firm so the cake is easy to slice, and the vanilla wafers to soften to a cake-like texture.
- To serve – Remove the springform ring. Use a large spatula (or two) to carefully transfer the cake to a serving dish, or serve straight from the springform pan bottom. Garnish with more strawberries (optional). To get clean slices, wipe the knife clean after each slice.
- Store the cake covered in the refrigerator for up to 3 days. Beyond that, and it may start to loosen. You can also freeze the icebox cake in the pan for up to 2 months. Wrap tightly in plastic wrap and thaw in the refrigerator.
Notes
- Serving Size – This is a small batch cake recipe that is easily doubled. I recommend an 8-inch pan to make a larger cake.
- Yield – As written, you can easily get 4 to 6 slices of cake.
- Cake Pans – The icebox cake is versatile and you can use just about any pan or dish. Keep in mind the small batch recipe and the pan/dish should be smaller.
- Serving – You can serve the icebox cake straight from the pan/dish.
- Sweetened Strawberries – I like to add a little honey and lemon to give the strawberries a bright flavor. You can omit it if you like.
- Whipped Cream – I add marshmallow cream to my whipped cream to make it stable. You can swap for powdered sugar for a lighter whipped cream.
- Wafers – Substitute any hardy or crunchy wafer, cracker, or cookies you like.
- Gluten Free Option – This recipe is easily made gluten free by swapping the vanilla wafers with any gluten free cookie or cracker you like. Also, double-check the ingredients on the marshmallow cream.
- Storage – Cover the cake with plastic wrap and refrigerate for up to 3 days. The icebox cake can also be frozen for up to 2 months. I recommend freezing in the pan and wrapping tightly in plastic wrap. Thaw in the refrigerator or serve frozen.
Nutrition Estimates
TRY THESE SMALL BATCH RECIPES NEXT!

About the Author …
Hi, I’m Erin! With years of experience baking for two in my own small household, I know about the love for desserts without the leftovers. I’ve tested, written, and photographed every one of the 300+ recipes on my website. And even had some of my desserts featured on Taste of Home, The Spruce Eats, ELLE, Parade, and more! From traditional to gluten free desserts for two, I have the recipe for you.
Click here to learn more about me →