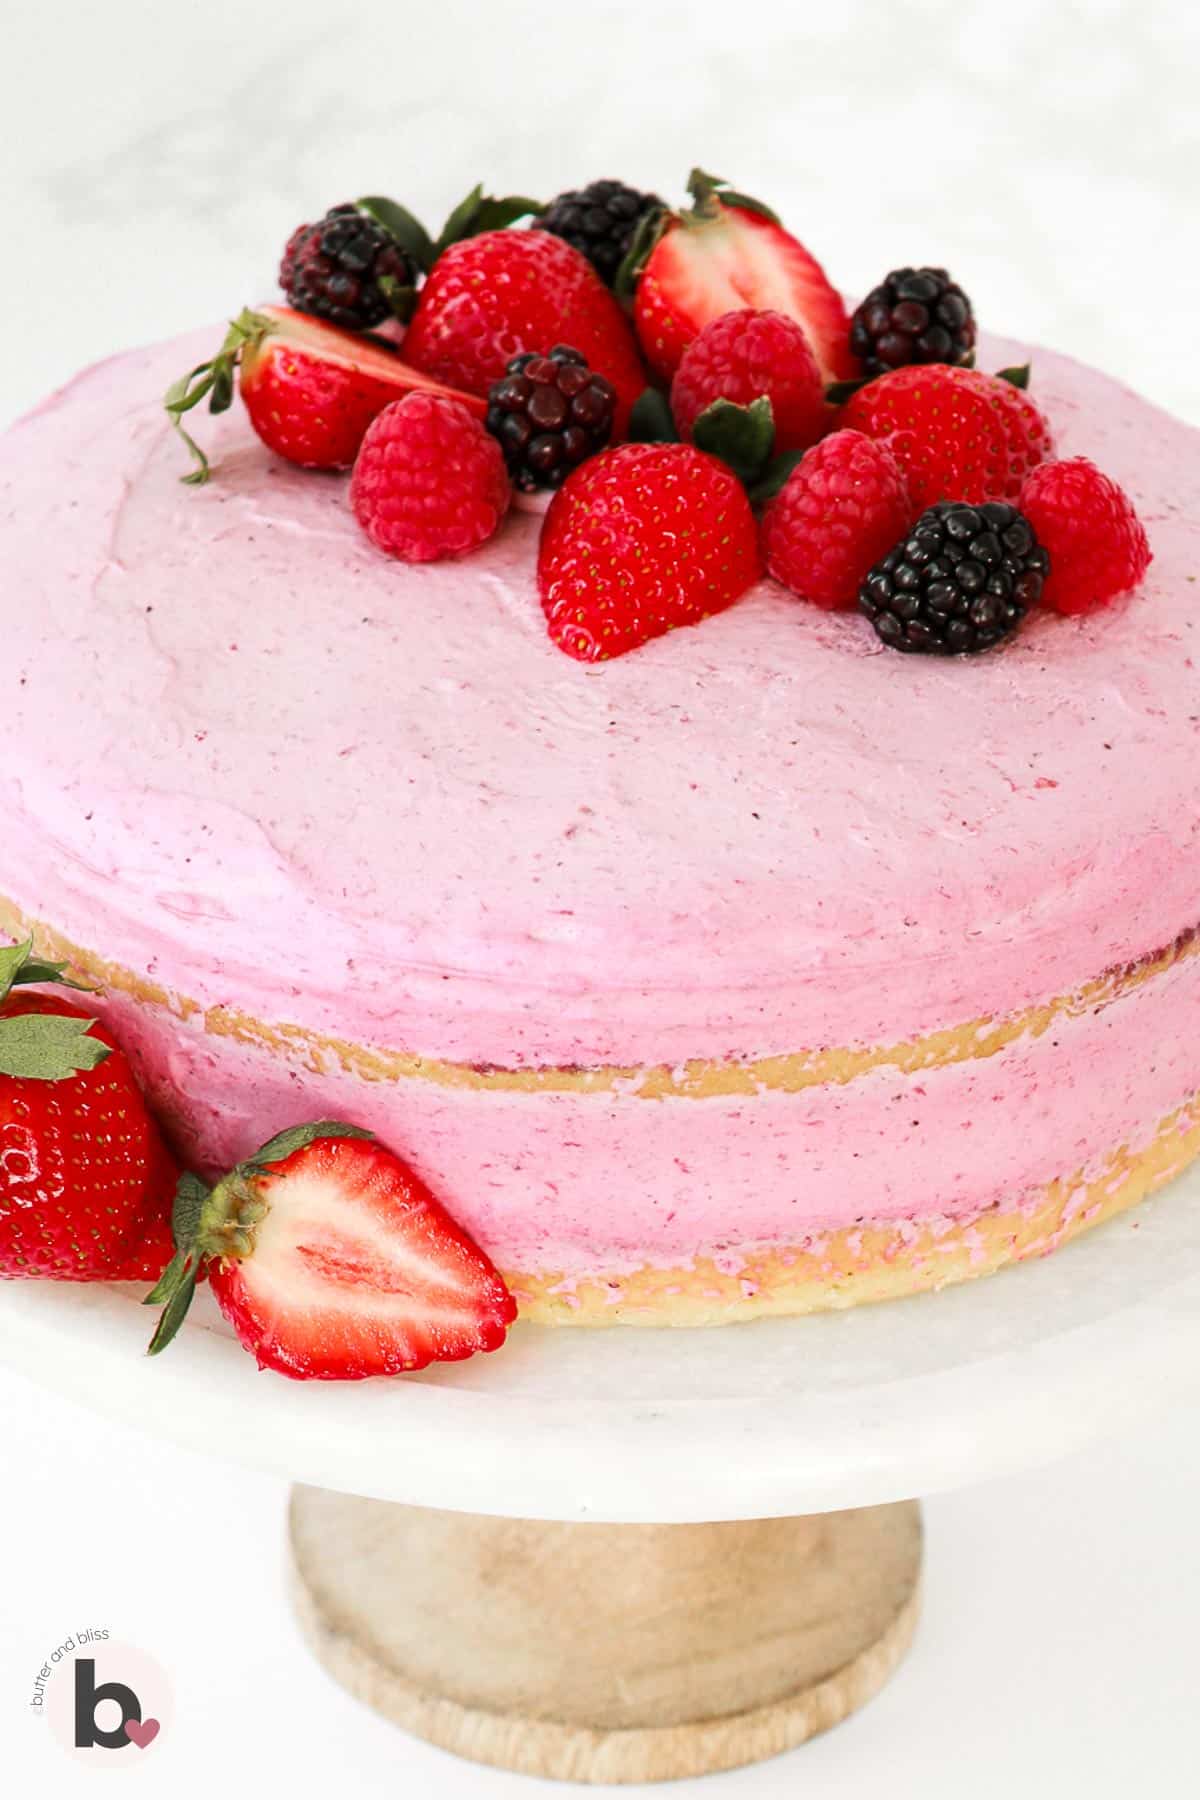
Berry Mousse Genoise Layer Cake
This post may contain affiliate links. See my disclosure policy.
This berry mousse genoise cake showcases two layers of soft and buttery genoise cakes topped with a bright homemade berry mousse. The mixed fruit mousse is thickened with whipped cream and gelatin, making it the perfect filling and topping on the cake. This is an impressive cake that can be made ahead of time and is ideal for special celebrations.
FEATURED REVIEW
“I just made this for my moms birthday and it came out WONDERFUL!! And looks exactly how I imagined it would taste. I added a touch of lemon extract to the mousse and loved that. Thank you for the great recipe!! “★★★★★ Mika (from Pinterest)
The Can’t Stop At One Slice Cake

This genoise berry mousse cake is one of the first cakes I made for the blog – hence the standard 8-inch size. After studying my America’s Test Kitchen Perfect Cakes Cookbook, I decided to take on my own version of their Charlotte Russe cake.
But, I’d rather leave the classic Charlotte cake to the professionals. It’s a bit involved. Besides, what attracts me most to a Charlotte is the fruit mousse. So, I came up with this approachable version for us home bakers that makes the fruity cream the star.
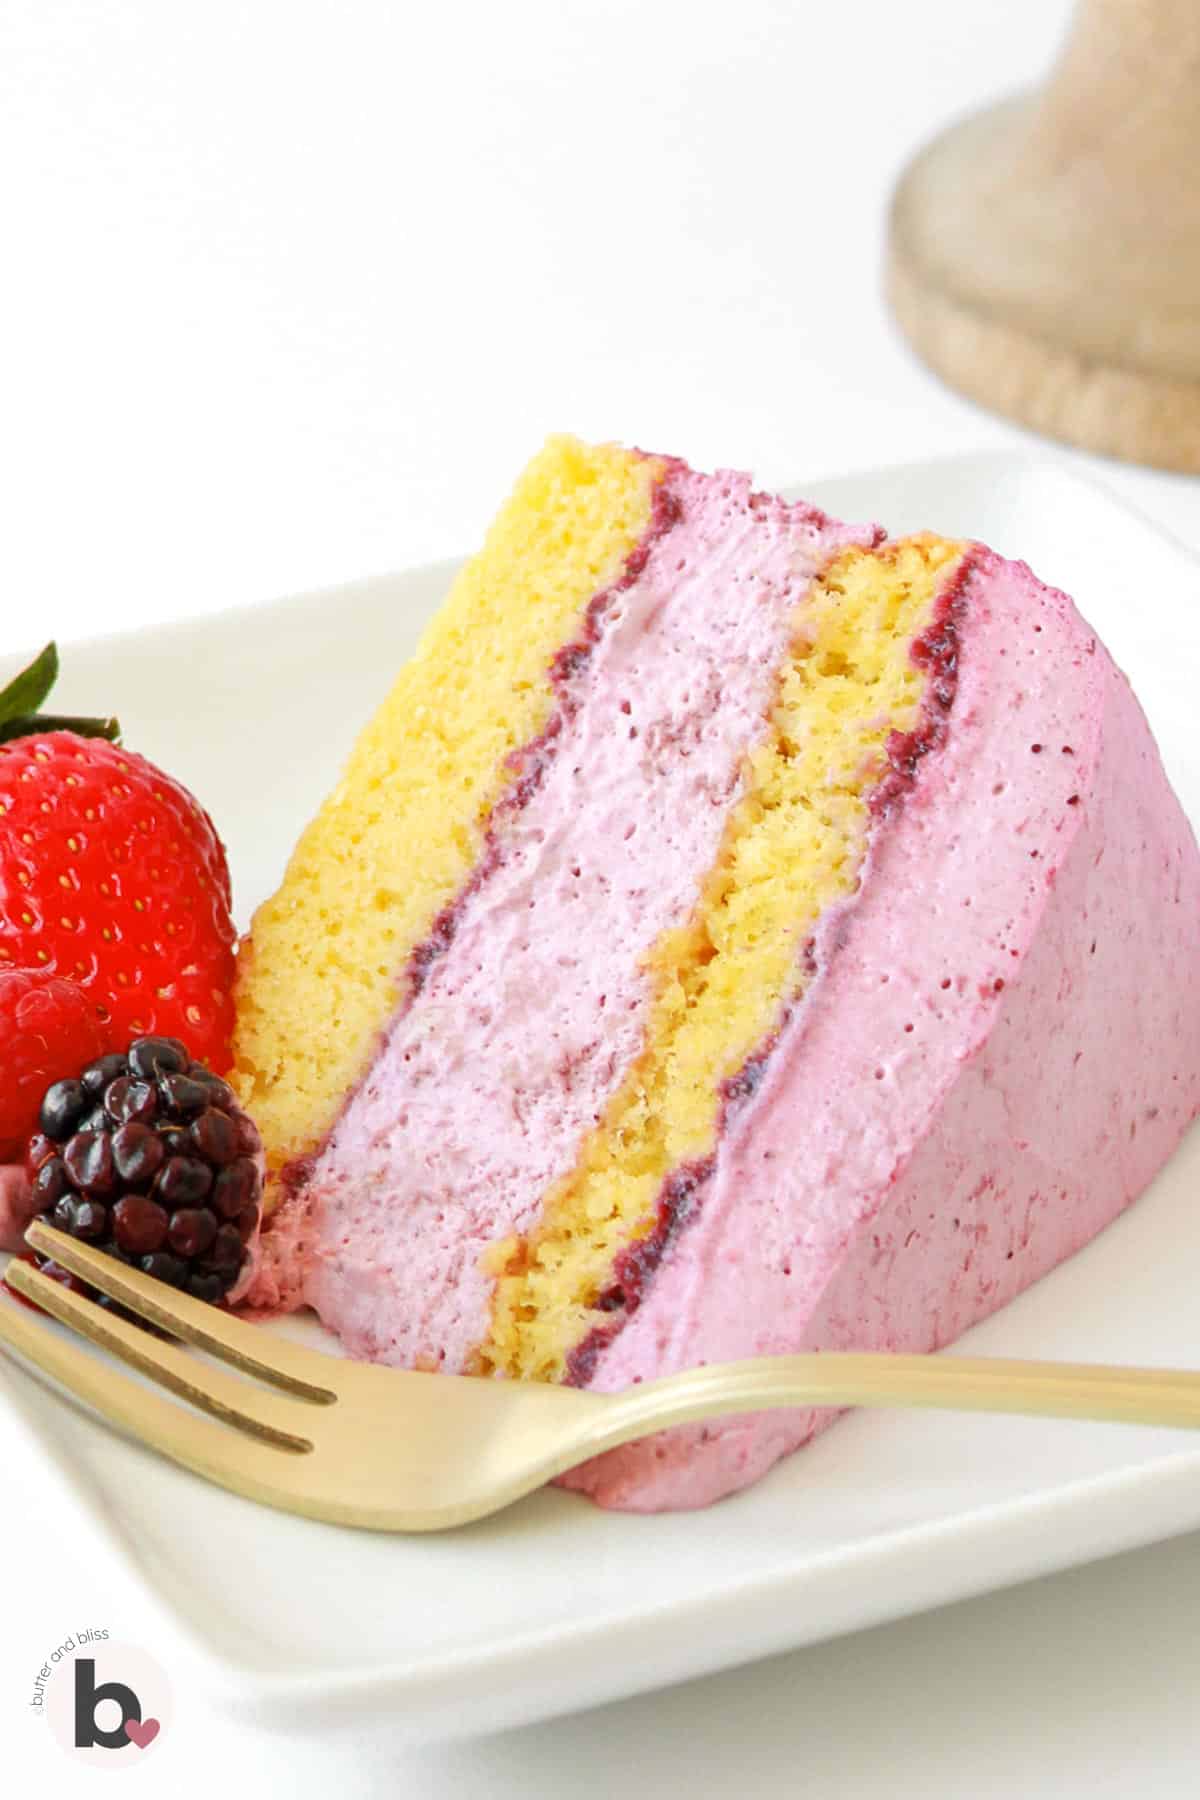
We have our traditional vanilla cake layers in the form of a rich genoise. Which is pretty special because it is made with whipped eggs that add volume and soft texture. But rather than your expected buttercream, the berry mousse steps in as a light filling and frosting.
And the cake continues to inspire my recipes on the blog. The combination of fruit and cake is highlighted in my blackberry mousse small batch trifles. Then there’s the small batch of berry filled vanilla cupcakes recipe – which mimics the flavors of this cake.
This recipe is pretty special to me. Yes, it was one of the first, but it demonstrates the creativity and deliciousness that can come out of your kitchen. Each bite is so soft and flavorful, you’ll be asking for more. I guarantee it. 🙂

A Few Things To Get You Started On The Cake
- This cake does require a few steps. More than your typical cake. Especially the berry mousse, so you’ll probably want to read the entire recipe first, then dive in.
- The genoise sponge cake in this recipe is different than your common vanilla cake. A genoise is leavened with whipped eggs, and you should expect a tight crumb and thinner cake layers. Whereas the vanilla cakes you’re used to fall into the category of a butter cake, are leavened with baking powder/soda, and have a lighter, airy crumb.
- The cake needs time to chill in the refrigerator. The mousse needs time to set up and get firm. You want to make sure you can get clean slices of cake!
Did you make this cake for a special occasion? What kind of fruit did you use for the mousse? 🍓🫐🍒 I’d love to hear about it in the comments below. Plus a star rating if you made the cake would be appreciated!
Berry Mousse Genoise Layer Cake
by Erin Cernich
Equipment
- 8-Inch Round Cake Pan (2)
Ingredients
Berry Mousse
- 1 ¼ teaspoons unflavored gelatin powder
- 2 tablespoons water
- 3 large egg yolks
- 2 teaspoons cornstarch
- 1 pound (3 and 1/4 cups) fresh or thawed frozen berries (raspberries, blackberries, blueberries, or strawberries)
- ⅔ cup granulated sugar
- 2 tablespoons unsalted butter
- ⅛ teaspoon salt
- 1 ¾ cups heavy whipping cream
Genoise Cake
- 1 ¼ cups cake flour
- ¼ teaspoon salt
- 4 tablespoons unsalted butter, melted and cooled slightly
- 5 large eggs, room temperature
- ¾ cup granulated sugar
- 1 teaspoon vanilla extract
- ½ cup seedless mixed berry jam (or any fruit jam)
- 1 tablespoon lemon juice
Instructions
Mousse Filling – Part 1
- In a large mixing bowl, sprinkle the gelatin over the water and set aside. This is the bowl we will use to make the mousse.1 ¼ teaspoons unflavored gelatin powder, 2 tablespoons water
- In a medium mixing bowl, whisk the egg yolks and cornstarch until combined.3 large egg yolks, 2 teaspoons cornstarch
- In a medium saucepan, combine the fruit, sugar, butter, and salt. Mash and mix before turning on the heat. Cook over medium heat, mixing frequently until the mixture is simmering and the fruit is almost completely broken down – about 4 to 6 minutes.1 pound (3 and 1/4 cups) fresh or thawed frozen berries, 2/3 cup granulated sugar, 2 tablespoons unsalted butter, 1/8 teaspoon salt
- Temper the eggs to make berry curd – Remove the fruit from the heat. While whisking constantly, slowly stream about half of the fruit into the egg yolk mixture. Whisking constantly, return the tempered mix back to the saucepan. Over medium heat, continue to whisk and cook until the curd thickens and bubbles – about 1 minute.
- Strain the curd through a fine-mesh strainer set over the bowl with the gelatin. Press through the strainer with a spatula until only the seeds remain. Scrape the underside of the strainer to make sure all of the curd is in the bowl! Discard the seeds. Stir the curd with the gelatin until the gelatin is dissolved.
- Set aside, stirring occasionally, until the curd is lightly thickened and cooled to room temperature – at least 30 minutes or up to 1 and 1/2 hours.
Genoise Cake
- Adjust oven rack to middle position and preheat the oven to 350F degrees. Line the bottom of 2, 8-inch round cake pans with a piece of parchment paper cut to fit. Lightly grease and flour the pans.
- On a piece of wax or parchment paper, sift the cake flour and salt. Set aside.1 ¼ cups cake flour, 1/4 teaspoon salt
- In a medium microwave-safe bowl, melt the butter. Set aside.4 tablespoons unsalted butter, melted and cooled slightly
- In the mixing bowl of a stand mixer fitted with the whisk attachment, add the eggs and sugar. Start mixing on low speed to break up the eggs. Then turn the speed up to medium and mix until the batter is airy, pale, and has tripled in volume (it will resemble whipped cream). This will take about 4 to 5 minutes. You will know that the eggs are properly whipped when you lift the whisk and the batter falls back into the bowl in a 'ribbon' that rests on the surface for about 10 seconds. If the 'ribbon' immediately sinks to the mixture, continue to whip for a few more minutes. Add the vanilla extract during the last moments of mixing.5 large eggs, room temperature, 3/4 cup granulated sugar, 1 teaspoon vanilla extract
- Remove the mixing bowl from the mixer. Sprinkle about 1/3 of the sifted flour over the batter. Using a spatula, very gently fold in the flour, stopping as soon as it is incorporated. Repeat this 2 more times.
- Temper the butter so the eggs/batter don't deflate – Spoon about 1 cup of the cake batter into the bowl of melted butter. Using the spatula, fold the butter into the batter. Transfer this mixture back to the batter in the mixing bowl and gently fold until incorporated. The batter is extremely fragile at this point, so be sure to fold very, very gently so the eggs do not deflate.
- Pour the batter equally into the prepared cake pans and smooth the top with a spatula. Bake for 25 to 27 minutes, or until the tops of the cake are springy to the touch and a toothpick inserted in the middle comes out clean. Pro Tip – Use a large cookie scoop to equally portion the batter into the cake pans.
- Cool the cakes in the pans set on a wire cooling rack for 10 minutes. Then invert the cakes onto the wire rack to cool completely. Tip – To ensure the cakes release from the pan, run a knife around the outside of the cake.
Mousse Filling – Part 2
- While the cakes are baking and cooling, finish the mousse. Clean the work bowl and whisk attachment for the stand mixer. Add the heavy cream to the bowl and mix the cream until soft peaks form. You can also use a hand mixer.1 ¾ cups heavy whipping cream
- Transfer 1/3 of the whipped cream to the fruit curd. Whisk gently until the mixture is lightened. Add the remaining whipped cream and fold into the fruit with a spatula until no whipped cream streaks remain.
- Assemble the cake – Add the jam and lemon juice to a microwave-safe dish and microwave for about 30 to 60 seconds, or until the jam is hot and fluid. Tip – The lemon juice lightens the flavor of the jam. You can omit it if you prefer.1/2 cup seedless mixed berry jam , 1 tablespoon lemon juice
- Set one cake on a serving platter. Spread half of the jam on top, then spread half of the berry mousse on top. The mousse will be sturdy and should be spread on thick. Top with the second cake and spread on the remaining jam. Finish with the remaining mousse and smooth out with an offset spatula or spoon.
- Refrigerate the cake for at least 4 hours, or up to 24 hours, to allow the mousse to set. Serve the cake at room temperature.
Notes
- Genoise cake – You will notice there are no chemical leaveners in the cake (baking powder or soda). The whipped eggs are what leavens the cake. The texture of genoise is rich, with a tighter crumb.
- Berries and jam – Any berry will work, including the jam.
- Take your time – The recipe does have a few steps, and the mousse filling is probably the most laborious part. And it’s fine if it sits at room temp. while you make the cake.
- Use sifted cake flour – The finer consistency of cake flour makes it super soft and tender. However, all-purpose flour will work.
- Room temperature eggs – Eggs whip up better when they are at room temperature. They will take a few minutes to reach the ‘ribbon’ stage.
- Be gentle mixing the cake batter and mousse – You’ve just spent time whipping air into the eggs and whipped cream! So we don’t want to deflate them. Gently folding with a spatula will keep everything light and airy.
Nutrition Estimates
TRY THESE SMALL BATCH RECIPES NEXT!


About the Author …
Hi, I’m Erin! With years of experience baking for two in my own small household, I know about the love for desserts without the leftovers. I’ve tested, written, and photographed every one of the 300+ recipes on my website. And even had some of my desserts featured on Taste of Home, The Spruce Eats, ELLE, Parade, and more! From traditional to gluten free desserts for two, I have the recipe for you.
Click here to learn more about me →
Could you please give approximately how many cups of batter goes into each pan? Half the batter doesn’t explain it to me and I need more detailed explanation please🙂 Looking forward to try this type of cake for first time! This recipe looks fairly straightforward.
It should be approximately 4 cups of batter. Though, I recommend using a large cookie scoop to equally portion the batter into the pans.