Gluten Free Mini Apple Pie
This post may contain affiliate links. See my disclosure policy.
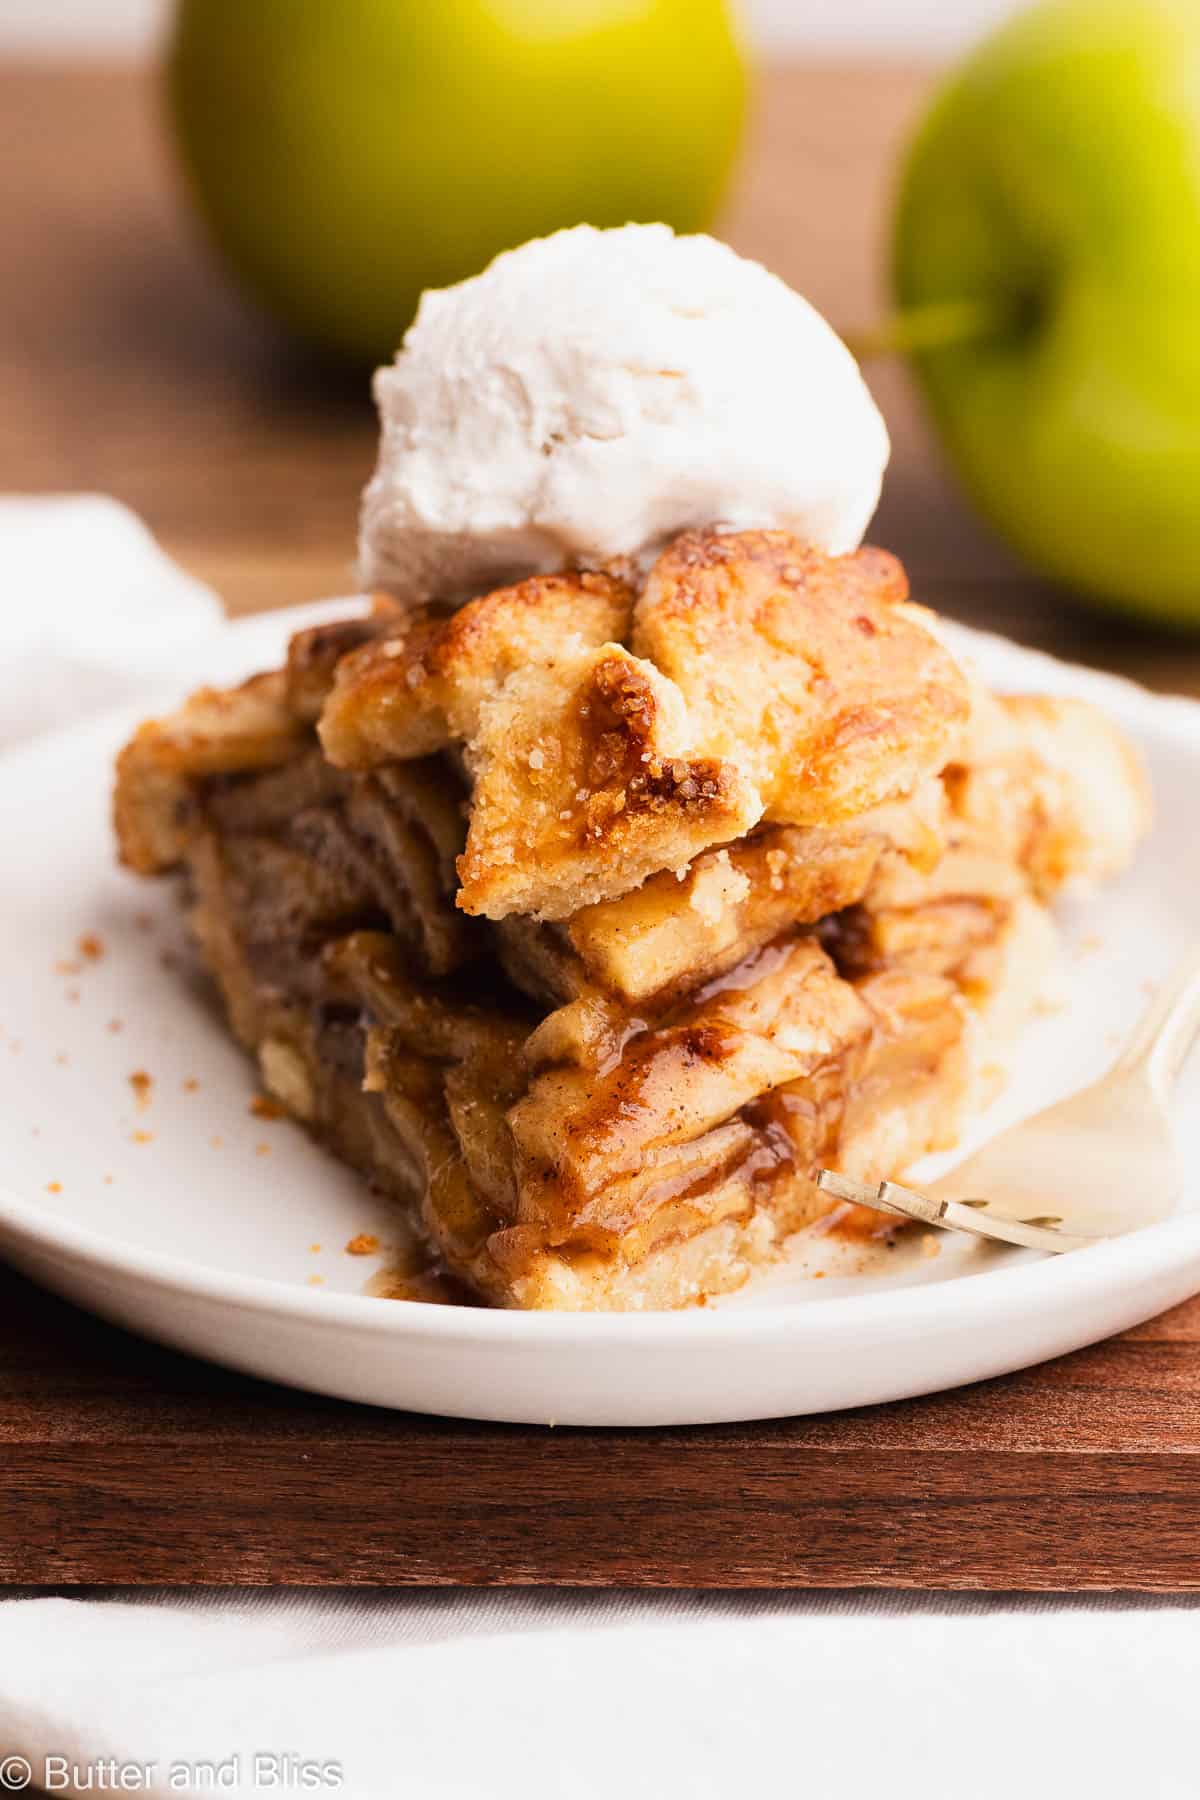
Simply the best mini gluten free apple pie recipe with double crust! We take my super flaky all-butter gluten free 6-inch crust, double it, and pile in slices of firm, seasoned apples. The pie bakes to golden brown perfection with a sweetened flaky crust holding a juicy and syrupy apple pie filling. A delicious pie you’d never know was gluten free and suitable for any occasion!
Mile-High Gluten Free Apple Pie
Quite literally, since I live outside of Denver. But also because the gooey apple filling is piled well beyond the brim of the pie dish! The 6-inch pie is classic Americana and deserves a seat at any 4th of July, Thanksgiving, Christmas, or Sunday dinner table!
Though, this recipe is timely, because as we near Thanksgiving, I often think of desserts other than pumpkin pie. Don’t get me wrong, I love pumpkin pie. Or pumpkin anything for that matter (hello gooey pumpkin bars!), but I do like to incorporate fall fruit into my holiday repertoire.

All The Reasons To Love This gluten free apple pie
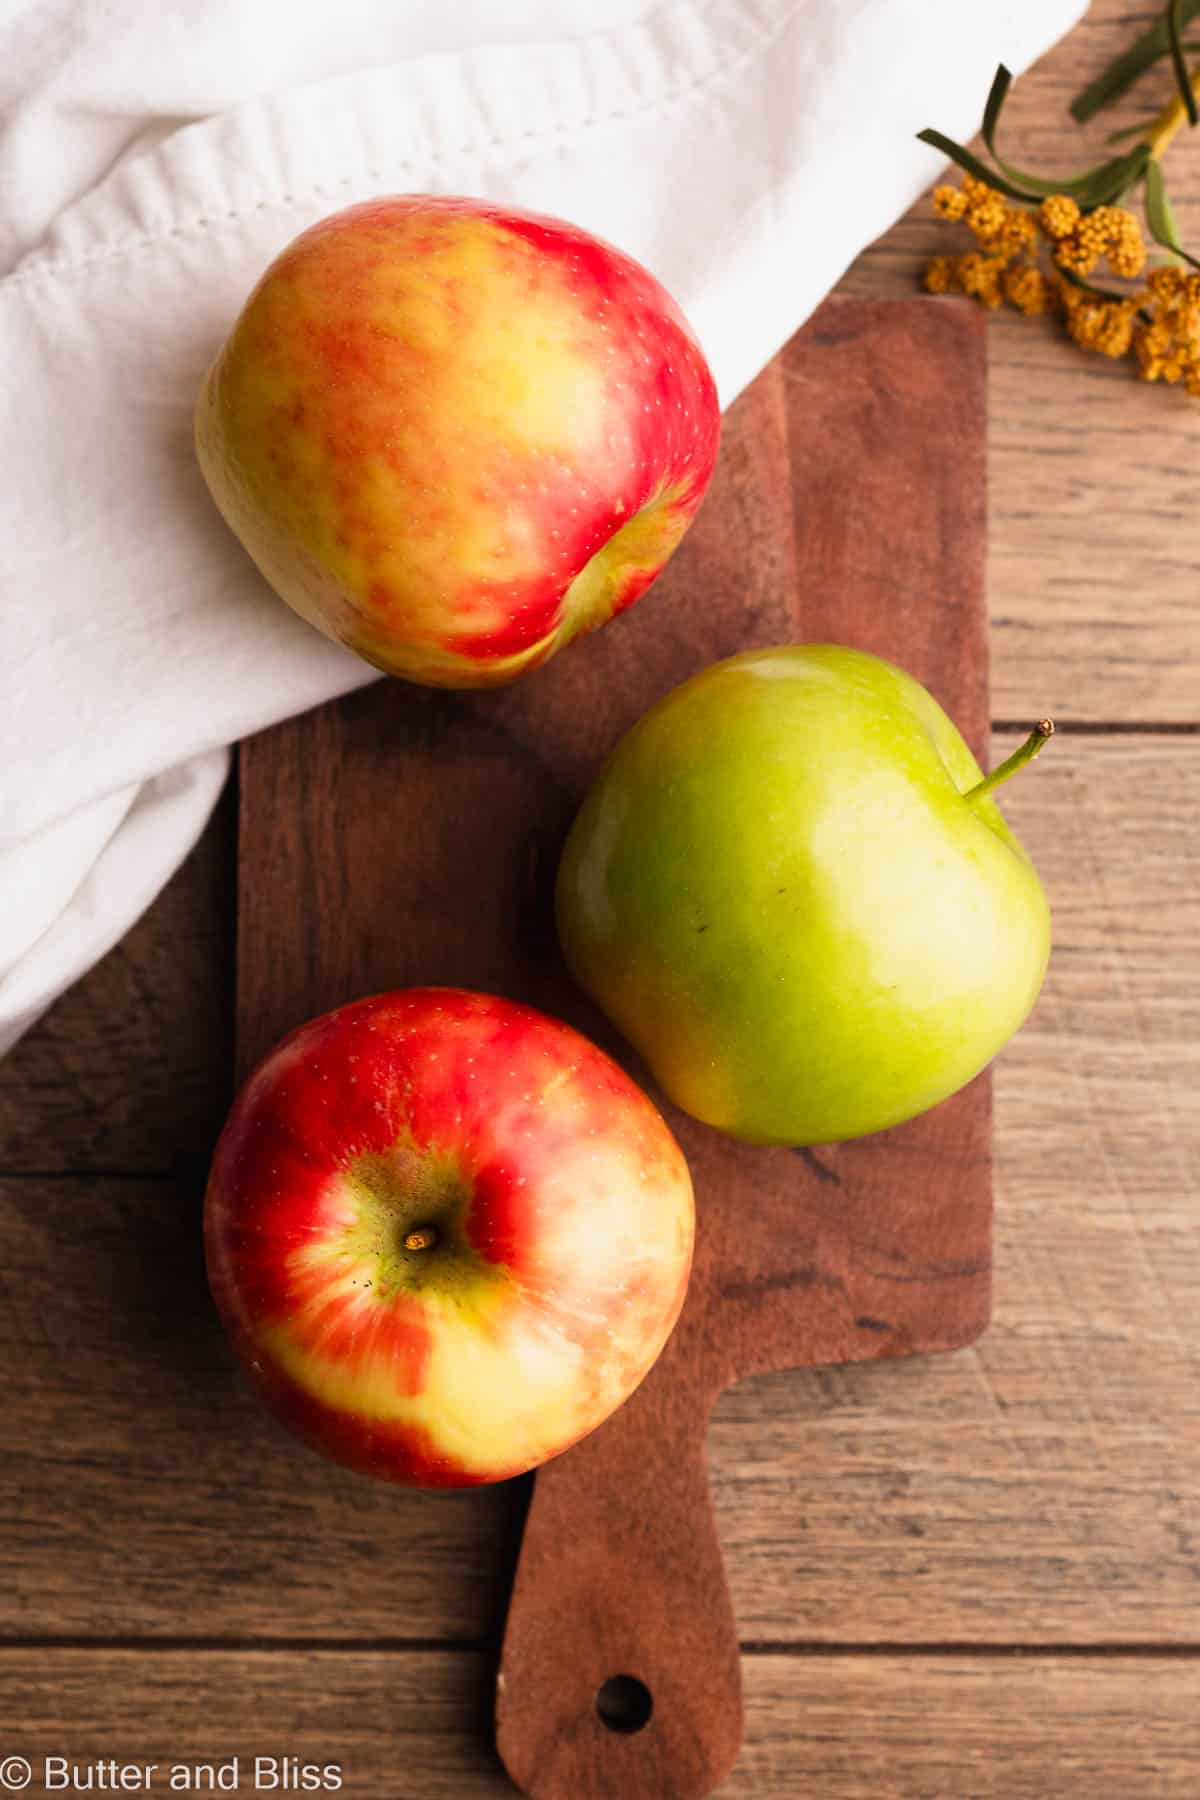
- Mini in size, but mighty in flavor – Tart and sweet Granny Smith and Honeycrisp apples combine with the best gluten free pie crust to give all the flavors we come to expect with a delicious, homemade, apple pie.
- Gooey fresh apple pie filling – While the apples marinate with their spices and sugar, this leads to syrupy juices that coat the apples while they bake.
- Super flaky pie crust – The same pie crust we use in my gluten free pumpkin pie. A gluten free crust you won’t be able to tell is gluten free. Buttery, flaky, and full of flavor.
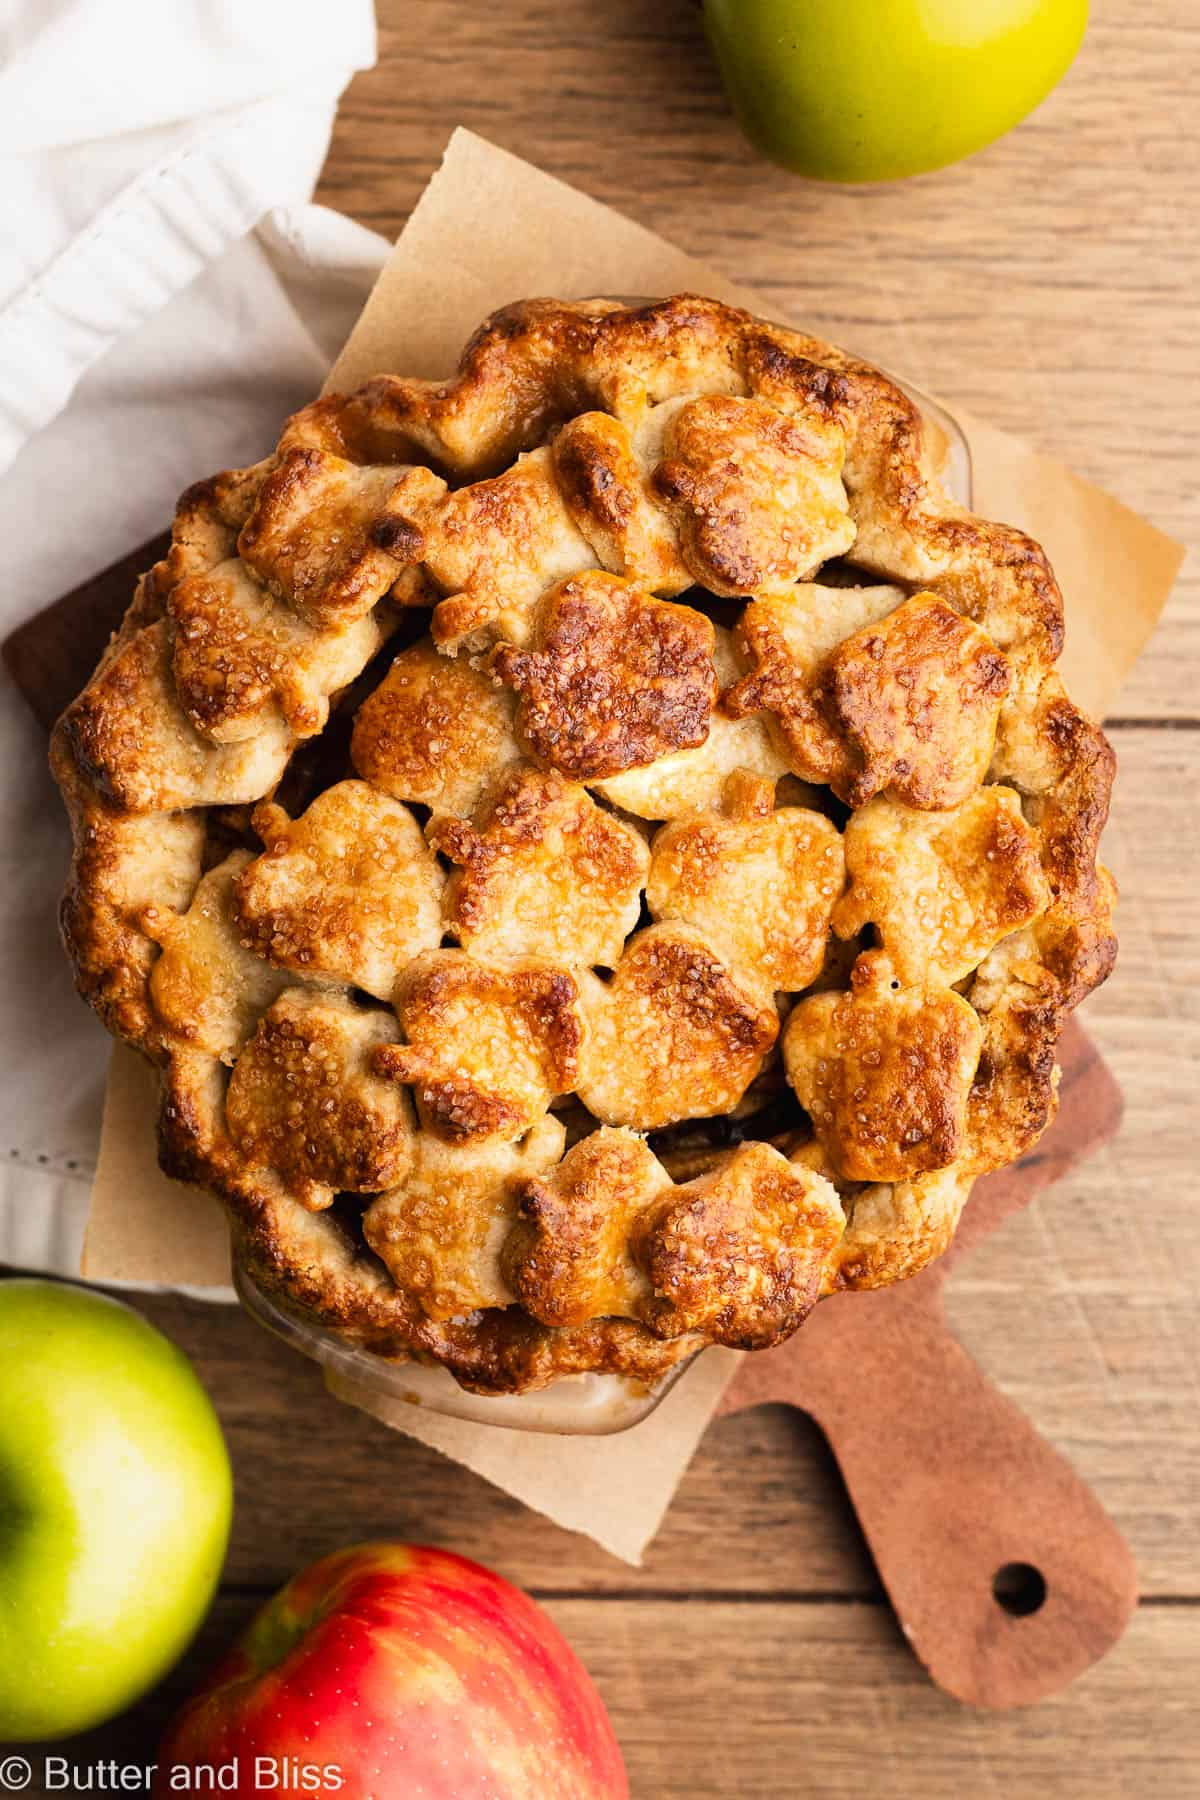
- Fun to decorate – Oh, the fun you can have with the pie top! I went a little meta and did apple cut-outs for the apple pie. But think of the season and celebration, and have fun with your shapes!
- A la mode, whipped cream, or au naturale – Any way you top it, the pie is a delicious canvas for any accessory. Personally, I look forward to a slice with homemade apple cider caramel sauce!
What Are The Best Apples To Use For Baking
I have (often) said with my recipes, that use an apple you like to eat. Now, while that may be true for apple crisp, apple spice cupcakes, or apple cheesecake bars, I will say for pie, you want to use firm apples.
- Honeycrisp – My personal favorite and I use most often in my apple recipes.
- Granny Smith – I use Granny Smith in my Irish Apple Cake – to stay true to the original.
- Pink Lady – Slightly more tart than Honeycrisp, but not quite Granny Smith tart.
- Braeburn – Flavor is on par with a Red Delicious.
- Golden Delicious – A little more sweet than a Granny Smith.
In pie – like apple pie – it bakes for such a long time to achieve the golden, crisp crust, and drippy filling. With that, we want apples that will hold their shape and and texture when baked for an hour. In other words, we don’t want soft apples because they will turn to mush when baked for a long time.
How To Make Apple Pie Filling That Doesn’t Spill Out
It happens to the best of us. We take hours to prepare the perfect pie. Then, when it comes time to slice it, all the filling just spills out. Not that it’s a bad thing – I mean, it still tastes delicious. But certainly not the presentation we want after all that work!
My top tips to make sure you have a juicy pie filling that will hold its shape when sliced:
- Use firm apples – We talked about the benefits above, but the firm apple won’t get mushy when baked.
- Cornstarch – Or really any thickening agent like flour, tapioca flour, or even arrowroot flour. These flours/starches will naturally combine with the juices to thicken the sauce.
- Let the pie cool – Again, from experience, if you slice too soon (i.e. while the pie is still warm because you just can’t wait!), the juices will just run out. I say give the pie at least 3 hours to cool and set.

The Best Apple Pie Filling
- Firm Apples – Honeycrisp and Granny Smith offer different flavors and textures.
- Cane Sugar – Organic cane sugar is my preference for flavor and is less processed. Granulated white sugar will work.
- Brown Sugar – Light or brown sugar.
- Lemon Juice – To offer a little acidity and keep the apples from over-browning.
- Cornstarch – To make the filling thick and syrupy.
- Cinnamon, Allspice, and Cardamom – Cinnamon may be a must, but you can certainly add any spice you like!
Mix all the ingredients and let the apples sit for at least 20 minutes. This gives them time to soak up all the yummy flavors!
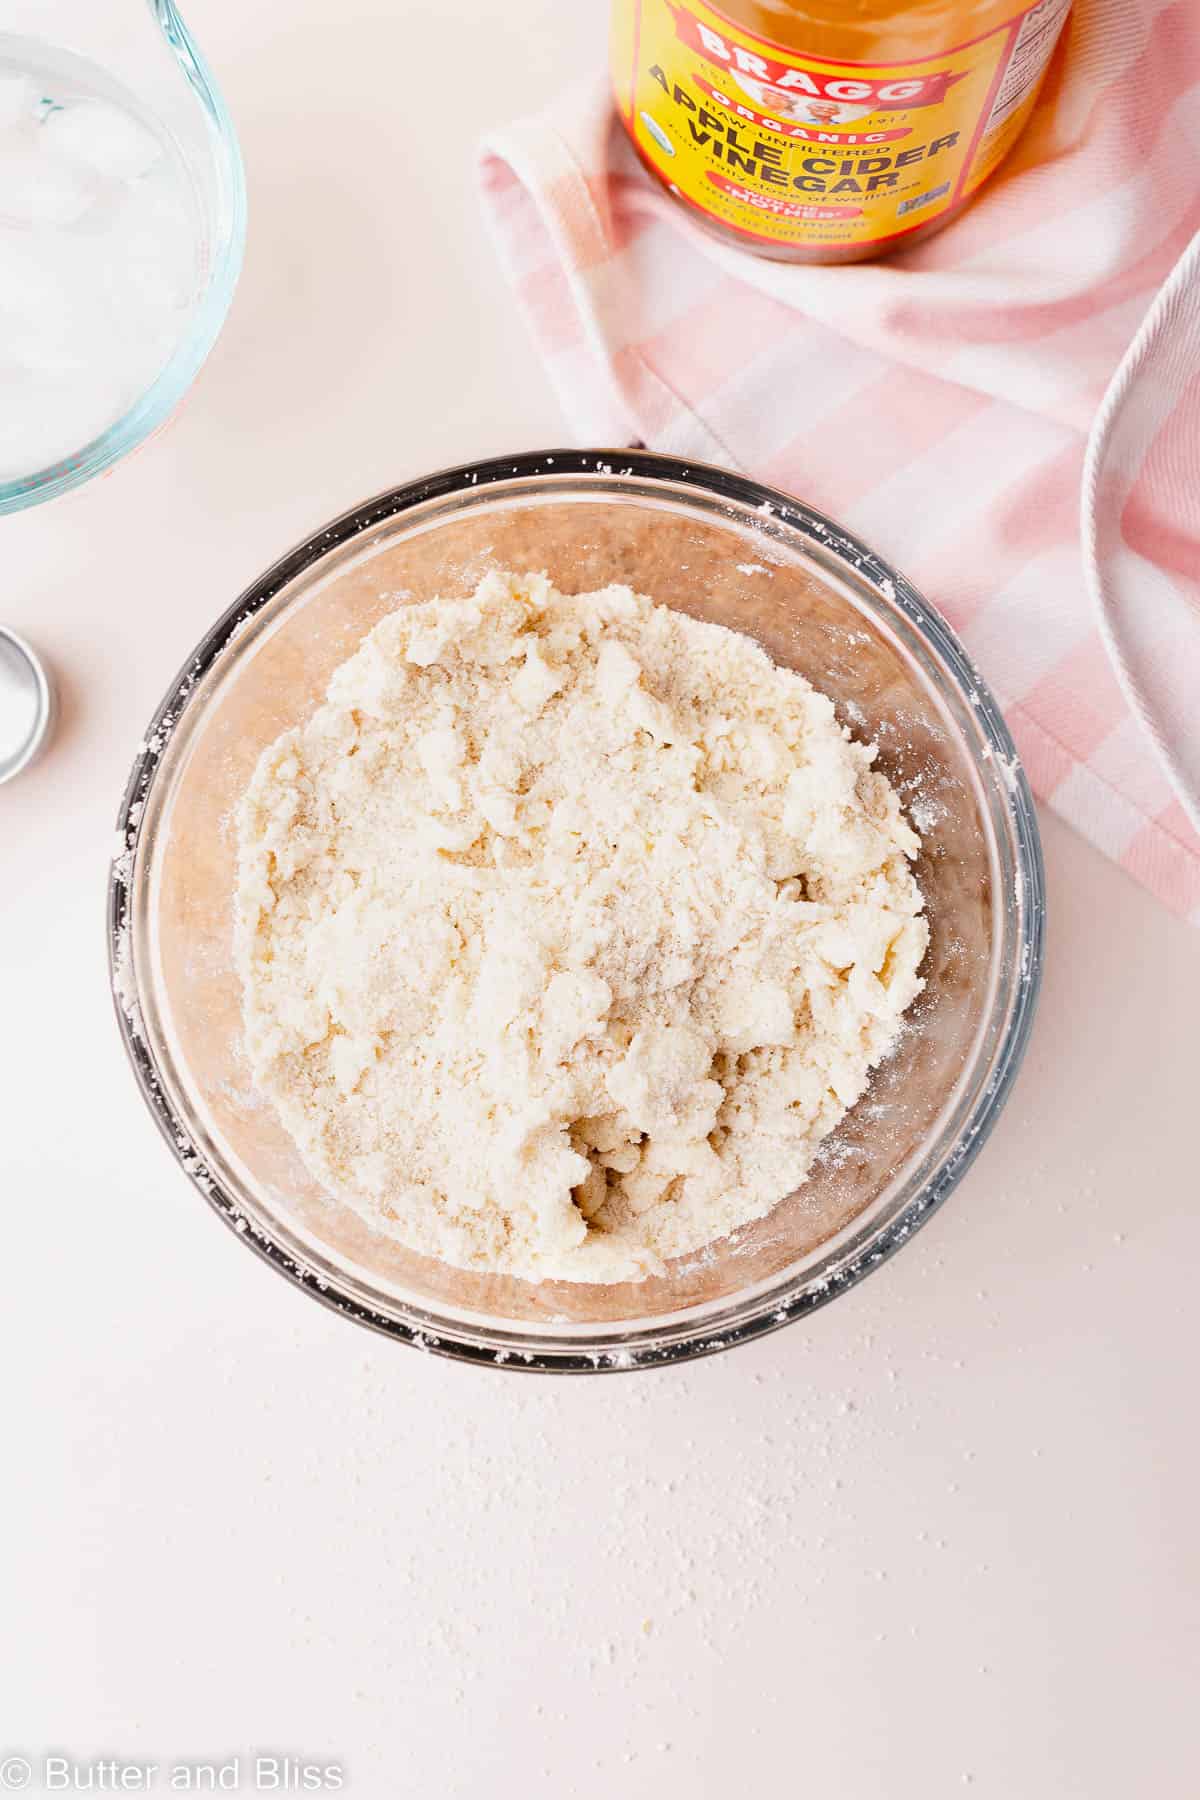
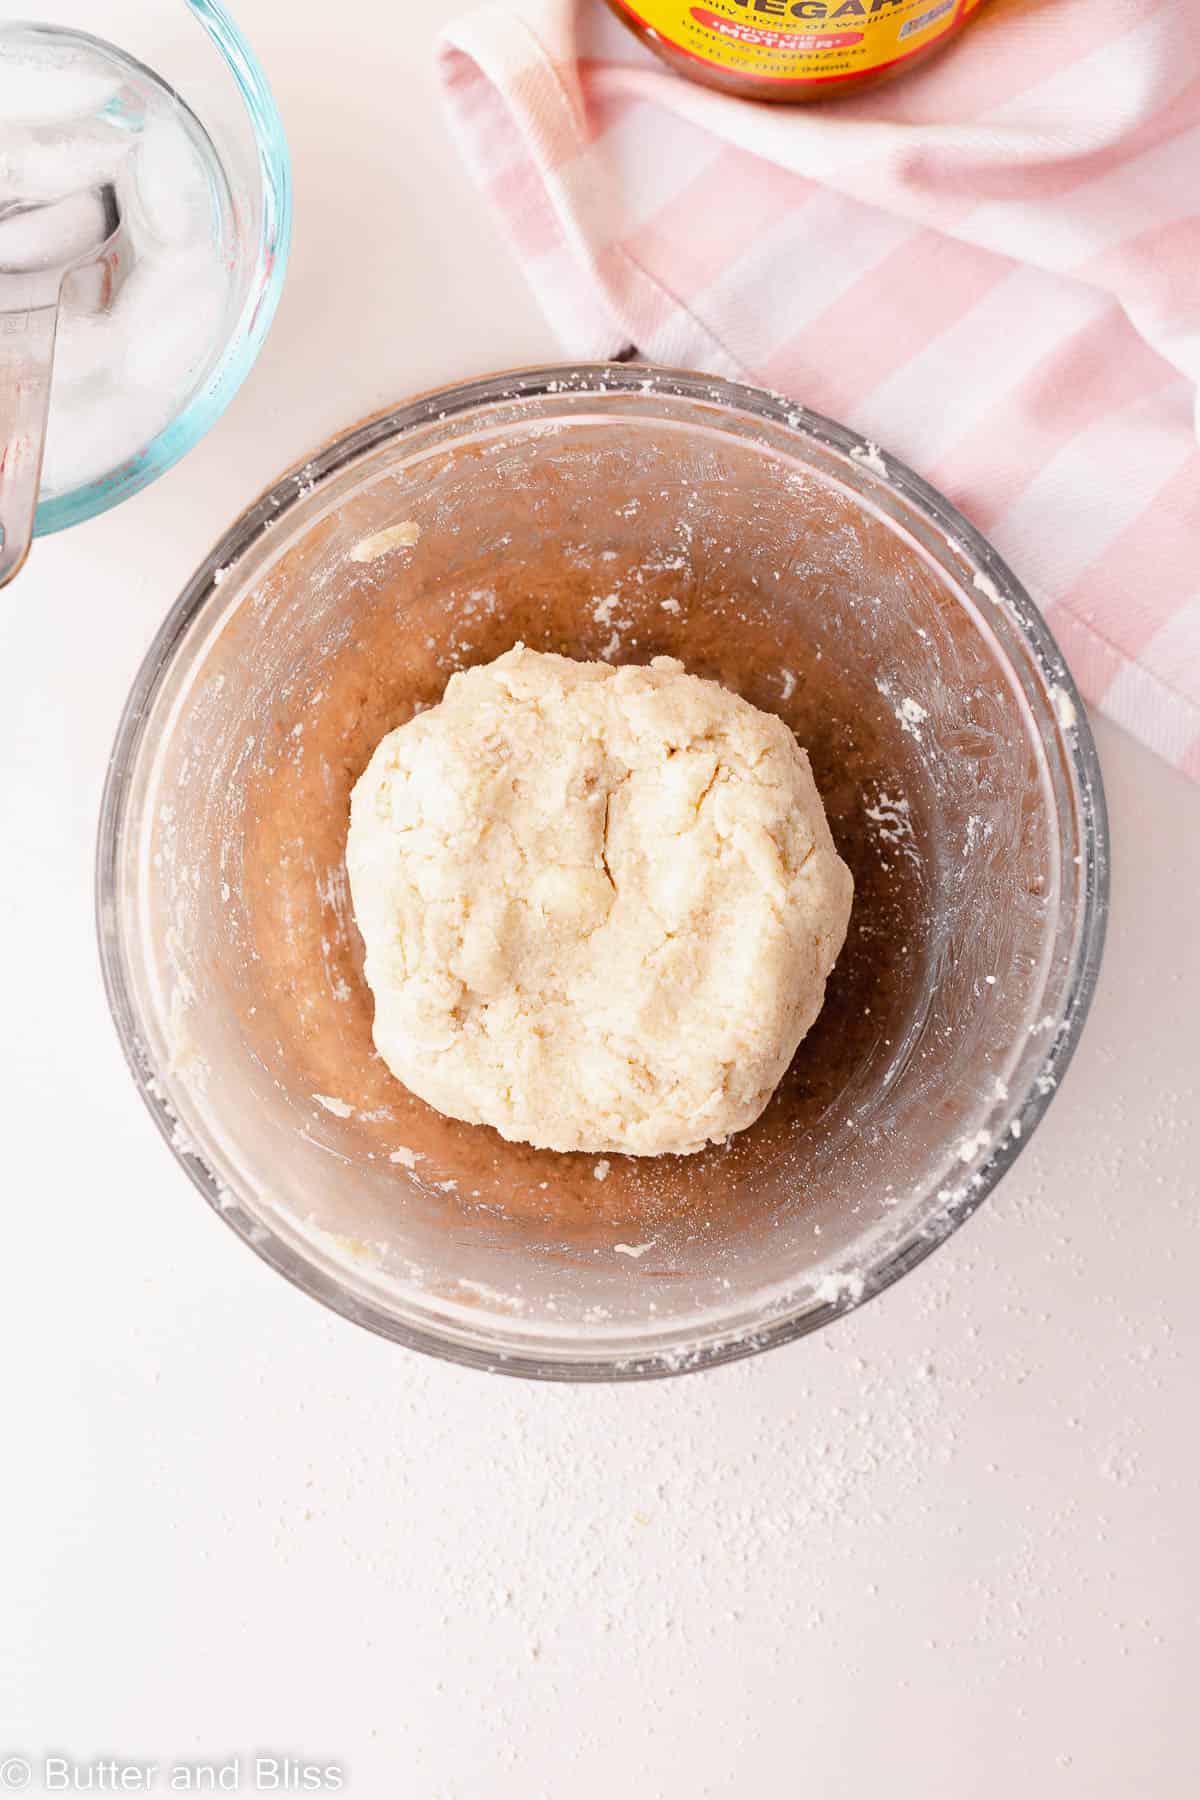
Prepare the pie dough. Much like a traditional pie dough, the few ingredients are combined and then chilled. The key ingredient to a good pie dough: cold butter.
- Almond Flour – Almond flour provides structure, moisture, and flavor.
- Oat Flour – I think of oat flour as the main structure of the dough and has a great flavor.
- Sweet Rice Flour – And not regular rice flour! Sweet rice flour mimics gluten, provides elasticity, and yields a soft dough.
- Tapioca Flour – Tapioca combines with the other flours to yield a soft dough, and it also mimics gluten.
- Xanthan Gum – Think of xanthan gum as a gluten replacer. It is what helps to bind the dough, provide elasticity, and yield a tender crust.
- Granulated Sugar – If you’re like me, I do like my pie crust to have flavor. A little sugar goes a long way. Use the same granulated sugar you use in the filling.
- Salt – Salt is a must for flavor!
- Vinegar – A little vinegar to help tenderize the pie crust. I use apple cider vinegar for the flavor – it is an apple pie!
- Ice water – Ice water because we don’t want to melt the butter!
- COLD Butter – Cold butter is what contributes to the flaky (and tasty) layers of the pie crust. Additionally, I strongly recommend good quality (i.e. high fat content) butter. I like to use Kerrygold butter for this recipe, and unsalted since we add salt.
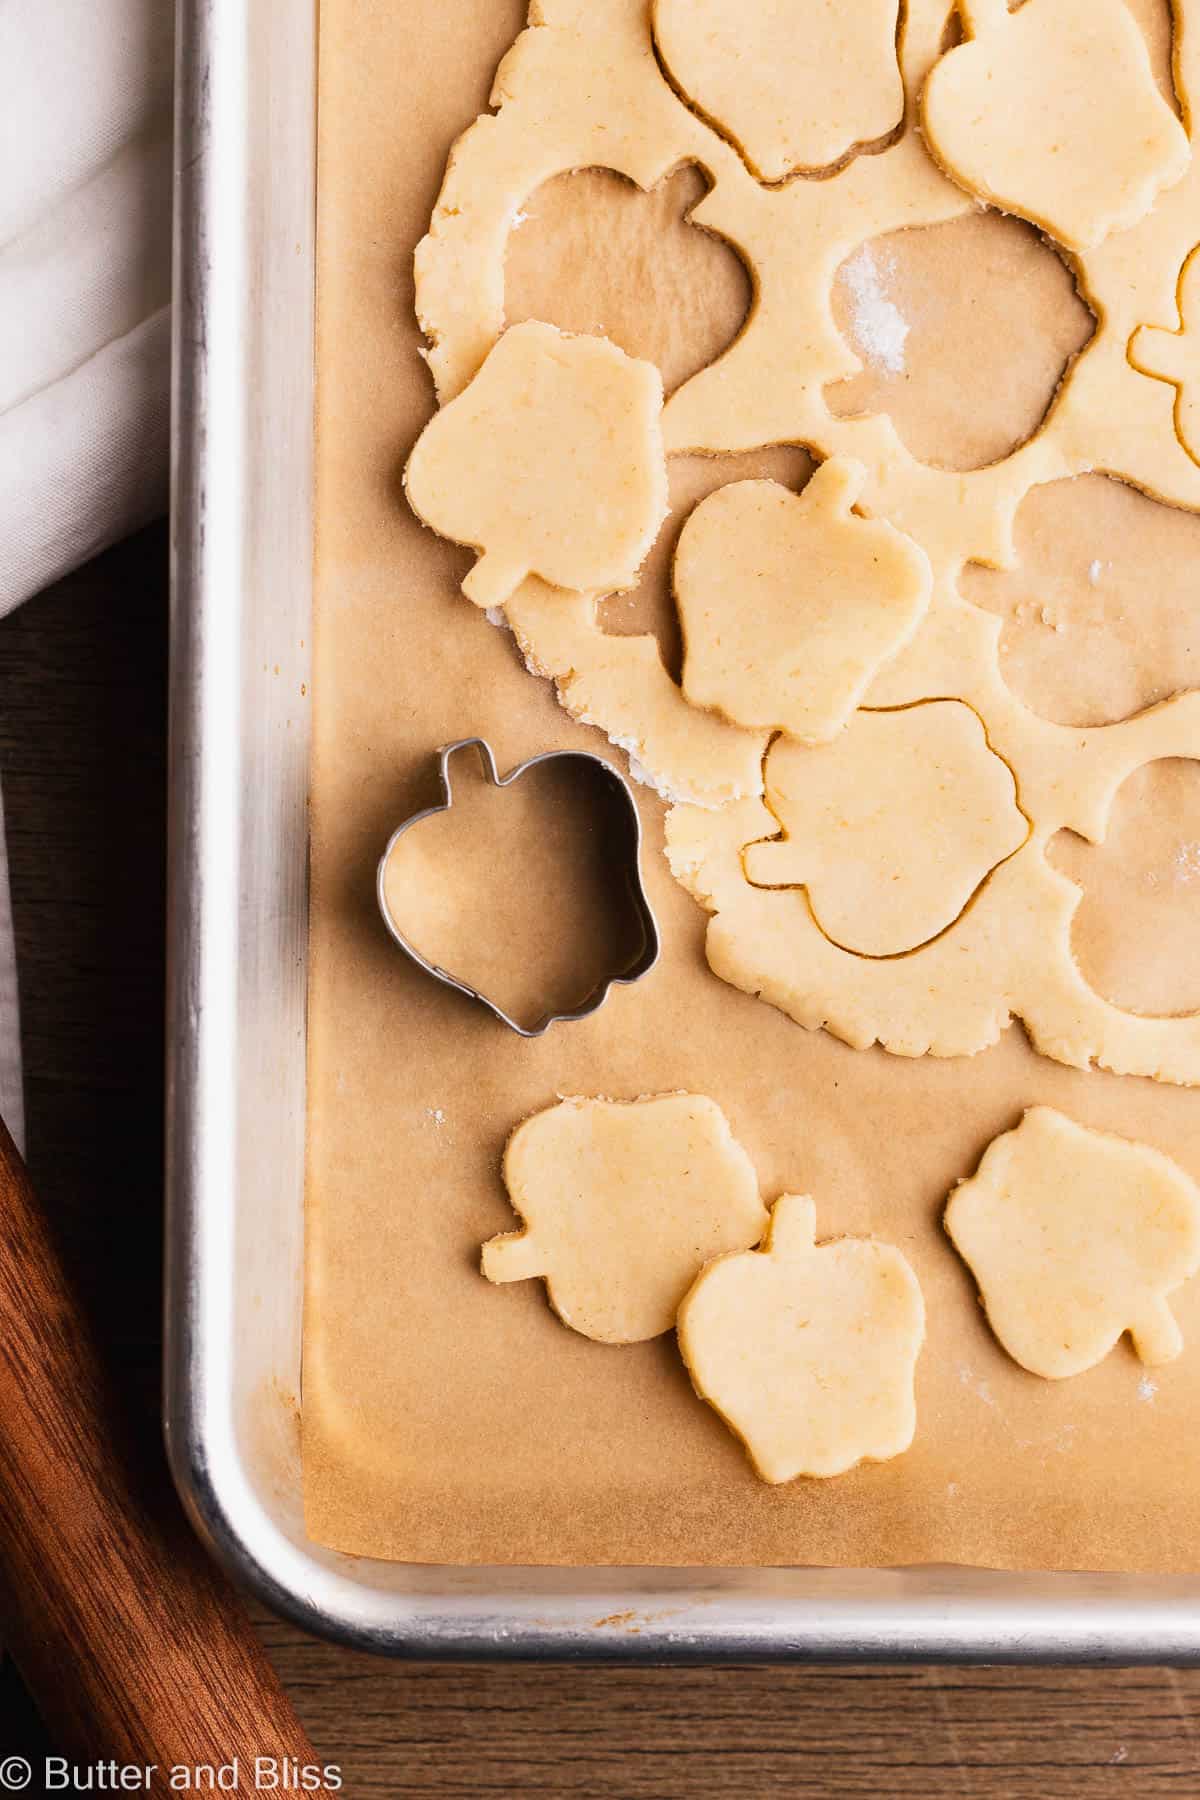
Use a seasonal-inspired inspired cookie-cutter to make shapes for the apple pie top. A creative – and fun – alternative to a traditional lattice top!
Tip – Use the leftover pie scraps to make cinnamon sugar pie cookies!
- Cut into your desired shape.
- Sprinkle with cinnamon sugar.
- Bake at 375F degrees for 15 minutes – or until golden.
Brush the prepared pie with cream and sprinkle with sugar before baking. The cream will make the crust golden and crisp, and the sugar gives a delightful sweet crunch!

Few More Tips
- Slice the apples 1/4-inch thick – not too big, not too thin – And ensure they are the same size so they bake evenly.
- Pile on the apples – It will seem like there is too much. It is not. The apples bake down, and we want an apple pie full of apples!
- Chill the dough – The pie dough needs time to hydrate and develop flavor. Plus, we don’t want the butter to melt before baking. Chill the dough after you make it, then again after you assemble the pie.
- Use a mini pie dish – For this recipe, you make a 6-inch apple pie. There is a (affiliate) link in the recipe card. Trying to put this pie into a larger pie dish will make the crust way too thin.
- Use a glass pie dish – The glass will conduct heat slowly and evenly. Plus, you can see the bottom of the pie crust to see when it gets golden!
- Bake on a baking sheet – This is simply cautionary should any of the sneaky apple juices decide to bubble out of the pie!

Recipe FAQ
You can try it. However, I find the cup4cup blends to be drier than the blends I use. You may want to add another tablespoon of butter and/or more water.
Gently knead the dough for about 1 minute to take the chill off and make it more pliable to roll out.
You can, but I don’t think you have to. The pie bakes for long enough that the apples will soften. If you decide to, only cook them for about 5 minutes.
No need to pre-bake the pie crust for this recipe because we are baking the pie for so long. Also, use a glass pie dish to cook evenly and you can monitor how the bottom is baking!

Gluten Free Mini Apple Pie
by Erin Cernich
Ingredients
Gluten Free Double Pie Crust
- 5 to 6 tablespoons ice water
- ½ cup, plus 2 tablespoons blanched almond flour
- ½ cup, plus 2 tablespoons gluten free oat flour
- 6 tablespoons sweet white rice flour
- 6 tablespoons tapioca flour (plus more for dusting)
- ½ teaspoon xanthan gum
- 2 tablespoons organic cane sugar (or granulated sugar)
- 1 teaspoon salt
- 9 tablespoons unsalted butter, cold and cut into cubes
- 1 teaspoon apple cider vinegar
- 1 to 2 tablespoons heavy whipping cream (for brushing the crust)
Apple Pie Filling
- 3 cups apples, cut into 1/4-inch slices (about 2 ½ peeled and cored apples)
- 3 tablespoons organic cane sugar (or granulated cane sugar)
- 2 tablespoons brown sugar, light or dark
- 1 tablespoon cornstarch (or tapioca flour)
- 1 teaspoon lemon juice
- 1 teaspoon ground cinnamon
- ¼ teaspoon ground allspice
- ¼ teaspoon ground cardamom
- turbinado sugar (optional for sprinkling on the crust)
Instructions
Gluten Free Double Pie Crust
- Line a quarter size baking sheet with a piece of parchment paper.
- Fill a liquid measuring cup with at least 1/4 cup ice water.5 to 6 tablespoons ice water
- In a medium mixing whisk together the almond flour, oat flour, sweet rice flour, tapioca flour, xanthan gum, sugar, and salt.1/2 cup, plus 2 tablespoons blanched almond flour, 1/2 cup, plus 2 tablespoons gluten free oat flour, 6 tablespoons sweet white rice flour, 6 tablespoons tapioca flour, 1/2 teaspoon xanthan gum, 2 tablespoons organic cane sugar, 1 teaspoon salt
- Add the cold butter cubes to the flour. Using your fingertips, press the butter cubes into small flat, flaky discs (about the size of a nickel) – making sure they are all coated with flour. You should still see butter chunks in the dough when you are done mixing it.9 tablespoons unsalted butter, cold and cut into cubes
- Make a well in the center of the flour. Add the vinegar and 2 tablespoons of ice water to the well. Using your fingers (or a fork or spatula), stir the flour around the water, and continue to add water 1 tablespoon at a time until you start to get larger clumps of dough and the dough is moist – like a sugar cookie dough. Note – I find the sweet spot for water to be about 5 tablespoons. But you may need more or less depending on moisture in your butter or the accuracy of measuring the flour.1 teaspoon apple cider vinegar, 5 to 6 tablespoons ice water
- Knead the dough into a ball in the bowl. Cut the dough into equal halves and transfer each to a separate sheet of plastic wrap and flatten into a disc. Tightly wrap the dough in the plastic and refrigerate for at least 1 hour.
Apple Pie Filling
- While the dough is chilling, prepare the apple pie filling. Allow for at least 20 minutes to let the apple pie filling 'marinate'.
- Peel, core, and slice the apples into 1/4-inch slices. I like to use a mix of apples for the pie filling. I use Honeycrisp and Granny Smith, because they are firm and will retain some texture when baked.3 cups apples, cut into 1/4-inch slices
- Place the sliced apples in a medium mixing bowl. Sprinkle the sugars, cornstarch, lemon juice, and spices over the apples. Toss with a spatula or wooden spoon to get all the apple slices coated. Set the apples aside – no need to refrigerate.3 tablespoons organic cane sugar, 2 tablespoons brown sugar, light or dark, 1 tablespoon cornstarch, 1 teaspoon lemon juice, 1 teaspoon ground cinnamon, 1/4 teaspoon ground allspice, 1/4 teaspoon ground cardamom
- Assemble The Pie
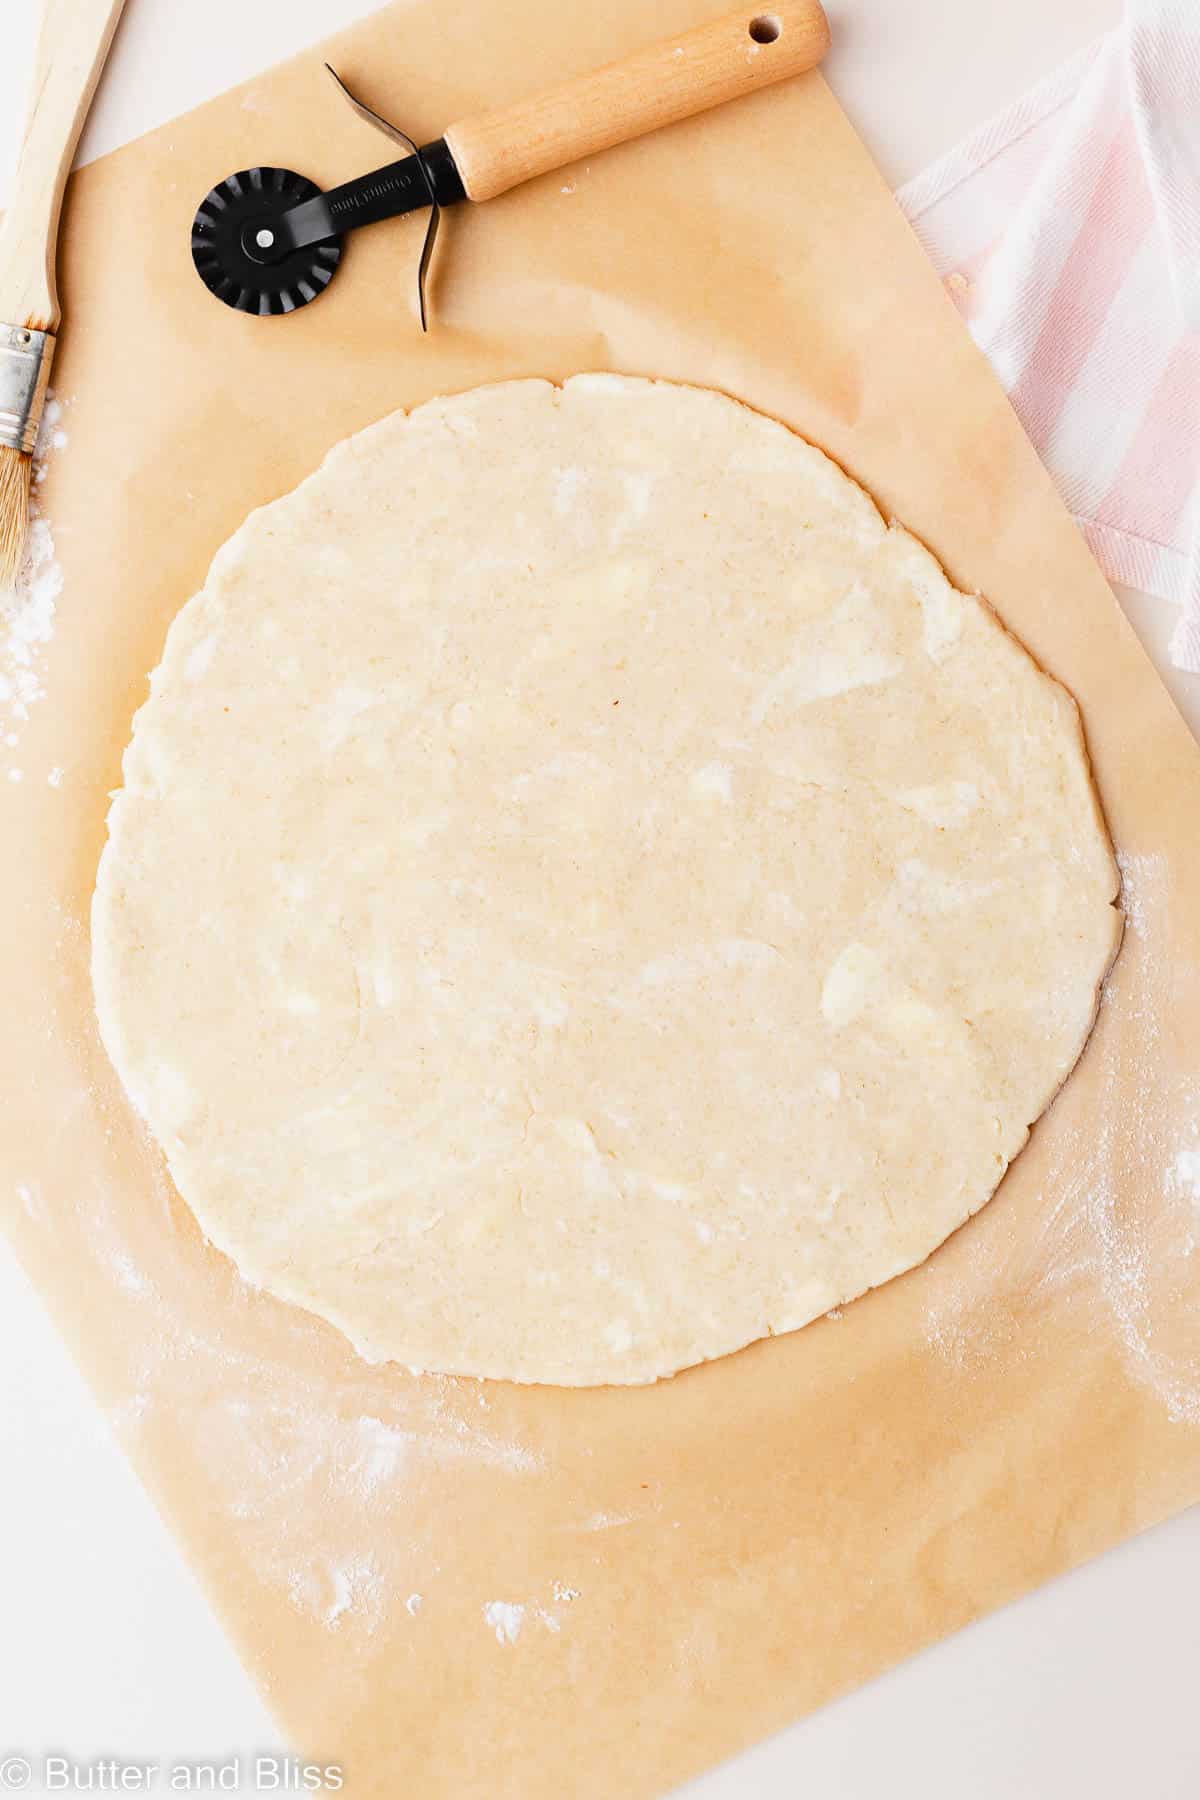
- Shaped cookie-cutter pie top – Lightly flour your work surface with tapioca flour. Take 1 of the wrapped dough out of the refrigerator. Knead the dough for about a minute to take the chill off and make it pliable to roll out. Roll it into an 8½-inch circle. Use a small cookie cutter (like an apple) to cut out as many pieces as you can. Transfer the cut-outs to the prepared baking sheet and refrigerate until ready to use. Note – You will likely have leftover pie dough scraps. You can re-roll and make into more shaped cut-outs, sprinkle with cinnamon and sugar, bake for about 15 minutes, and enjoy as cookies!
- Shape the pie dough – Lightly flour your work surface with tapioca flour. Remove the other wrapped dough from the refrigerator. Knead the dough for about a minute to take the chill off and make it pliable to roll out. Roll it into an 8½-inch circle. This will give us enough dough to sit snuggly into the pie pan and for a designed crimp edge. Trim off any jagged edges. Note – If the dough cracks while rolling it, simply pinch it back together.
- Gently place the dough into the center of the pie dish, making sure it sits snug on the bottom and corners of the dish. Pile the apples, along with their juices, into the pie. Arrange the slices so they fit evenly and snuggly in the pie. Take the dough overhang and fold it under so you still have a tall lip of pie dough sticking out of the pie dish. Crimp the edges in any method you prefer.
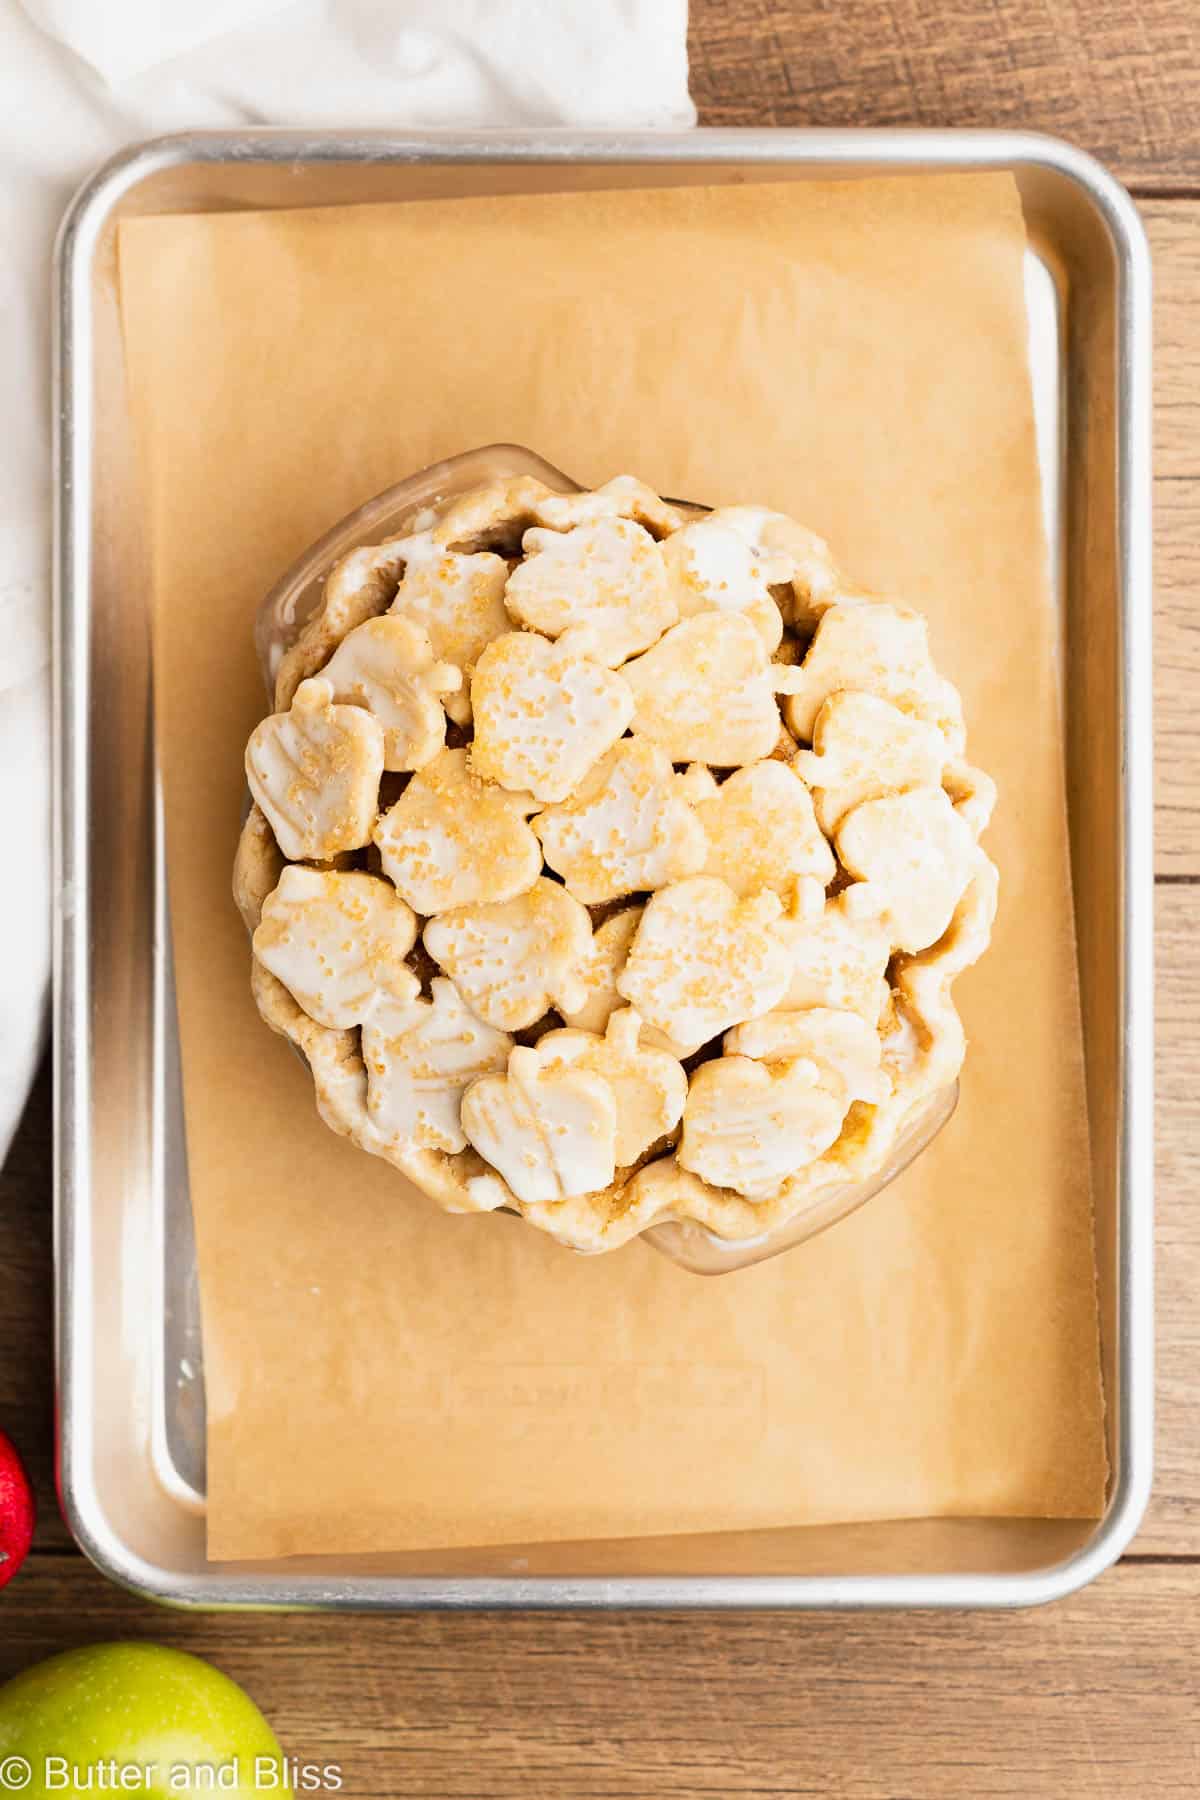
- Remove the pie cut-outs from the refrigerator. Arrange them over the top of the pie – include the pie edges. If some overlap, that's ok, as long as you have holes so the steam can vent out.
- Brush the top and edges of the pie crust with the cream and sprinkle sugar over the top. Note – The cream makes the crust nice and golden, and the sugar sprinkles give the edges a little crunch.1 to 2 tablespoons heavy whipping cream, turbinado sugar
- Place the prepared pie on the lined baking sheet you used for the cut-outs, and refrigerate while the oven pre-heats.
- Preheat the oven to 425F degrees and adjust the oven rack to the middle position. Bake the pie for 15 minutes at 425F, then reduce the heat to 375F degrees and bake for an additional 40 minutes. Or until the crust is golden and filling is bubbly. Note – If the top is browning too fast, loosely place a piece of foil over the top while it finishes baking.
- Place the pie on a wire cooling rack to cool completely. Allow the pie to cool for at least 3 hours, to give the filling time to set. To serve, top with your favorite scoop of ice cream or whipped cream and Enjoy!
- Cover leftover pie with foil and store at room temperature for up to 2 days, or in the refrigerator for up to 5 days. Note, the pie dough will start to soften in days after it is baked.
Notes
- Serving Size – This is a small batch recipe that can be doubled and baked in a 9-inch pie dish. Start checking at 60 minutes.
- Yield – The 6-inch pie will yield 4 to 6 slices.
- Apples – I like to use a mix of apples to give a variety of flavor and texture, though you can use only one. Use firm apples, like Granny Smith, Honeycrisp, or Pink Lady.
- Cut-Out Pie Top – The mini apple cutter I use was my Grandmother’s. It is about 2-inches. Any shaped cutter will work.
- Flour Substitutions – The only flour substitution I recommend is cassava flour instead of oat flour. Cassava flour is very absorbent and you may need a little more ice water, and it will impart an earthy flavor.
- Xanthan Gum – The xanthan gum behaves like gluten in the gluten free pie crust. It gives the crust elasticity which contributes to flaky layers. You can omit the xanthan gum. Just note the pie crust may be more tender and crumbly like a shortbread cookie.
- Butter – The butter must be cold to get a light and flaky pie crust. When ready for the butter step, I pull it straight from the fridge versus getting it out ahead of time.
- Sugar and Salt – I find gluten free pie crust needs a little extra flavor. You can reduce the amount of each if you prefer.
- Freezing Pie Dough – The pie dough can be frozen for up to 3 months. Wrap tightly in plastic and place in a freezer bag. Thaw in the refrigerator.
- Freezing A Baked Pie – The baked pie can be frozen, for up to 3 months. Wrap tightly in plastic and place in a freezer bag. Thaw in the refrigerator, then bring to room temp to serve.
Nutrition Estimates


About the Author …
Hi, I’m Erin! With years of experience baking for two in my own small household, I know about the love for desserts without the leftovers. I’ve tested, written, and photographed every one of the 300+ recipes on my website. And even had some of my desserts featured on Taste of Home, The Spruce Eats, ELLE, Parade, and more! From traditional to gluten free desserts for two, I have the recipe for you.
Click here to learn more about me →