Peanut Butter Mousse and Berry Jam Cake
This post may contain affiliate links. See my disclosure policy.
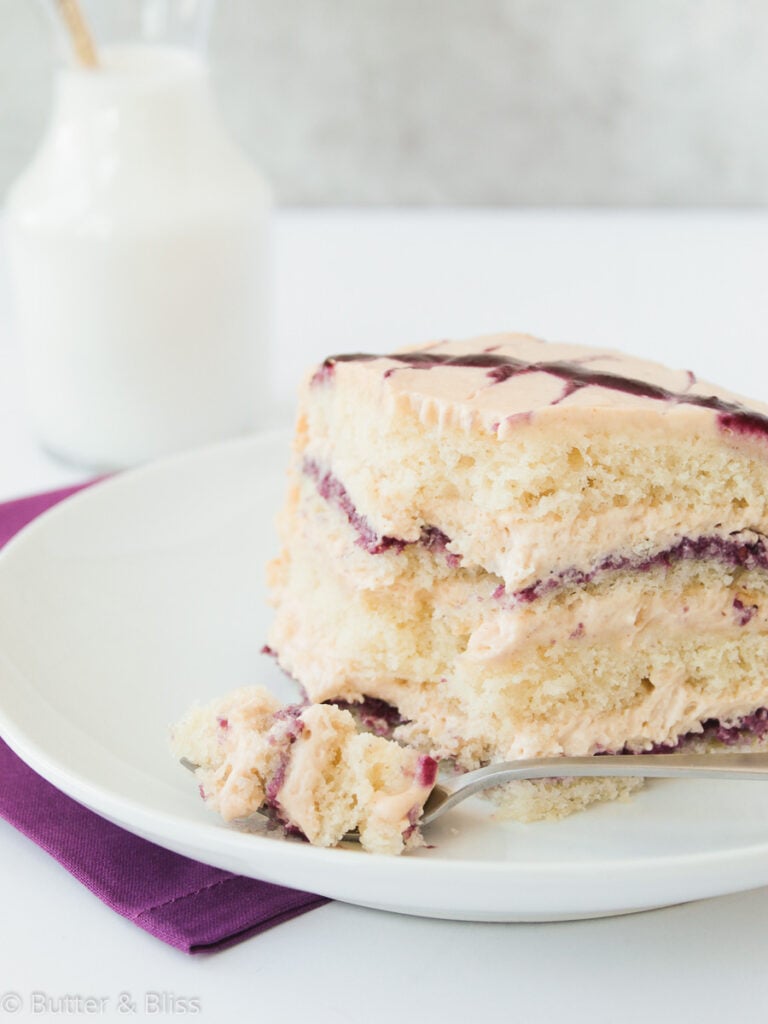
This decadent Peanut Butter Mousse & Berry Jam Cake is a sophisticated version of the classic PB&J sandwich! The moist white cake is reminiscent of nostalgic white bread, the peanut butter has been enhanced as creamy mousse, and the jelly is a bit more refined as a homemade jam.
Peanut Butter Mousse & Berry Jam Cake
I’m not afraid to admit it. I love peanut butter and jelly sandwiches. What’s not to love? It’s hard to mess up creamy salty-sweet peanut butter (and of course, sometimes crunchy!), crushed fruit, and the simplicity of white bread. But perhaps you’re a little embarrassed to break out a classic PB&J sandwich, wrapped in those flimsy cellophane baggies, from your brown bag lunch sack when you’re sitting in the break room with your colleagues. I’ve done it and was quickly the recipient of childhood lunchroom jokes for the rest of the workweek. Oh well, I survived 🙂
This recipe has been adapted from the Peanut Butter and Jam Cake in the Perfect Cake cookbook from America’s Test Kitchen.
Peanut Butter Sandwich as a Cake
What if you could swap out the old-school PB&J for a slice of this sophisticated gem, neatly protected in a fancy flip-top storage container? I’m sure the jokes would soon turn to envy, and who’s laughing now because the piece is just for you! I was worried that this cake would not accurately represent its sandwich predecessor, but no worries, this cake is simply a sophisticated version of the original.
The Cake
Starting with the cake, I wanted a cake that would mimic white bread, and what better than a classic white cake recipe? The cake stays a nice white because it only uses egg whites and if you want to keep it even whiter, look for clear vanilla extract. I have seen it at craft stores with all of the baking and decorating supplies.
I used regular vanilla extract and I think the cake is still a good white, white. The sour cream in this cake recipe does a wonderful job of keeping the cake moist. And it won’t stick to the roof of your mouth like some of the classic white slices of bread do!
The Peanut Butter Mousse
The next part of the cake, which I would declare is the best, is the peanut butter. I didn’t want to make a regular old peanut butter buttercream. I wanted to make this cake feel more adult and fancy because, well, I’m an adult.
Peanut butter mousse is one of the best desserts I have ever had. Even with the cream cheese and whipped cream, this fluffy filling is above all, peanut butter. I would even say that it could be toned down a notch (blasphemy!) by adding a bit more whipped cream, but that is certainly a taste preference.
Homemade Berry Jam Cake Filling
The jelly, or jam in this case, is not a far departure from classic jelly. Let’s start with the difference between jelly and jam.
- Jelly gets its fruit flavor from fruit juice.
- Jam gets its fruit flavor from actual crushed fruit and the fruit pectin.
I quickly discovered once I started my baking adventures, that making homemade jam is so easy and so worth it. There are many recipe variations out there to make jam, and I keep mine pretty simple with two ingredients:
- berries
- water
I don’t add any additional sugar because I think the berries are perfectly sweet enough on their own. Again, another taste preference and you could certainly add a few tablespoons (I wouldn’t do more than 4) of granulated sugar, or even maple syrup, to sweeten the berries a bit more.
I almost always use frozen fruit as well. It’s always in season, and it keeps for so much longer than fresh fruit. It seems these days I always have leftover homemade jam in the fridge, so this part of the recipe is a win-win!
Assembling the Cake
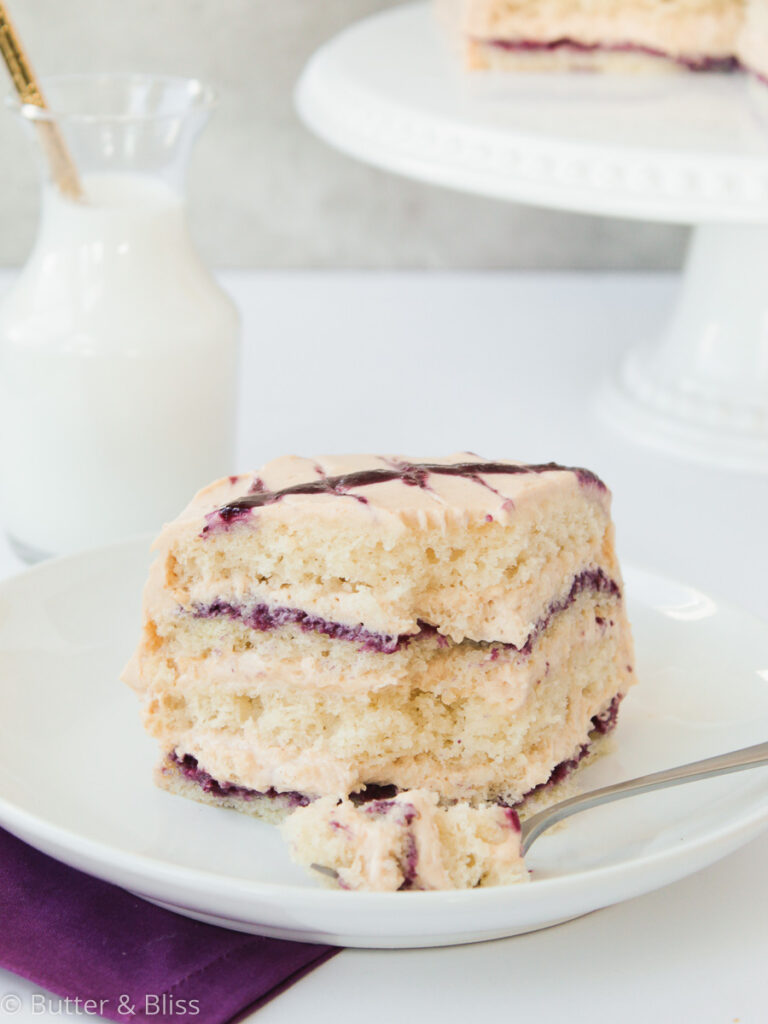
Once you start to assemble the cake, it is a pretty straightforward layer cake. It is going to seem like you have tons of the peanut butter mousse, which is why I put 3 layers of it inside the cake.
The mousse will spread nicely if you bring it to room temperature first, and try not to eat spoonfuls of it while you are assembling the cake.
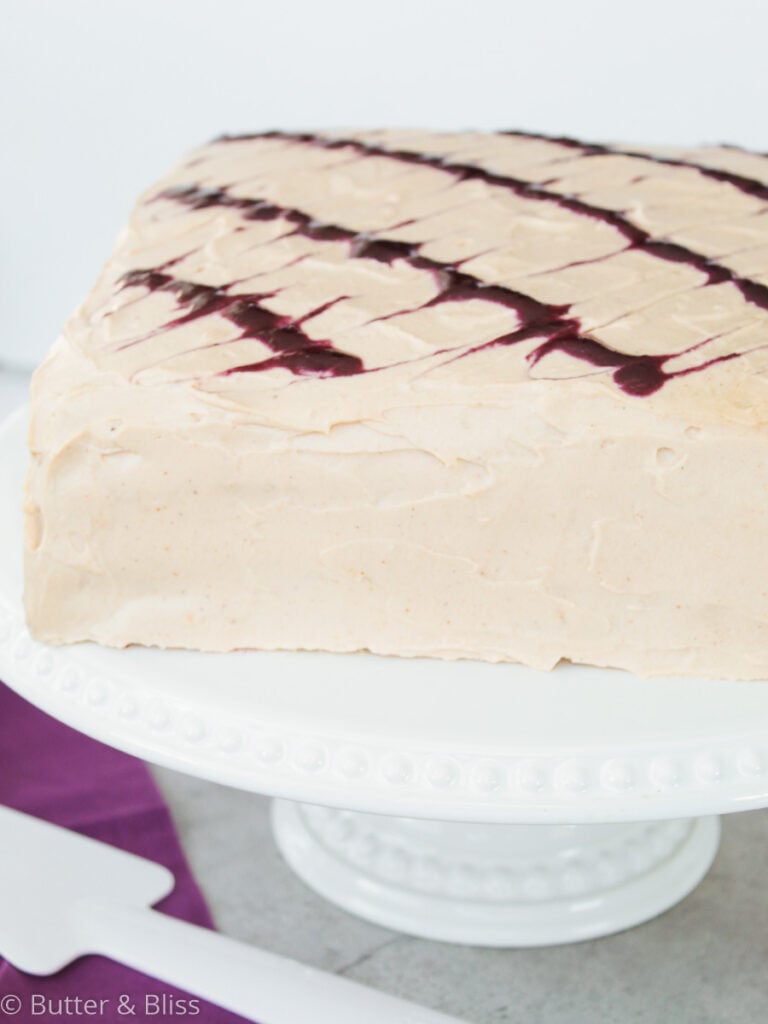
The jam design on the top is whatever creative mood you are in that day, and I would recommend an evenly spread design because you will want to make sure you get jam in every bite! A few extra tips when making the cake are below. Enjoy!
Tips For Making The Peanut Butter Mousse & Berry Jam Cake
- Make the mousse and the jam first, or even a day ahead of time if that works better for your schedule. They both keep well in the refrigerator.
- When making the cake batter, you will want to go back and forth with adding portions of the milk and flour mixture, ending with flour. This process keeps the batter from getting overmixed and gives you a light and fluffy cake.
- When assembling the cake, I always recommend lining your serving platter with strips of parchment paper to help keep the platter clean when you are frosting the cake. Keep the strips relatively thin (no more than two inches) so you can easily pull them out from under the cake when you are done.
- I keep my cakes in the refrigerator and just bring them to room temperature before serving. With this recipe, it makes me feel more comfortable refrigerating it because of the cream cheese in the frosting.

Peanut Butter Mousse and Berry Jam Cake
by Erin Cernich
Equipment
- 2 8-Inch Square Cake Pan
Ingredients
Peanut Butter Mousse
- 1 ½ cup heavy whipping cream
- 8 ounces cream cheese, room temperature
- ¾ cup creamy peanut butter
- ¾ cup powdered sugar
- 1 teaspoon vanilla extract
- 2 tablespoons milk, any kind
Berry Jam
- 1 ½ cups fresh or thawed frozen berries – raspberries, blackberries, blueberries (any berry combination will work)
- ¼ cup water
White Cake
- 2 ¼ cups all-purpose flour
- 2 teaspoons baking powder
- ½ teaspoon baking soda
- ½ teaspoon salt
- ¾ cup full fat sour cream, room temperature
- ¾ cup whole milk
- 1 cup unsalted butter, room temperature
- 1 ¼ cups granulated sugar
- 5 large egg whites, room temperature
- 1 tablespoon vanilla extract (clear vanilla extract will keep the cake whiter)
Instructions
Peanut Butter Mousse
- Chill a medium mixing bowl in the freezer for at least 30 minutes before beginning.
- Using a handheld mixer, beat the heavy whipping cream on medium speed until medium peaks form – about 4-5 minutes. You will have reached the right consistency when the whipped cream has a peak with a tip that curls over on itself when the beaters are lifted. Set aside in the refrigerator.
- In the mixing bowl of a stand mixer fitted with the paddle attachment, combine the cream cheese, peanut butter, and vanilla beat until smooth, about 2 minutes
- Add the powdered sugar and mix for 1 minute.
- Add the milk and mix until smooth – about 30 seconds.
- Using a spatula, gently fold in the prepared whipped cream into the peanut butter mixture and mix until well incorporated. Place the mousse in the refrigerator until ready to assemble the cake.
Berry Jam
- In a medium saucepan, bring the fruit and the water to a boil on medium-high heat. Using a wooden spoon, mash and break down the fruit. Let the fruit cook on low heat for about 5 minutes and continue to stir and mash the fruit to let the fruit break down and all of the juices released.
- Using a fine-mesh strainer, strain the berry mixture into a small bowl by pressing the fruit solids with the wooden spoon until only the seeds remain. Scrape the underside of the sieve to make sure to get all of the strained fruit.
- Place the fruit in the refrigerator until ready to assemble the cake.
White Cake
- Adjust oven rack to middle position and preheat oven to 350F degrees. Butter 2 8-inch square cake pans and line the bottoms with parchment paper. You can use round cake pans as well.
- In a medium bowl, sift together the flour, baking powder, baking soda, and salt. Set aside.
- In another medium bowl, mix the sour cream and milk. Set aside.
- In a stand mixer fitted with paddle attachment, beat the butter and sugar on medium speed until light and fluffy – about 3-4 minutes – scraping the sides of the bowl as needed. Add the egg whites and vanilla extract and beat until combined.
- With the mixer on low speed, add a third of the flour mixture and mix until just combined. Add half of the milk mixture – mix until combined. Add 1/3 of the flour mixture – mix until combined. Add the remainder of the milk mixture – mix until combined. Finish adding the remaining flour mixture and mix the final time by hand using the mixer paddle. Do not over mix each of these steps – the less you mix, the lighter and fluffier the cake will be. You will want to mix each step just until all of the ingredients are incorporated.
- Divide the batter evenly between the prepared baking pans. Bake for 25-30 minutes until a toothpick inserted in the middle comes out clean.
- Let the cakes cool in the baking pans for 15 minutes, then carefully remove from the baking pans and cool completely on a wire rack. If needed, gently run a knife around the edge of the cakes to loosen from the pans.
Assembling the cake
- Once the cakes have cooled completely, line the edges of a cake platter with 4 narrow strips of parchment paper.
- Using a long serrated knife, cut each cake into 2 even layers. Place one cake layer on the cake platter. Using a spatula, spoon or offset spatula spread about 1/2 cup of the berry jam onto the cake – covering completely and spreading all the way to the edges of the cake layer. Next, spread 1/2 cup of the peanut butter mousse evenly to the edges of the cake. Top with one of the cake layers.
- Top the second layer of cake with 3/4 cup of the peanut butter mousse and spread evenly to the edges of the cake. Top with a third layer of cake. Repeat with the jam and mousse and top with the last cake layer. Spread the remaining mousse over the entire cake
- Microwave the remaining jam in a bowl until melted and smooth. Transfer to a piping bag and cut a small opening at the tip (or use a Ziploc bag and cut 1 of the corners of the bag). Pipe the jam in straight lines diagonally on the cake. Using a knife, lightly drag through the lines in the opposite direction.
- Carefully remove the parchment paper and serve at room temperature. The cake can be stored in the refrigerator for up to 5 days. Leftovers can also be wrapped in plastic wrap and stored in the freezer for up to 3 months. Bring to room temperature before serving.
Notes
- Make the mousse and the jam first, or even a day ahead of time if that works better for your schedule. They both keep well in the refrigerator.
- When making the cake batter, you will want to go back and forth with adding portions of the milk and flour mixture, ending with flour. This process keeps the batter from getting overmixed and gives you light and fluffy cake.
- I used regular vanilla extract in my recipe (the dark stuff), but you could also use clear vanilla extract. It usually is more of a specialty item and I have seen it available in craft stores with all of the baking and decorating supplies.
- When assembling the cake, I always recommend lining your serving platter with strips of parchment paper to help keep the platter clean when you are frosting the cake. Keep the strips relatively thin (no more than two inches) so you can easily pull them out from under the cake when you are done.
- I keep my cakes in the refrigerator and just bring to room temperature before serving. With this recipe, it makes me feel more comfortable refrigerating it because of the cream cheese in the frosting.
Nutrition Estimates
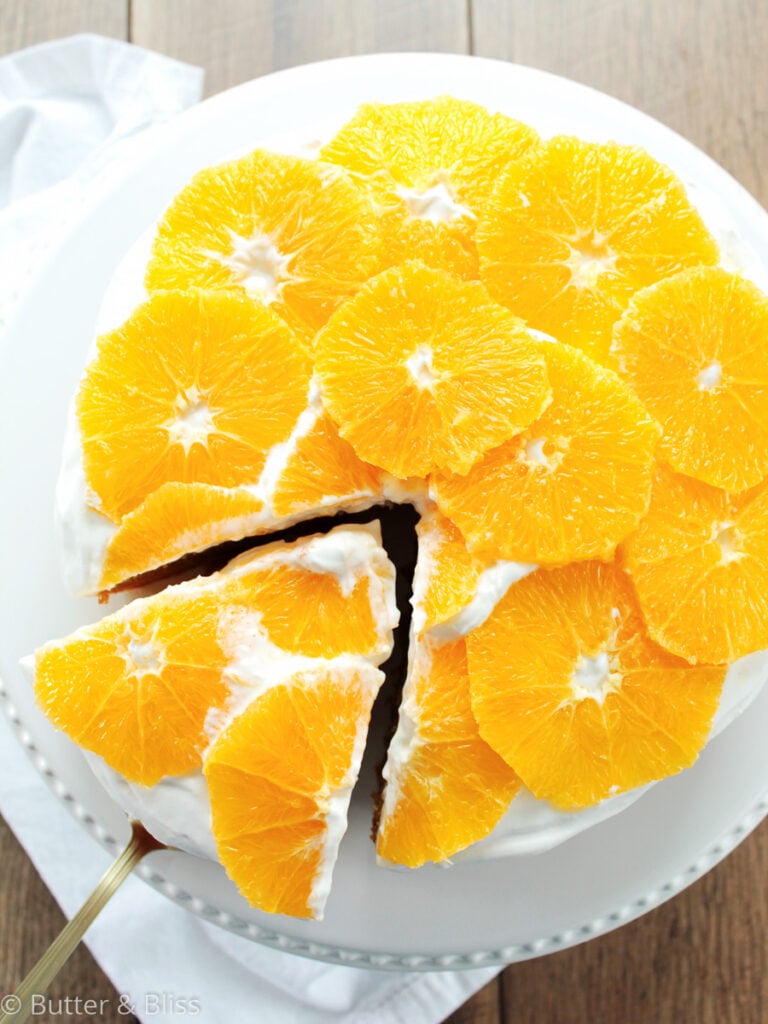
TRY THESE SMALL BATCH RECIPES NEXT!


About the Author …
Hi, I’m Erin! With years of experience baking for two in my own small household, I know about the love for desserts without the leftovers. I’ve tested, written, and photographed every one of the 300+ recipes on my website. And even had some of my desserts featured on Taste of Home, The Spruce Eats, ELLE, Parade, and more! From traditional to gluten free desserts for two, I have the recipe for you.
Click here to learn more about me →