Easy Brownies With Peppermint Frosting
This post may contain affiliate links. See my disclosure policy.
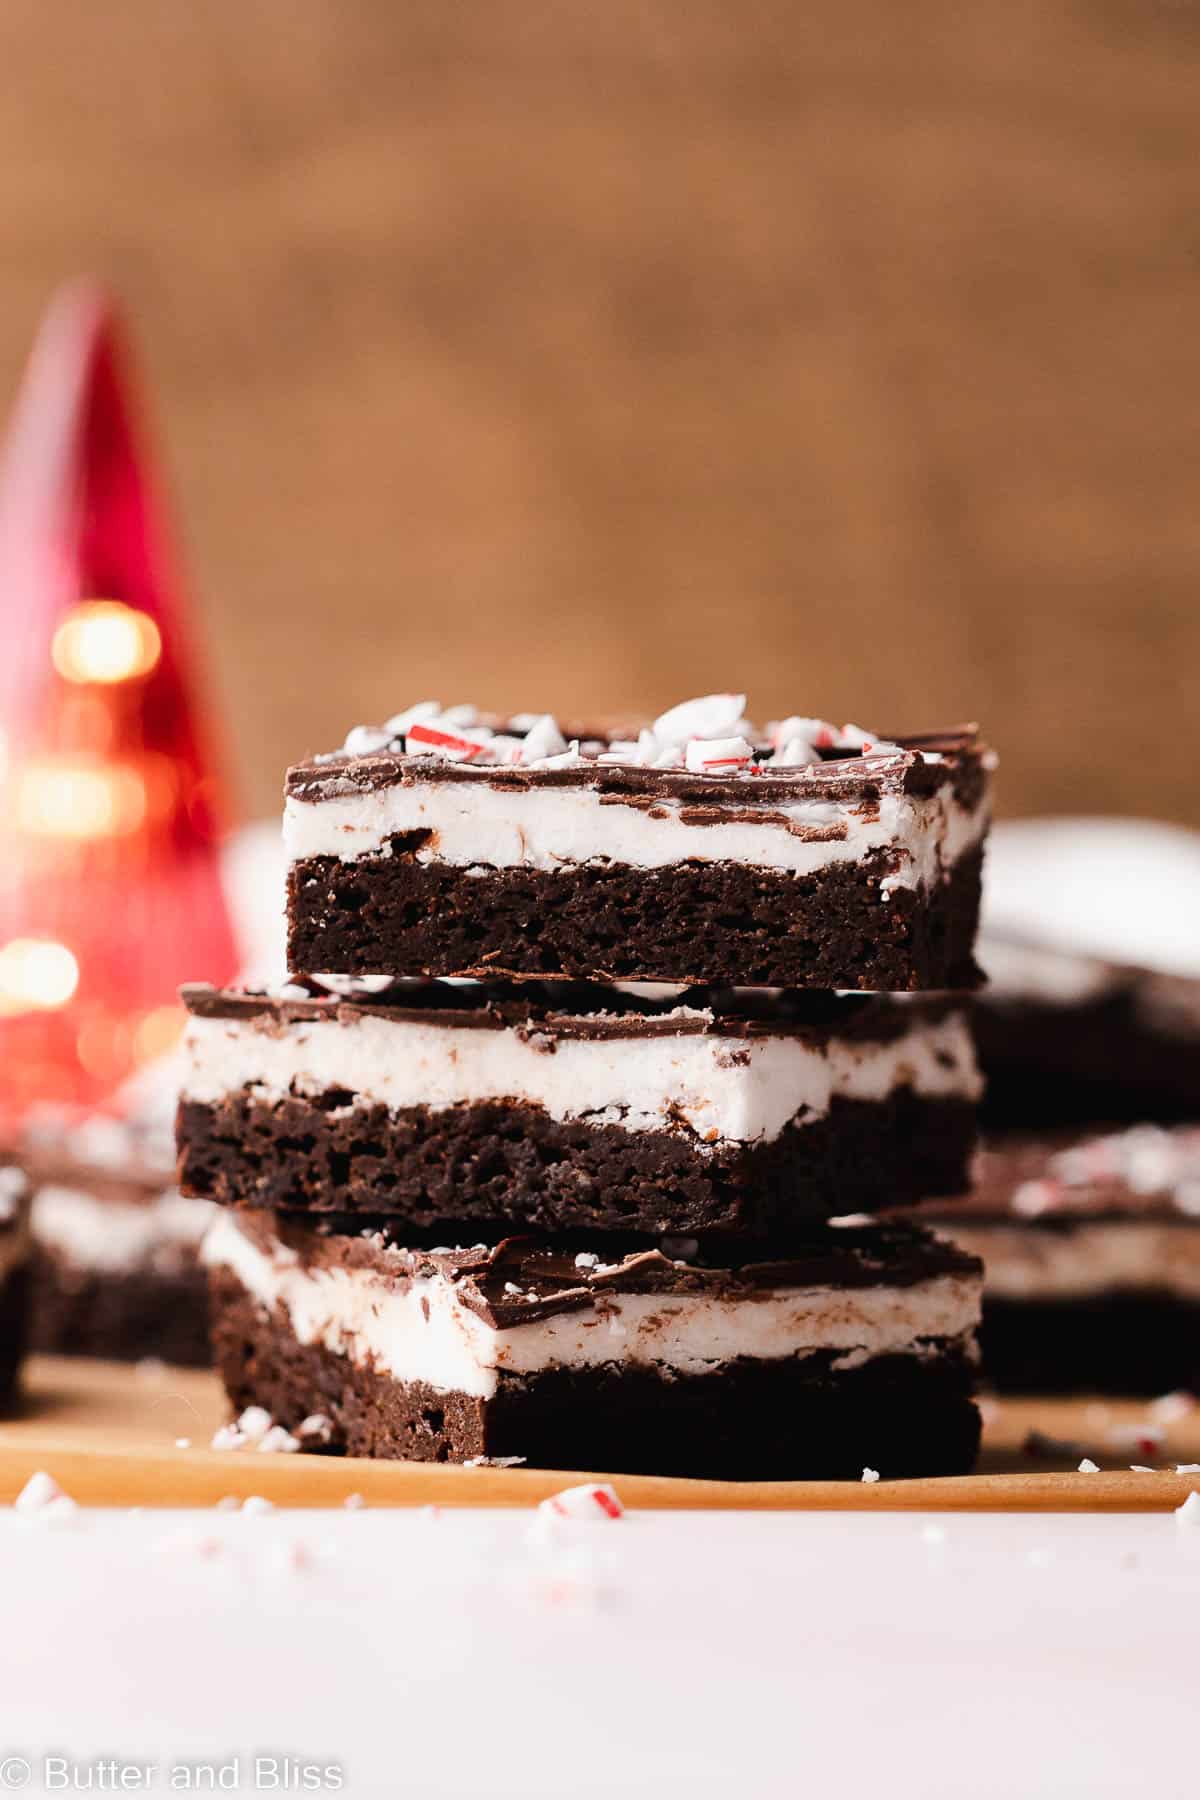
A small batch of easy brownies with peppermint frosting combines fudgy gluten free or traditional brownies, peppermint-infused butter-free frosting, and a rich chocolate shell into one delectable Christmas treat!
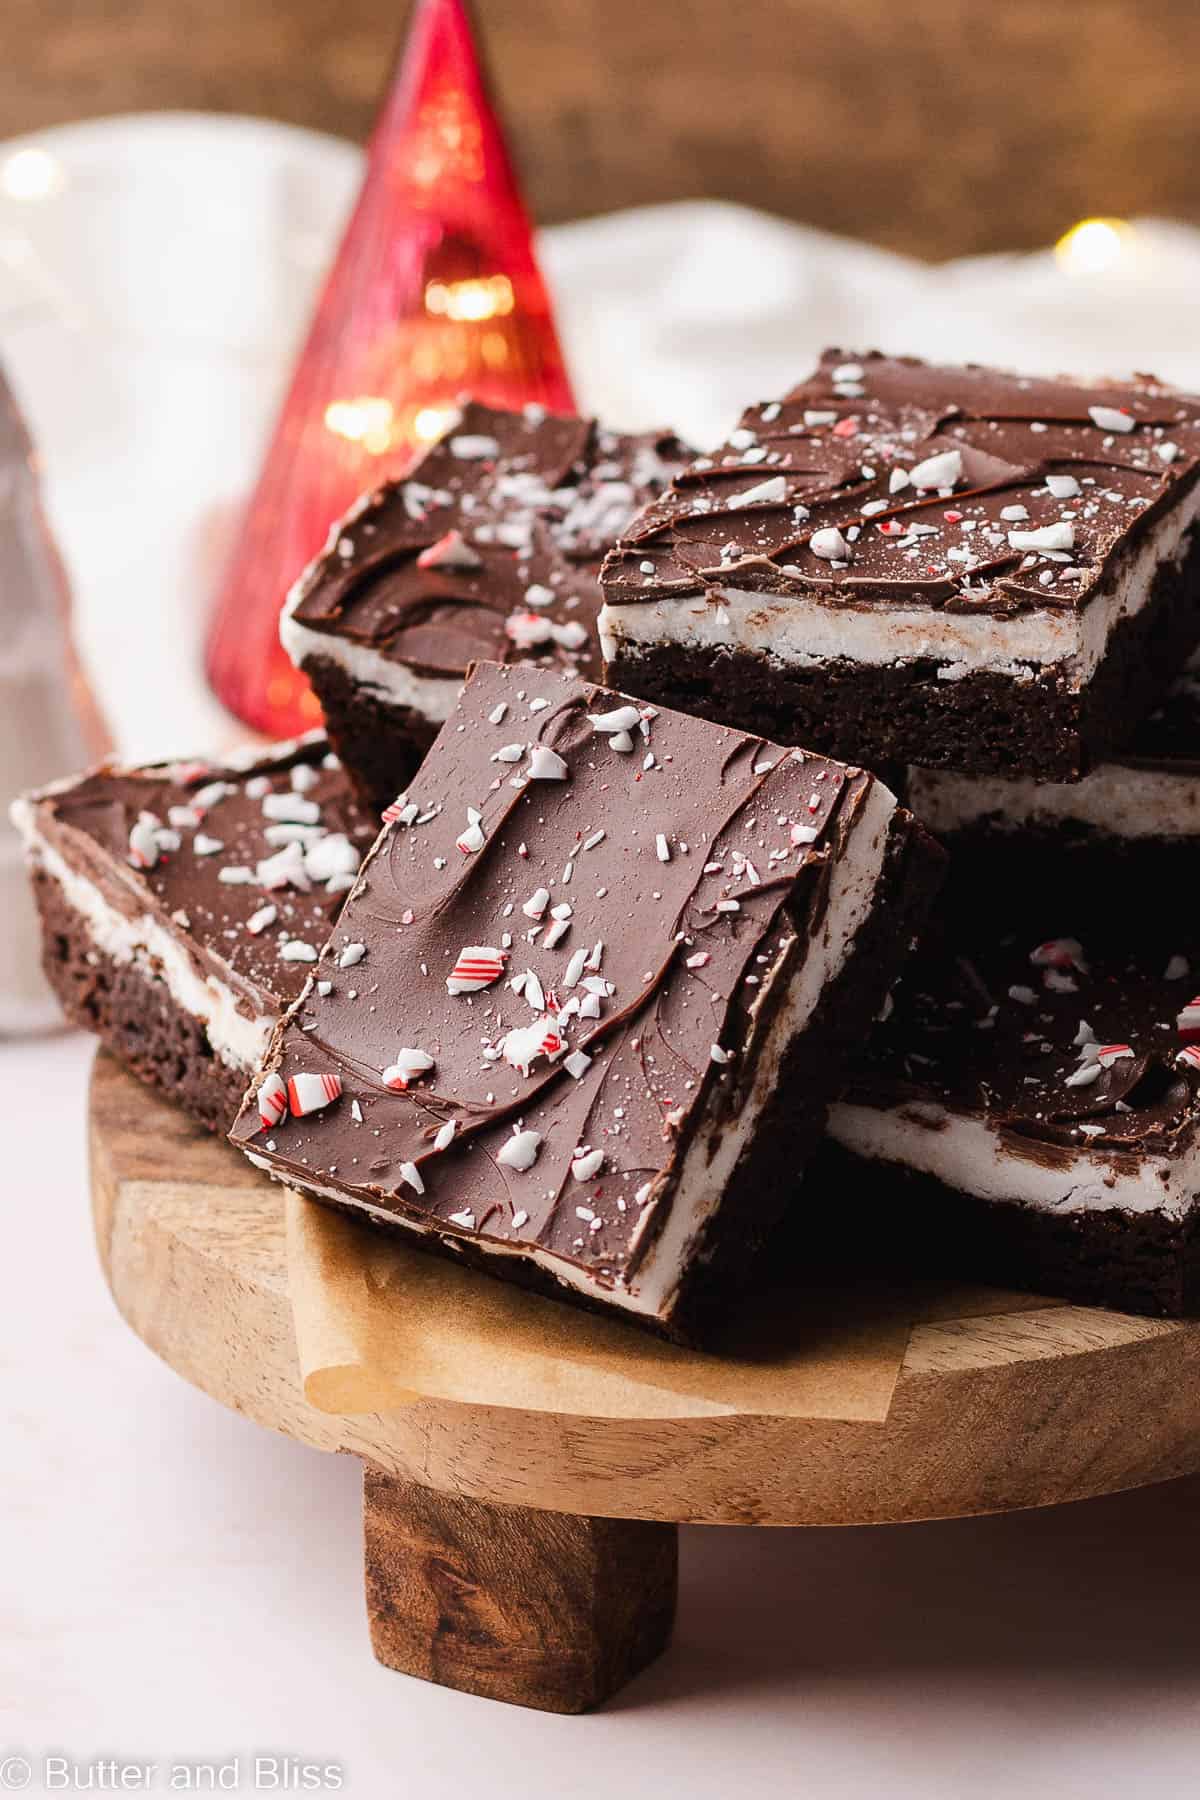
Three incredible layers make these small batch brownies especially tasty. And in the spirit of the holidays, this easy dessert is rich enough that the brownies can double as a festive little candy or the sweet chocolate bars they are!
The brownies start with either my gluten free fudgy brownies or traditional small batch brownies. Then we infuse my popular frosting made without butter with peppermint, then cover it all with a magical shell of chocolate and peppermint candy bits.
Highlights: Easy Brownies With Peppermint Frosting
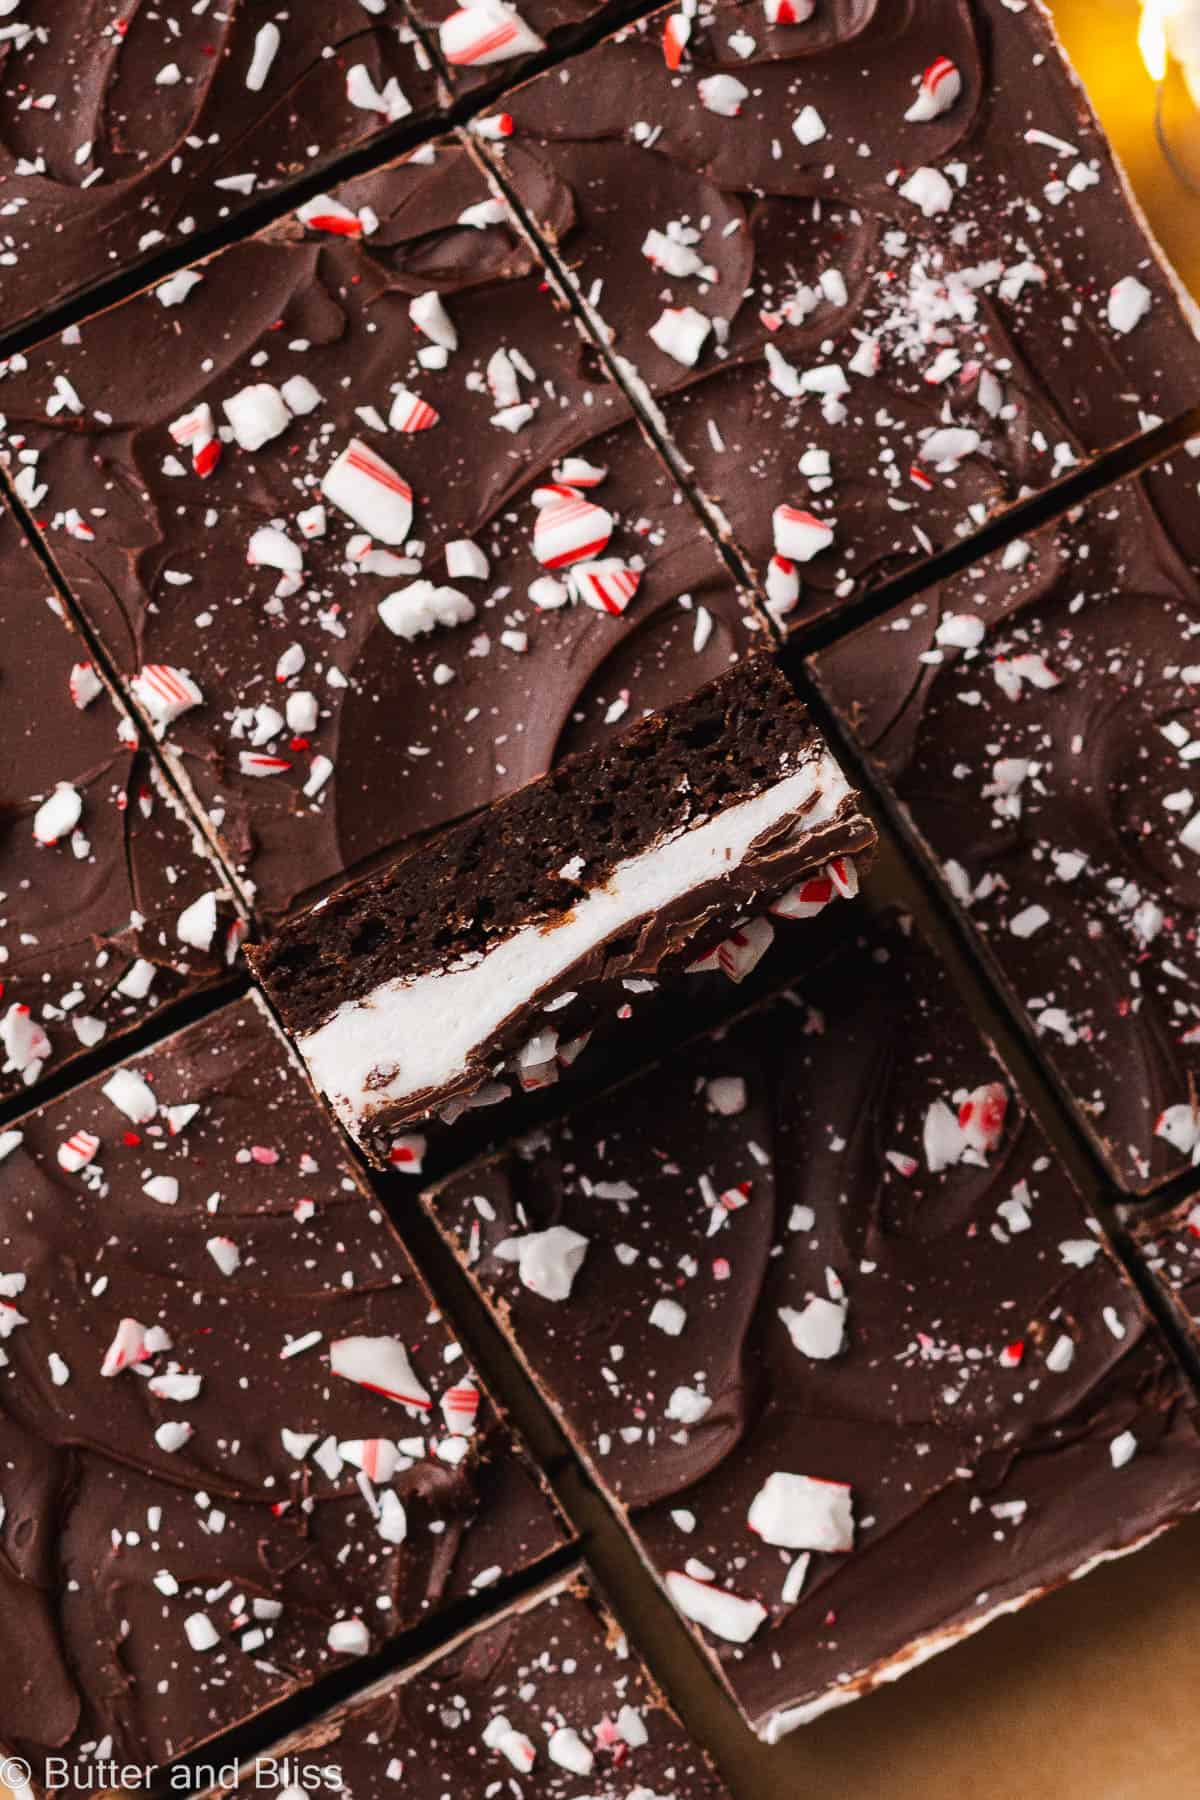
- Fudgy Brownies – Whether you make almond flour brownies or regular brownies, each are rich in cocoa flavor, subtly sweet, and perfectly fudgy.
- Peppermint Explosion – The frosting is reminiscent of the filling in a peppermint patty candy!
- Candy Chocolate Shell – Snappy chocolate studded with candy cane bits is everything you love about peppermint bark, in an easy homemade treat!
- Doubles As Candy – The decadent nature of these frosted brownies makes them satisfying enough to cut into smaller bite-sized candy treats.
Ingredients
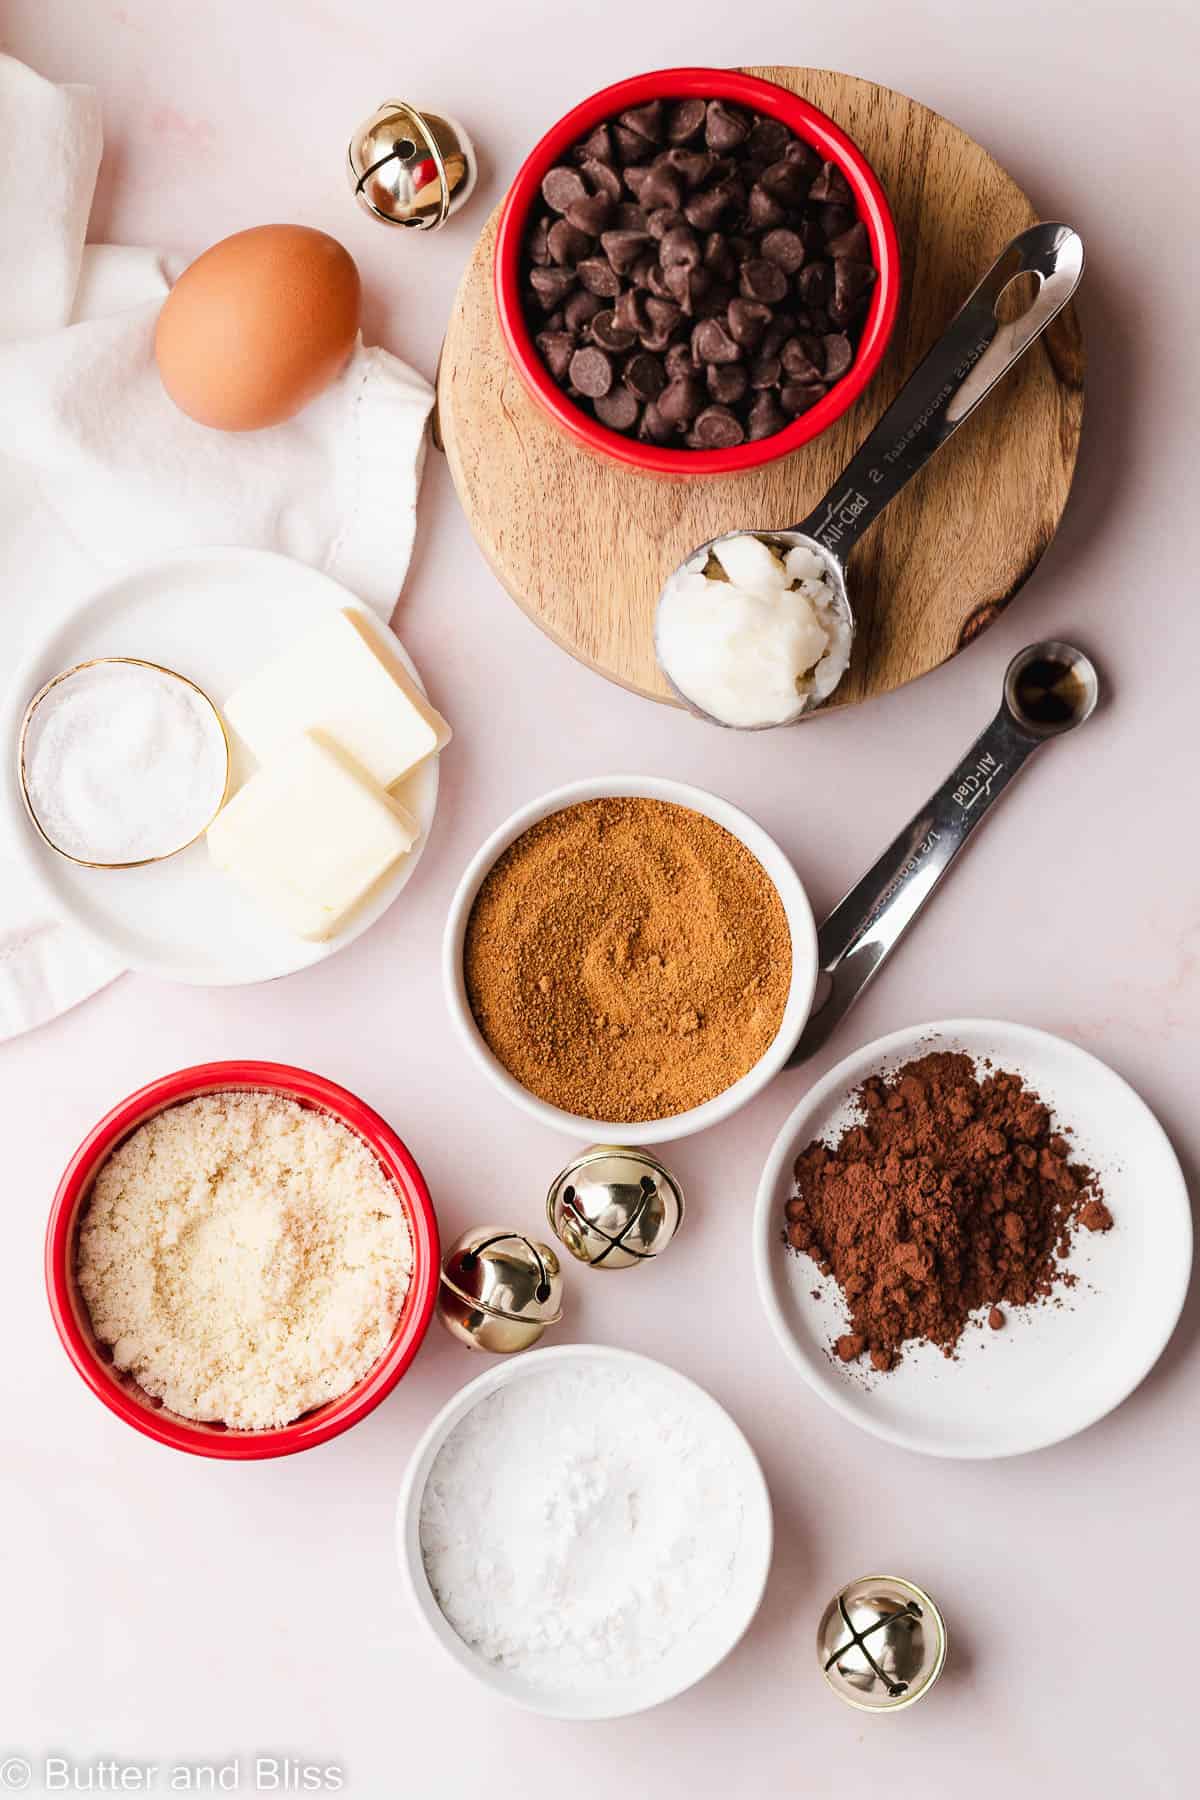
- Egg – 1 large egg. When whisked with the sugar, the mixture is what gives brownies the shiny, crinkly top.
- Coconut Sugar – Coconut sugar imparts a caramel-like flavor. And because it is not as sweet as regular granulated sugar, the cocoa flavor really shines.
- Vanilla – Vanilla and chocolate combine for brownies with lots of layers of flavor.
- Coconut Oil – I like to make my brownies with a combination of oil and butter. This gives the brownies an ultra fudgy texture. We also use a little for the chocolate shell so the chocolate melts smooth and shiny.
- Unsalted Butter – The butter adds flavor and texture, and since we add salt, choose unsalted butter.
- Chocolate Chips – The chocolate chips are melted to make the brownie batter and the snappy top shell. Semi-sweet chocolate chips are perfect.
- Almond Flour – Almond flour gives the gluten free brownies chewy texture and structure.
- Tapioca Flour – The tapioca lightens the almond flour and adds to the texture.
- Dutch Cocoa Powder – I prefer Dutch cocoa because it is less acidic and has a robust cocoa flavor.
- Salt – A must to balance and enhance all the flavors.
- Candy Canes – Crushed to sprinkle on the chocolate shell.
Helpful Tips
- The brownies are rich – After all, they are a rich brownie, covered in frosting, covered in chocolate. I like to cut the peppermint brownies into smaller portions.
- Use any chocolate chip you like – I use semi-sweet chocolate in the brownies and chocolate shell so the brownies are not cloyingly sweet. Dark chocolate would be delicious. As would milk, but keep in mind, the brownies will be sweeter.
- Freeze the brownies – I keep my leftovers in the freezer and pull out a square or two a few minutes before I want to devour it. This keeps the peppermint frosted brownies intact, the chocolate hard, and the cool bite is incredible!
FAQ
I can’t say for certain as I don’t work with 1:1 blends. I find they are much drier and other ingredient ratios would probably need to be adjusted.
Freeze the frosted brownies after you assemble them. Then cut them into squares. And, use a really good sharp knife!

Easy Brownies With Peppermint Frosting
by Erin Cernich
Equipment
- Eighth Size Baking Sheet (or 6-Inch Square Cake Pan)
Ingredients
Gluten Free Brownies
- 1 large egg (room temperature)
- ½ cup coconut sugar
- ½ teaspoon vanilla extract
- ½ cup semi-sweet chocolate chips
- 2 tablespoons unsalted butter
- 2 tablespoons cold pressed refined coconut oil
- 3 tablespoons blanched almond flour
- 3 tablespoons tapioca flour
- 1 tablespoon unsweetened cocoa powder, Dutch process
- ¼ teaspoon salt
Peppermint Frosting
- 3 tablespoons unsweetened canned coconut cream, full fat (only the cream from the can)
- 3 tablespoons cold pressed refined coconut oil
- ¼ teaspoon peppermint extract (more or less to taste)
- 1 cup, plus 1 tablespoon powdered sugar
- pinch salt
Chocolate Shell
- 5 tablespoons semi-sweet chocolate chips
- ¼ teaspoon cold pressed refined coconut oil
- candy canes, crushed (for garnish)
Instructions
Gluten Free Brownies
- Preheat the oven to 350F degrees and adjust the oven rack to the middle position. Line an eighth size baking sheet completely with aluminum foil to cover the bottom and sides of the baking sheet. Lightly grease the aluminum foil. Note – The brownies can also be made in a 6-inch square cake pan or 9×5 inch loaf pan. To make the brownies with regular brownies, I have provided a recipe link in the Notes below.
- In a medium mixing bowl, add the egg, sugar, and vanilla extract. Whisk the mixture very well for a couple of minutes until it is creamy and foamy. This helps create the crinkly and shiny brownie tops. Note – I like to mix the egg and sugar as the first step because it dissolves the coconut sugar. I will even go back and whisk the mix a couple of times while I'm waiting for the chocolate to melt.1 large egg, 1/2 cup coconut sugar, 1/2 teaspoon vanilla extract
- Melt the chocolate – In another small mixing bowl, add the chocolate chips, butter, and coconut oil. You can either melt the chocolate over a double boiler (see Notes for details), or in the microwave in 30 second increments – stirring after each – until the chocolate chips are mostly melted. A few small chocolate lumps are ok because they will melt with the residual heat. Set aside and let cool for a couple of minutes – adding too hot of chocolate to the egg mixture and the egg will scramble.2 tablespoons unsalted butter, 1/2 cup semi-sweet chocolate chips, 2 tablespoons cold pressed refined coconut oil
- While the chocolate is melting – In a small bowl, whisk together the almond flour, tapioca flour, cocoa powder and salt.3 tablespoons blanched almond flour, 3 tablespoons tapioca flour, 1 tablespoon unsweetened cocoa powder, Dutch process, 1/4 teaspoon salt
- Pour the chocolate mixture into the egg mixture and stir until incorporated. Then sprinkle the dry ingredients over the top of the wet and stir until no dry streaks remain.
- Pour the batter into the prepared baking pan and bake the brownies for 20 to 23 minutes, or until a toothpick inserted in the middle comes out mostly clean – we want a few moist crumbs for fudgy brownies.
- Cool the brownies in the baking sheet set on a wire rack. The brownies must be completely cool before assembling and frosting.
Peppermint Frosting
- Refrigerate the can of coconut milk overnight. This causes the coconut cream and liquid to separate in the can. We only use the cream from the can. For leftover coconut cream, use it in smoothies, overnight caramel oats, or whipped coconut cream.
- In a small saucepan, add the coconut milk solids, solid coconut oil, and 1 tablespoon of powdered sugar. Heat over medium-low heat and stir the mix with a spatula until it has completely melted together – this should only take about 1 minute. Do not boil. The mixture will resemble a creamy soup.3 tablespoons unsweetened canned coconut cream, full fat, 3 tablespoons cold pressed refined coconut oil
- Transfer the mix to a small mixing bowl and stir in the peppermint extract. Let cool to room temperature – about 10 to 15 minutes. You still want the mix to be be liquid when you add the powdered sugar. Note – You can also refrigerate it for a few minutes to speed up the cool down.1/4 teaspoon peppermint extract
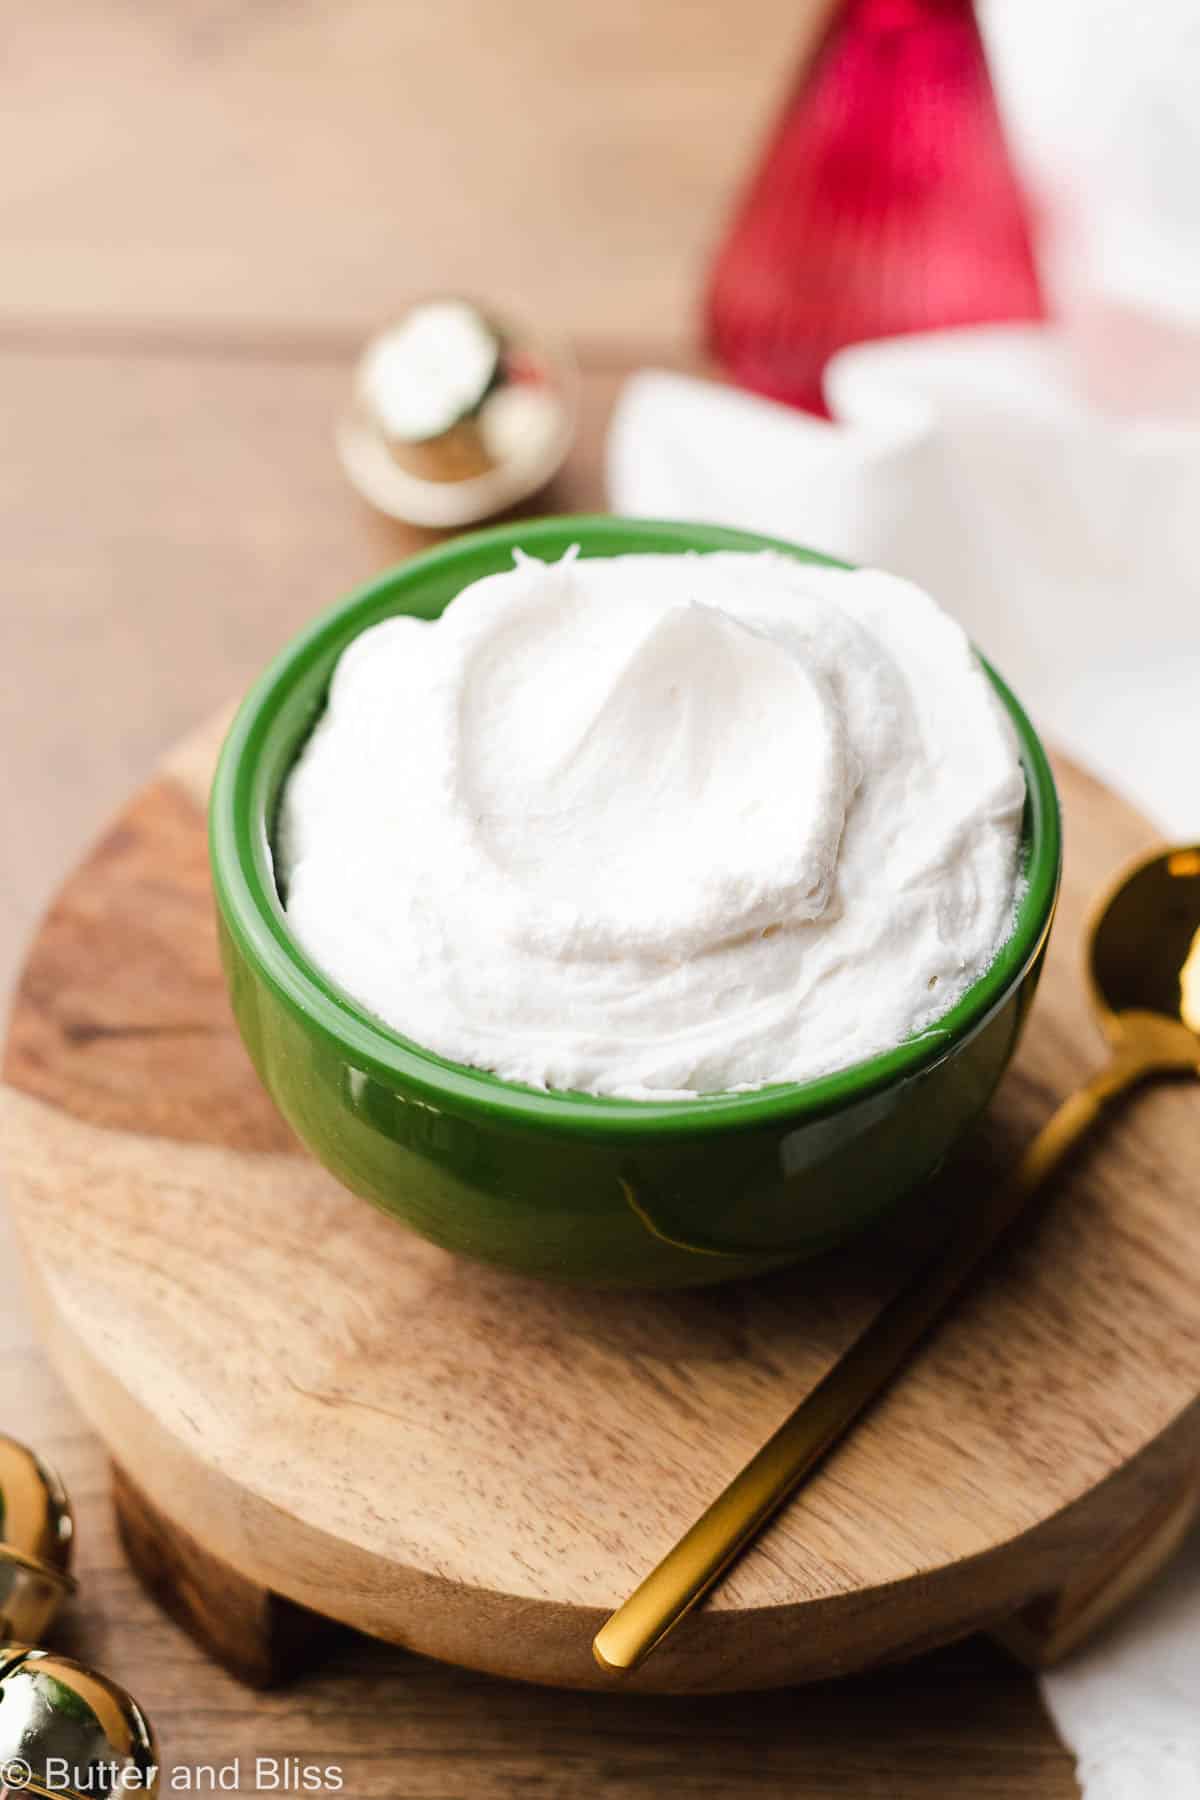
- Add the remaining powdered sugar in 1/4 cup increments at a time. Using a handheld mixer fitted with the whisk attachments, add a 1/4 cup of the powered sugar and salt to the coconut mixture. Start at low speed to incorporate the powdered sugar and avoid having it spray everywhere. Turn up the speed to high and beat for 1 minute. At this point, the frosting will look sticky and gooey.1 cup, plus 1 tablespoon powdered sugar, pinch salt
- Continue to add a 1/4 cup of powdered sugar at a time – beating for at least 1 minute after each addition. With the final 1/4 cup, beat the frosting for an additional 2 to 3 minutes, until it is light and creamy. The frosting should be thick and creamy and resemble the store-bought frosting you buy in the small tubs at the grocery. If the frosting still looks loose, refrigerate it for about 10 minutes, then beat for a couple more minutes until it thickens.
- Taste the frosting – if you want a stronger peppermint flavor add stir in an extra dash or two of the peppermint extract.
- The frosting is ready to use right away or can be refrigerated. If refrigerating, the frosting will firm even more. Allow refrigerated frosting to come to room temperature and stir/mix to fluff before frosting.
- Assemble the brownies – Evenly spread the peppermint frosting over the completely cool pan of brownies. Place in the freezer for 20 to 30 minutes to give the frosting time to chill.
Chocolate Shell
- Finish assembling the brownies – Once the frosting has chilled, make the chocolate shell.
- In a small heat-proof mixing bowl, add the chocolate chips and coconut oil. Microwave the chocolate in 30 second increments, stirring after each, until the chocolate is mostly melted. A few small chocolate lumps are ok because they will melt with the residual heat.5 tablespoons semi-sweet chocolate chips, 1/4 teaspoon cold pressed refined coconut oil
- Let the chocolate cool for 2 to 3 minutes – so it doesn't melt the frosting. Pour the chocolate over the frosted brownies. Use an offset spatula to evenly spread the chocolate to coat the brownies. Sprinkle with crushed candy canes, and place the assembled brownies back in the freezer for another 20 to 30 minutes to give the chocolate time to set, and make cutting the brownies easier.candy canes, crushed
- Remove the assembled and chilled brownies from the pan. Use a sharp knife to cut the brownies and Enjoy!
Notes
- Serving Size – This is a small batch recipe that can be doubled. Use an 8-inch square baking pan or quarter size baking sheet. Start checking the brownies at 25 minutes.
- Baking Pan – The small baking sheet will yield slightly thinner brownies. For thicker brownies, use a 6-inch square cake pan.
- Brownies – For a reguar non-gluten free brownie, use the recipe for traditional fudgy small batch brownies.
- Double Boiler – Use a mixing bowl that is large enough to sit on top of a small saucepan without touching the bottom. Bring about 2 inches of water to a simmer and set the bowl on top of the saucepan. Heat until the chocolate is mostly melted, stirring occasionally to incorporate the ingredients. A few lumps are ok because they will melt in the residual heat. This is my preferred method for melting the chocolate, butter, and oil because I can monitor the melting. Heat too long, and the chocolate may seize up.
- Fudgier Brownies – If you prefer a super fudgy brownie, check and take the brownies out of the oven a 20 minutes. Leave in longer if you prefer your brownies not as moist.
- Frosting Tips – See my blog post for butter free vanilla frosting for more tips and tricks to make the dairy free frosting.
- Freeze Leftovers – I recommend storing leftover brownies in the freezer. This will keep them intact and they are incredibly decadent when a little cold!
Nutrition Estimates


About the Author …
Hi, I’m Erin! With years of experience baking for two in my own small household, I know about the love for desserts without the leftovers. I’ve tested, written, and photographed every one of the 300+ recipes on my website. And even had some of my desserts featured on Taste of Home, The Spruce Eats, ELLE, Parade, and more! From traditional to gluten free desserts for two, I have the recipe for you.
Click here to learn more about me →