Easy Small Orange Cake
This post may contain affiliate links. See my disclosure policy.
Craving a taste of sunshine? You’ll be snacking on this small orange cake in less than an hour! Bursting with bright citrus and floral honey, this moist cake uses simple ingredients, a fresh orange, is refined sugar-free, and is made in a handy loaf pan.
This Cake Proves Orange And Honey Belong Together

This orange cake was my first endeavor into baking small batch cakes in a loaf pan. And it makes sense. The simplicity of the cake doesn’t require fancy decorating or impressive layers. It is intended to be snacked on, and the kind of cake meant to satisfy those cravings when all you want it just something a little sweet.
Orange (really any citrus) is a fav in my house. After the deliciously successful whole orange butter cake recipe, my sights were set on what else can I bake with orange.
Now, you may be thinking, orange and honey – are we fighting off the common cold? And while I wouldn’t turn down a slice if I had the sniffles, the two are just a harmonious fit. So much so, I replicate the combo in my honey orange mini bundts recipe.
Orange is bright, sweet, and still feels incredibly juicy even when it’s baked. Honey has delicious floral and fruity undertones. And when you combine the two, you have a delicate balance of flavors. Plus, a moist cake free of refined white sugar.
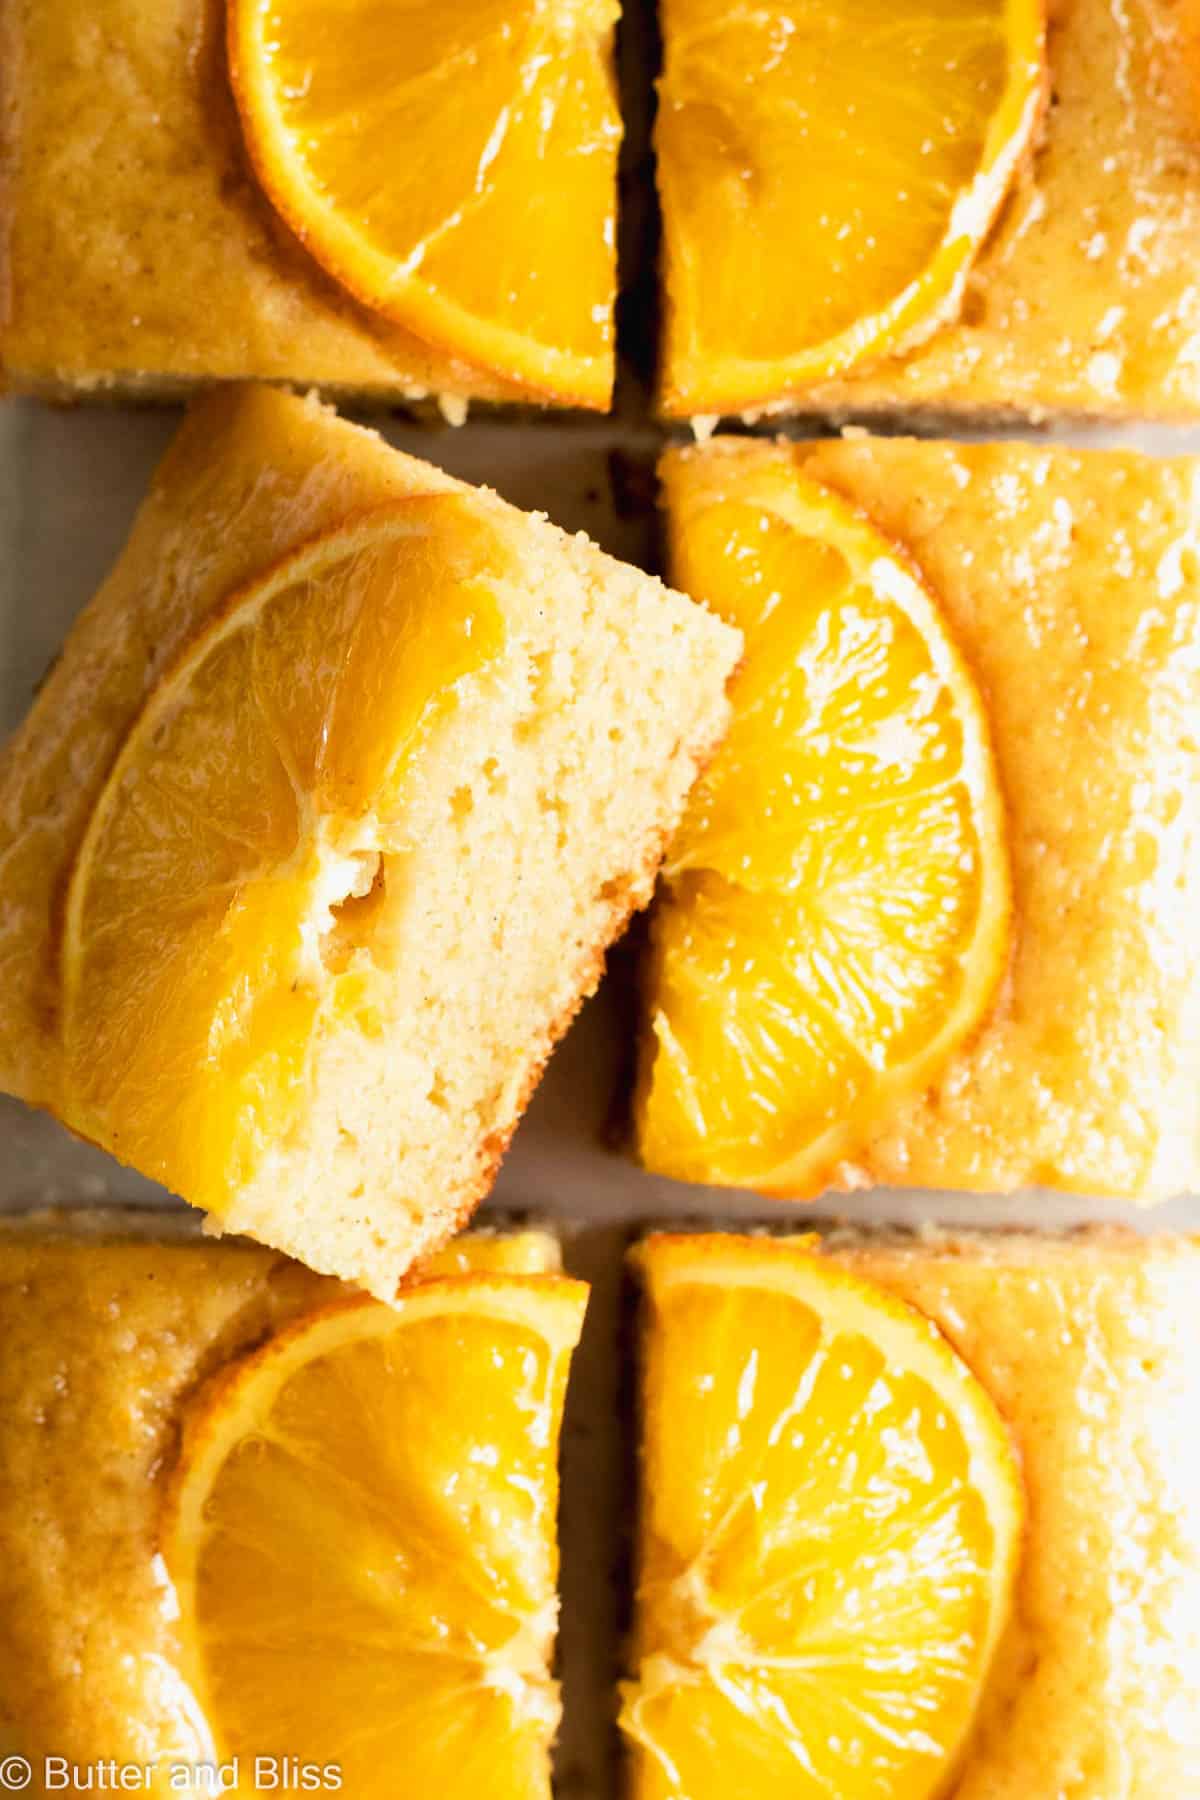
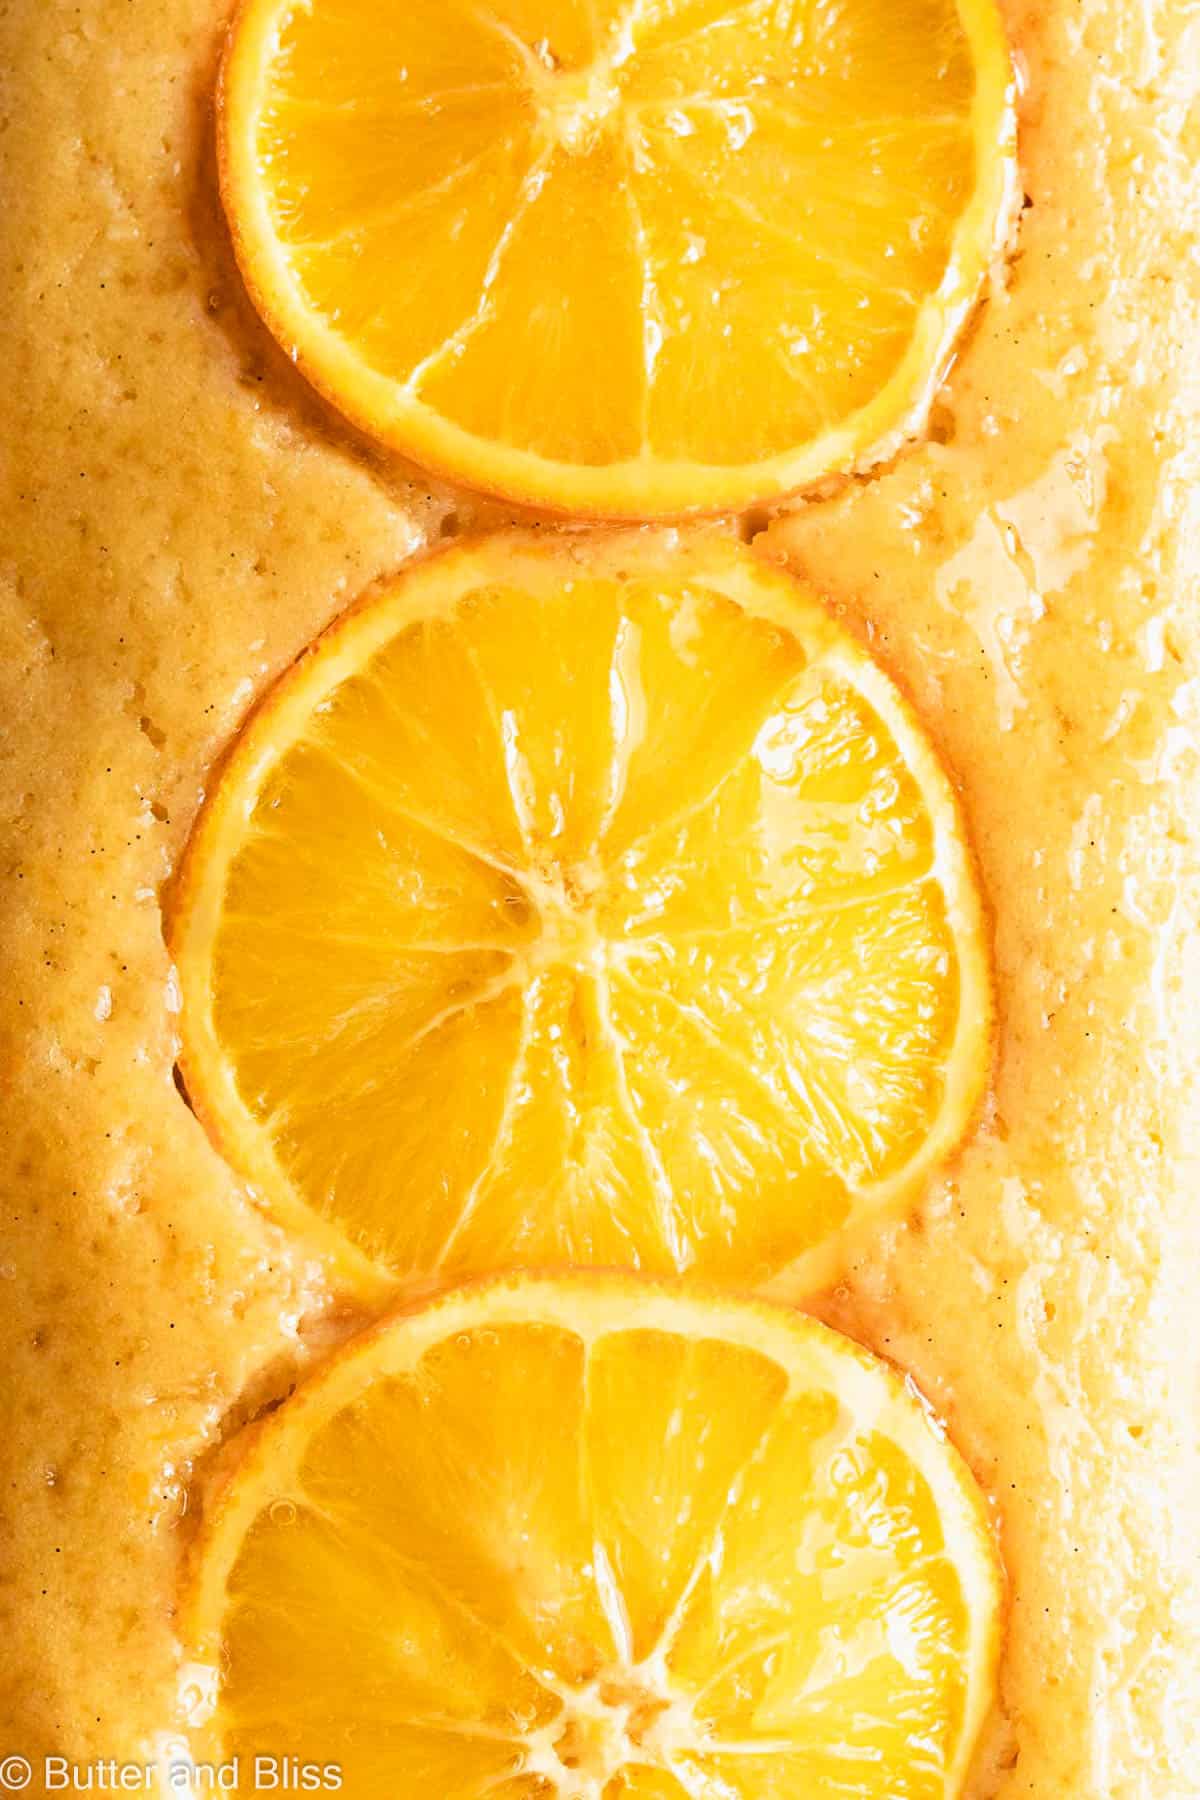
But the (literal) crown on this cake is the whole orange slices that get baked right in. Glazed with honey, the slices soften into sweet decorations and the bright aroma hits you before the first bite. Not to mention, you’ll feel a little guilt-free devouring each slice. Win. Win.

You’re 4 Steps Away From Your New Favorite Citrus Cake
Seriously, 4. And that includes preparing the orange. Have you ever made a cake this easy?!
Zest, slice, and juice your orange. Use a good-sized orange so you can get those pretty slices on top.
Mix the wet ingredients. This is the only bowl you need for the recipe. My kind of recipe!
Sprinkle the dry ingredients over the wet. There are only 3 of them. See, easy.
Bake and cool. The loaf pan makes getting the cake out of the pan easy. Not to mention, the perfect little squares it slices into.
Ok, one more, but it’s optional. Brush the top with a little more honey for a glossy finish.
Like the idea of orange desserts? I have a couple more ideas that highlight the bright citrus. The chocolate and orange mini tarts are divine. As are the winter citrus individual tarts with piles of fresh orange slices on top.
Tell me – do you like baking cakes in loaf pans as much as I do? 🙂 I’d love to hear from you in the comments below. And a star rating while you’re there would be great!
Easy Small Orange Cake Recipe
by Erin Cernich
Equipment
Ingredients
- 3 fresh orange slices, sliced thin (reserve remaining orange for juice and zest)
- ¼ cup honey (plus more for brushing the orange slices)
- 1 large egg, room temperature
- 3 tablespoons milk, room temperature (any kind will work)
- 3 tablespoons fresh orange juice
- ½ teaspoon orange zest
- ¾ teaspoon vanilla extract
- ¾ cup all-purpose flour
- ½ teaspoon baking powder
- ⅛ teaspoon salt
- 4 tablespoons unsalted butter, melted and cooled slightly
Instructions
- Orange Slices – To get even larger slices from the orange (as pictured), you will want to take your slices from the middle of the fruit. I recommend zesting the ends of the orange first – avoiding the middle so you keep the skin on your slices. Then cut the orange to get your thin slices (less than 1/4 inch thick). Juice the remaining orange for the cake.3 fresh orange slices, sliced thin
- Preheat oven to 350F degrees and adjust the oven rack to the middle position. Line a 9×5-inch loaf pan with a piece of parchment paper – long enough to hang over the long sides of the pan. Lightly grease the pan and paper.
- In a medium mixing bowl, add the honey, egg, milk, orange juice, orange zest, and vanilla. Whisk until smooth and thoroughly combined.¼ cup honey, 1 large egg, room temperature, 3 tablespoons milk, room temperature, 3 tablespoons fresh orange juice, ½ teaspoon orange zest, ¾ teaspoon vanilla extract
- Sprinkle the dry ingredients over the wet, then add the melted butter. Fold the batter until no dry streaks remain.¾ cup all-purpose flour, ½ teaspoon baking powder, 4 tablespoons unsalted butter, melted and cooled slightly, ⅛ teaspoon salt
- Pour the batter into the prepared loaf pan. Top the batter with the orange slices and lightly brush the orange slices with honey.
- Bake for 20 to 22 minutes, or until a toothpick inserted in the middle comes out mostly clean. Cool the cake in the pan set on a wire rack for 10 minutes. Then gently lift the cake out of the pan using the parchment paper overhang, and cool completely on the wire rack.
- The cake is best enjoyed the day it is baked. Leftovers can be stored covered at room temperature for up to 3 days.
Notes
- Serving Size – This is a small batch recipe. I have not tested doubling the recipe to make a larger cake, though it may work. For a larger cake, use an 8-inch square or round cake pan. The cake will be thin – it is intended to be! The bake time may only need to be increase by 2 to 3 minutes.
- Yield – As written, the snack cake will yield 6 smaller or 4 larger cake slices.
- Orange Slices – To get the slices, juice, and zest from the orange takes a little planning. We want larger slices of the orange, which come from the middle. And we also want the skin on those slices for flavor. To accomplish this, I recommend zesting the orange – avoiding the middle – first. Then, slice the orange to get your thin slices for on top of the cake. Juice the remaining orange halves.
- Ingredient Substitutions – I recommend the ingredients as written. Honey bakes much differently than granulated sugar, or even maple syrup. With that, I can’t speak to how changing the flour or other ingredients will work.
- Storing Leftovers – Store the cake covered at room temperature for up to 3 days. Beyond that, and it may start to dry out.
- Freezing the Cake – You can freeze the cake for up to 3 months, and thaw at room temperature. Wrap tightly in plastic wrap then place in a freezer bag. Note – the texture of the orange slices may change once frozen and defrosted – i.e., they may get a little mushy.
Nutrition Estimates
TRY THESE SMALL BATCH RECIPES NEXT!

About the Author …
Hi, I’m Erin! With years of experience baking for two in my own small household, I know about the love for desserts without the leftovers. I’ve tested, written, and photographed every one of the 300+ recipes on my website. And even had some of my desserts featured on Taste of Home, The Spruce Eats, ELLE, Parade, and more! From traditional to gluten free desserts for two, I have the recipe for you.
Click here to learn more about me →
Easy and delicious!
So glad you enjoyed it! Thanks so much Molly!