Small Batch Red Velvet Cookies With Cream Cheese
This post may contain affiliate links. See my disclosure policy.
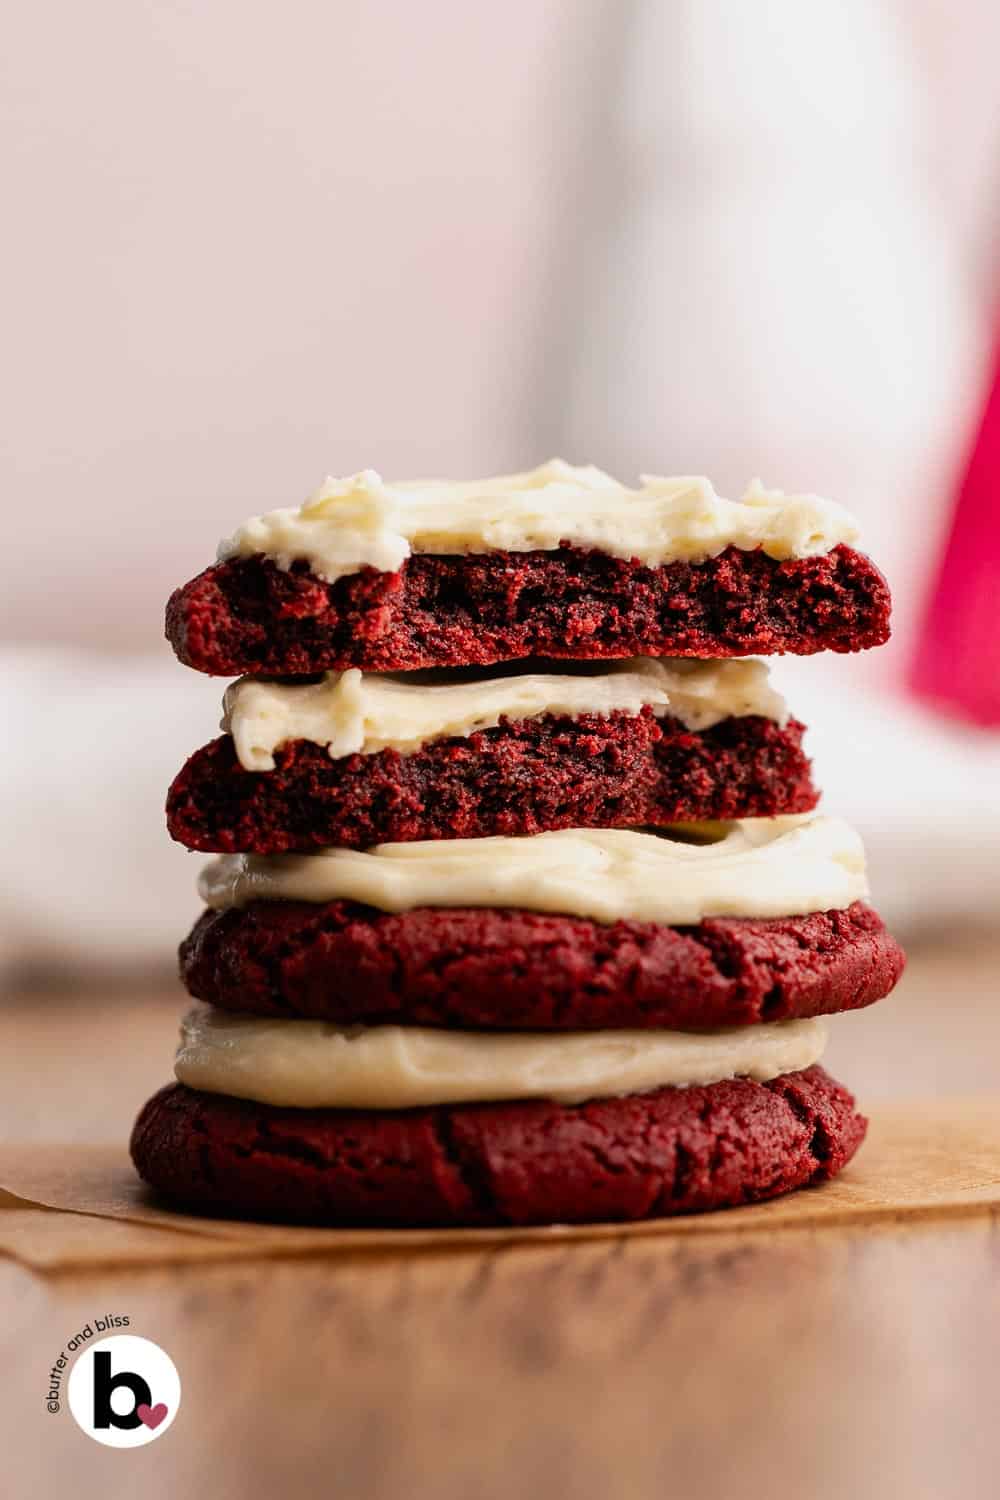
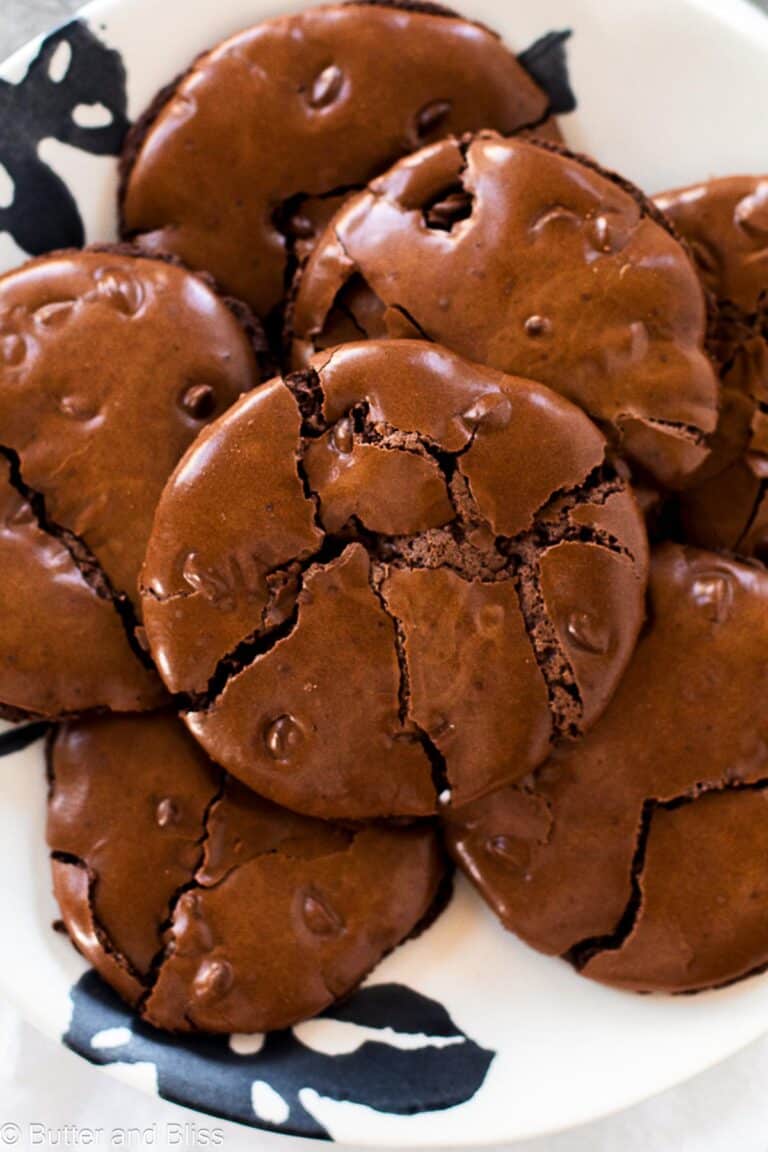
These frosted small batch red velvet cookies bake up fudgy and ultra-chewy, then get a generous swipe of tangy cream cheese frosting for that classic red velvet balance. Dutch cocoa, brown sugar, vanilla, and a little sour cream build the signature flavor. The tinted dough chills briefly, the bake is quick, and the batch is scaled for smaller celebrations — like Christmas gifting, Valentine’s Day treats, or anytime you want a splash of color for dessert.
Trust me when I say you will love this small batch of red velvet cookies! I had one of those ‘OMG’ social media moments with my first bite. The fudgy centers combined with spoon-worthy frosting made me a little weak in the knees. Yes, I love all of my recipes. But these were the delicious surprise I needed to catapult me into the Christmas baking season.
Red velvet cookies have the appearance of something fancy (hello red velvet small batch crinkles!), but really, they are just incredibly good chocolate cookies. And, traditionally red velvet is paired with cream cheese. Enter the cream cheese cookie frosting.
Because of their crimson hue, these cookies are great for any holiday or special occasion. And if it’s a chocolate and cream cheese cookie combination you crave, I have you covered with my chocolate cut-out small batch sugar cookies with cream cheese in the dough to keep them soft.
How To Make Frosted Red Velvet Cookies
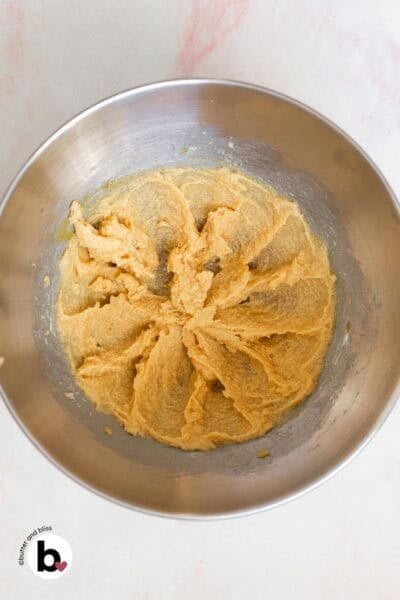
Start by creaming the butter and sugar, then add the egg and vanilla. 
Whisk the dry ingredients separately to fully combine.
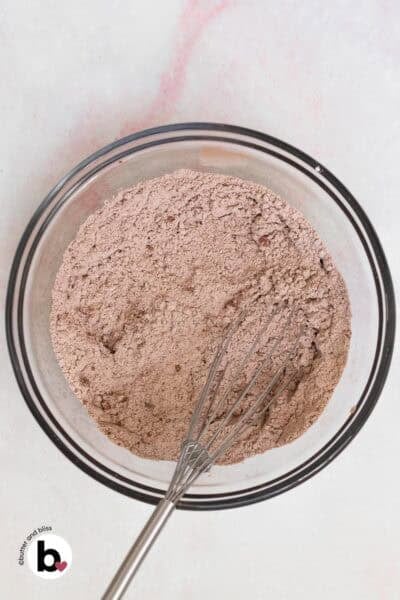
Tip! If your cocoa powder is extremely lumpy, sift it through a fine mesh strainer set over the mixing bowl. Otherwise, you can break up lumps with your whisk

Add the dry ingredients to the wet, along with food coloring, and mix until thick. Scoop and roll the cookie dough into balls, place on baking sheets, and chill for 1 hour.


Easy Cream Cheese Cookie Frosting
While the cookies bake (I find the sweet spot to be about 10 minutes), make the cream cheese frosting. This is the same base recipe I use in my fruit-flavored cream cheese cookie frosting. An option if you want to add more flavor.
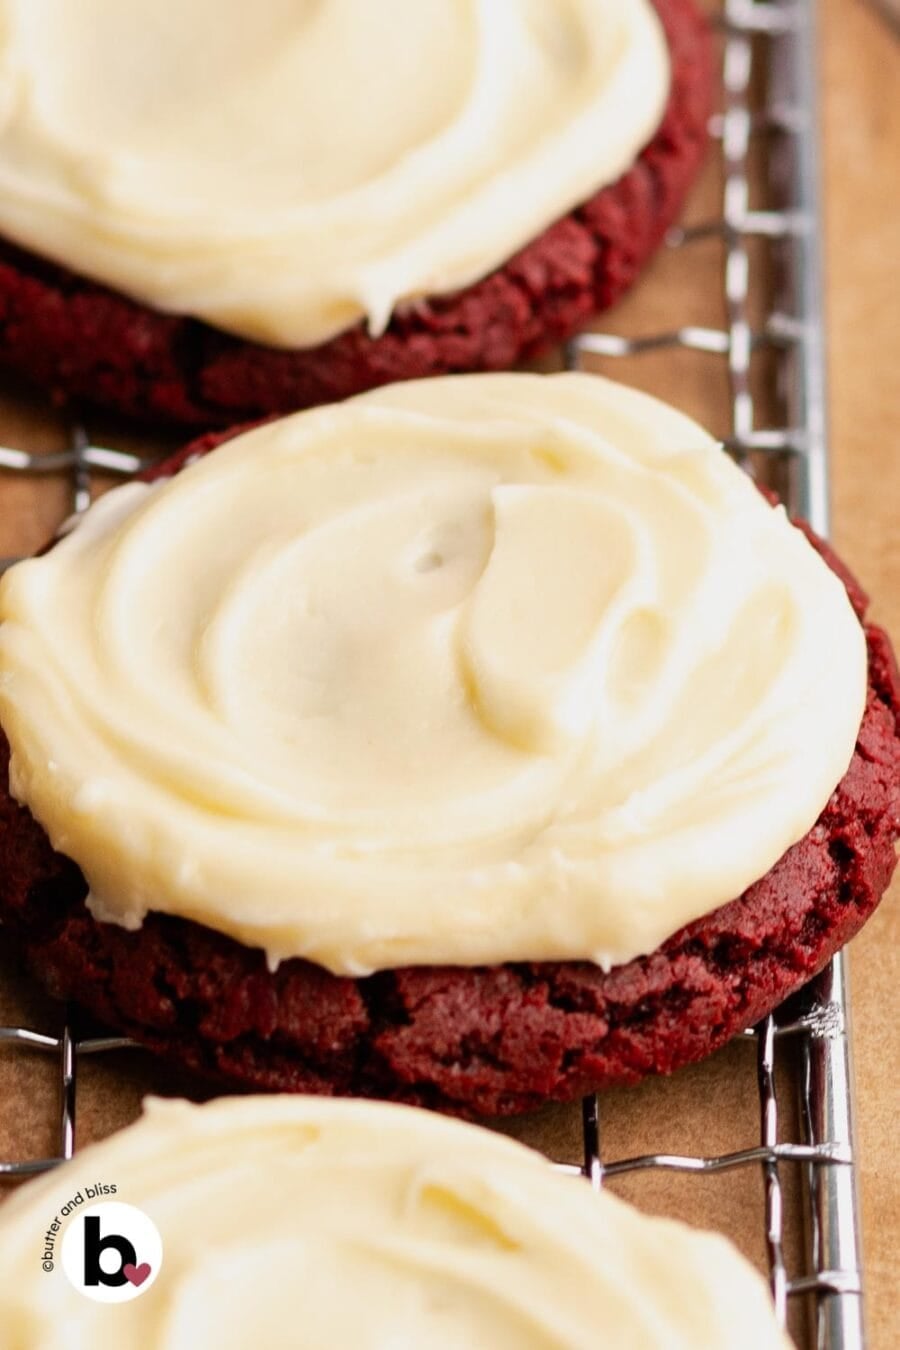
Cream together the butter and cream cheese until smooth. Then add the powdered sugar. Mix the frosting well until it is light and fluffy. It’s ready to use right away.


I hope you make these cookies and have the same ‘insta-worthy’ reaction! ❤️
Did You Make It? Let’s Hear About It!
⭐⭐⭐⭐⭐
Tell me what special occasion you made these red velvet cookies for! I’d love to hear about it in the comments below!

Small Batch Red Velvet Cookies With Cream Cheese
by Erin Cernich
Equipment
Ingredients
Red Velvet Cookies
- ¾ cup, plus 2 tablespoons (105 g) all-purpose flour
- 2 tablespoons (10 g) unsweetened cocoa powder, Dutch process
- ½ teaspoon baking soda
- ¼ teaspoon salt
- ¼ cup (56.75 g) unsalted butter, room temperature
- 6 tablespoons (72 g) brown sugar, light or dark
- 2 tablespoons (24 g) organic cane sugar (or granulated sugar)
- 1 large egg yolk
- 1 tablespoon (12 g) full fat sour cream, room temperature (or Greek yogurt)
- 1 teaspoon vanilla extract
- ½ teaspoon red food coloring
Cream Cheese Cookie Frosting
- 2 ounces cream cheese, room temperature (full fat)
- 2 tablespoons (28 g) unsalted butter, room temperature
- ½ teaspoon vanilla extract
- ⅛ teaspoon salt (pinch or two)
- ½ cup (60 g) powdered sugar
Instructions
Red Velvet Cookies
- Line 2 baking sheets with a piece of parchment paper.
- In a small mixing bowl, whisk together the flour, cocoa powder, baking soda, and salt. Pro Tip – Set a fine mesh strainer over the bowl and sift the cocoa powder over the flour to remove lumps.3/4 cup, plus 2 tablespoons all-purpose flour, 2 tablespoons unsweetened cocoa powder, Dutch process, 1/2 teaspoon baking soda, 1/4 teaspoon salt
- Add the butter and both sugars to the 3-quart mixing bowl of a stand mixer (or medium mixing bowl to use a hand mixer). Beat on high speed until fluffy and creamy. Add the egg yolk, sour cream, and vanilla. Beat on medium high speed until smooth and creamy.1/4 cup unsalted butter, room temperature, 6 tablespoons brown sugar, light or dark, 2 tablespoons organic cane sugar, 1 large egg yolk, 1 tablespoon full fat sour cream, room temperature, 1 teaspoon vanilla extract
- Sprinkle half of the dry ingredients over the wet. Mix on low to just combine. Then add the food coloring along with the remainder of the dry ingredients. Mix until well combined and no dry streaks remain. For a deeper shade of red, add more food coloring a couple drops at a time.1/2 teaspoon red food coloring
- Use a medium cookie scoop to scoop 12 cookies and place on the baking sheets – 6 on each. Cover the pans and refrigerate for at least 1 hour, or overnight.
- While the dough is chilling, preheat the oven to 350F degrees and adjust the oven rack to the middle position.
- Remove the cookies from the fridge, and one baking sheet at a time (refrigerate the other while the first batch bakes), bake for 10 to 11 minutes or until the edges of the cookies are set – the centers will still look soft. Note – I recommend baking one cookie sheet at a time to avoid opening the oven and losing heat to rotate the pans.
- Cool the cookies on the baking sheet set on a wire cooling rack for 10 minutes. Then transfer to the wire rack to cool completely. The cookies must be cool before frosting!
Cream Cheese Cookie Frosting
- Make the frosting while the cookies are baking and cooling. It can be covered and refrigerated for up to 5 to 7 days if making ahead of time.
- In a medium mixing bowl, add the cream cheese and butter. Using a hand mixer (or clean bowl and stand mixer), beat on medium high speed until smooth. Add the vanilla, salt, and half of the powdered sugar. Mix on low to combine, then add the remaining powdered sugar and mix until the frosting is smooth. Note – For thicker frosting, add more powdered sugar in tablespoon increments. Keep in mind this should be a soft frosting for cookies and not a thick buttercream frosting.2 ounces cream cheese, room temperature, 2 tablespoons unsalted butter, room temperature, 1/2 teaspoon vanilla extract, 1/8 teaspoon salt, 1/2 cup powdered sugar
- Use an offset spatula or spoon to frost the cooled cookies. The cookies can be covered and stored at room temperature for 1 day. After that, I recommend refrigerating because of the frosting.
Notes
- Serving Size – This is a small batch cookie recipe that can be doubled. You can either use 1 whole egg or 2 egg yolks for a double batch. Egg yolks only will make the cookies extra fudgy.
- Yield – The number of cookies you yield from the recipe will depend on the size cookie scoop you use.
- Cocoa Powder – I like to use Dutch process cocoa for its bold flavor and less acidic flavor. However, natural cocoa powder will work.
- Food Coloring – I like to use gel food color for a more saturated color.
- Make Ahead – The dough can be made and refrigerated for up to 3 days. If refrigerating longer than 1 hour, I recommend letting the dough sit at room temperature for 10 to 15 minutes as it will get firm when chilled.
- Freezing The Dough – Chill the dough as instructed, then scoop into cookie balls. Place in a freezer bag and freeze for up to 3 months. The cookie balls can bake from frozen – add at least 1 minute to the bake time.
- Freezing Baked Cookies – Completely cool and unfrosted cookies can be placed in a freezer bag and frozen for up to 3 months. Thaw at room temperature to frost and serve. I do not recommend freezing frosted cookies as the consistency of the frosting will change.
Nutrition Estimates


About the Author …
Hi, I’m Erin! With years of experience baking for two in my own small household, I know about the love for desserts without the leftovers. I’ve tested, written, and photographed every one of the 300+ recipes on my website. And even had some of my desserts featured on Taste of Home, The Spruce Eats, ELLE, Parade, and more! From traditional to gluten free desserts for two, I have the recipe for you.
Click here to learn more about me →
