How To Make Homemade Bagels
This post may contain affiliate links. See my disclosure policy.
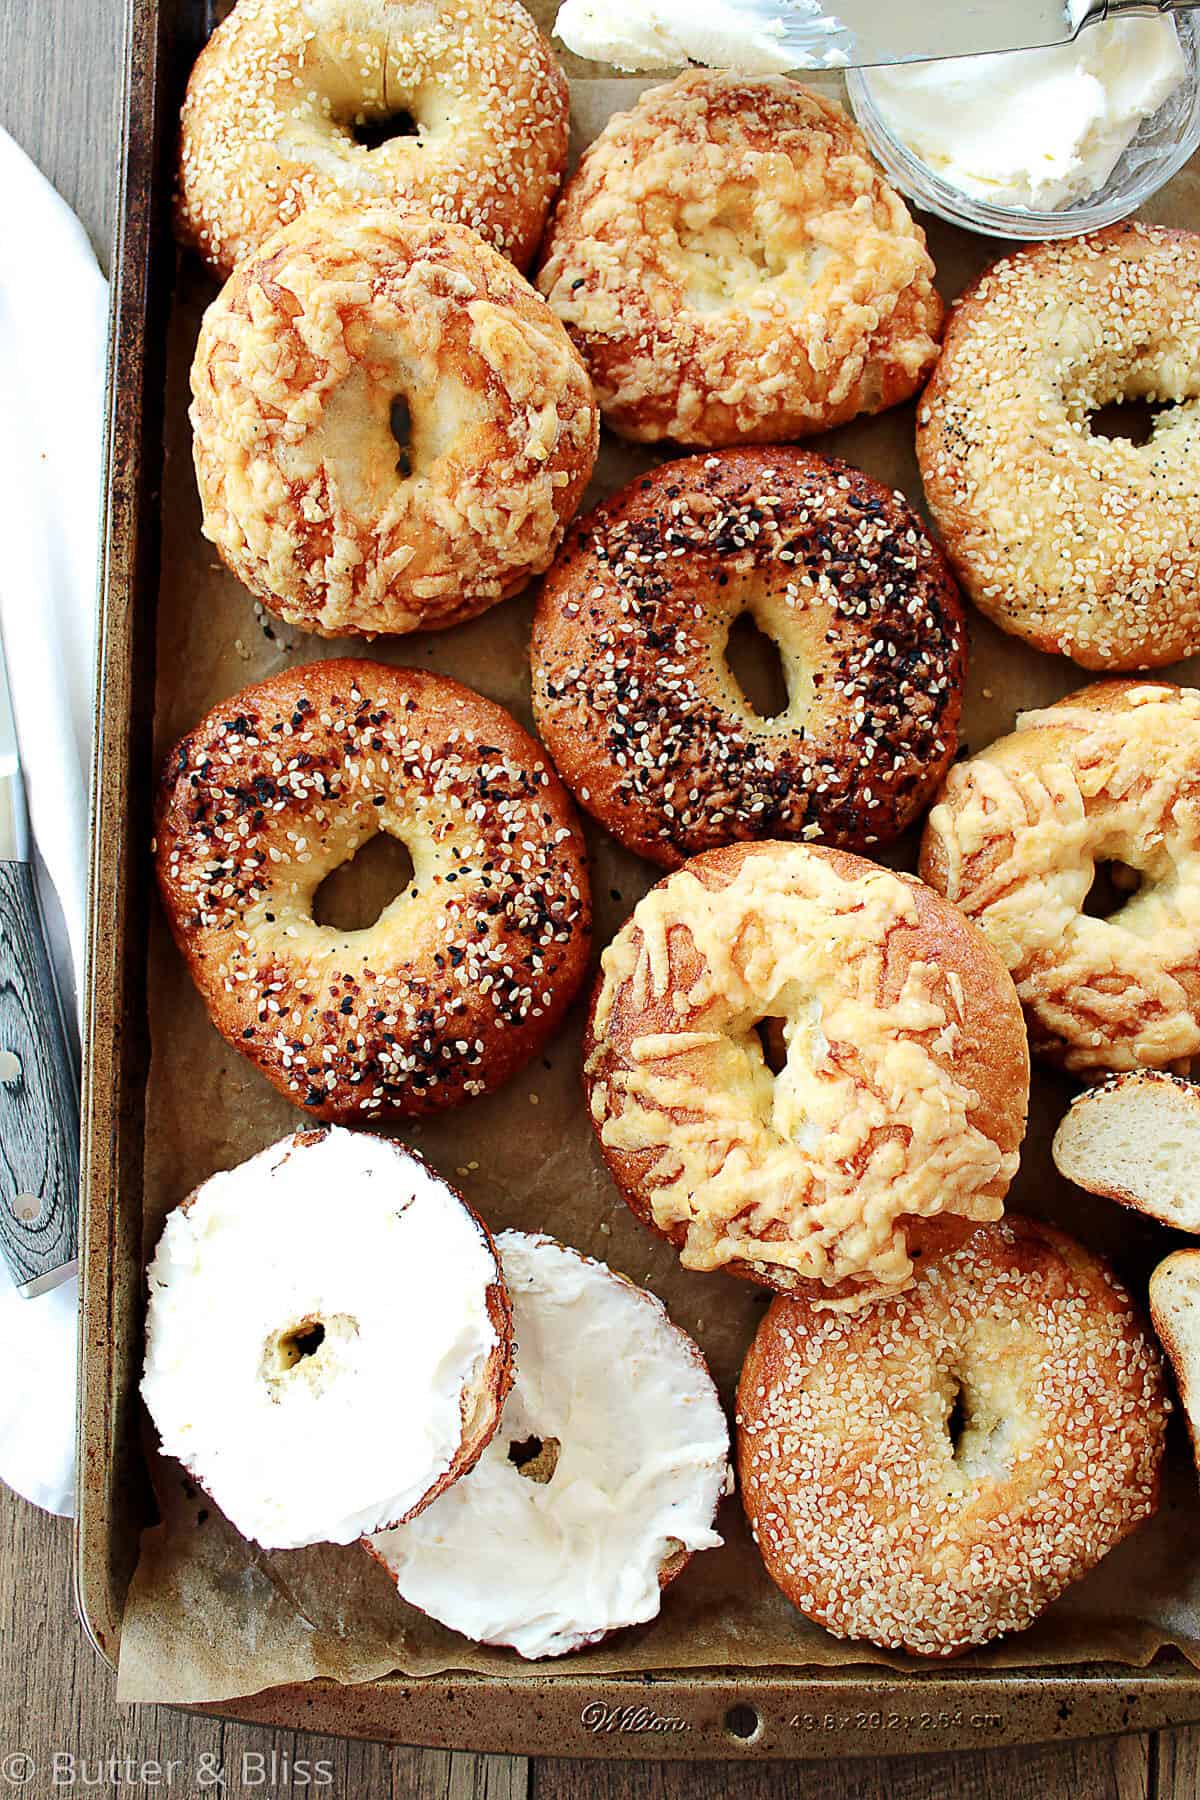
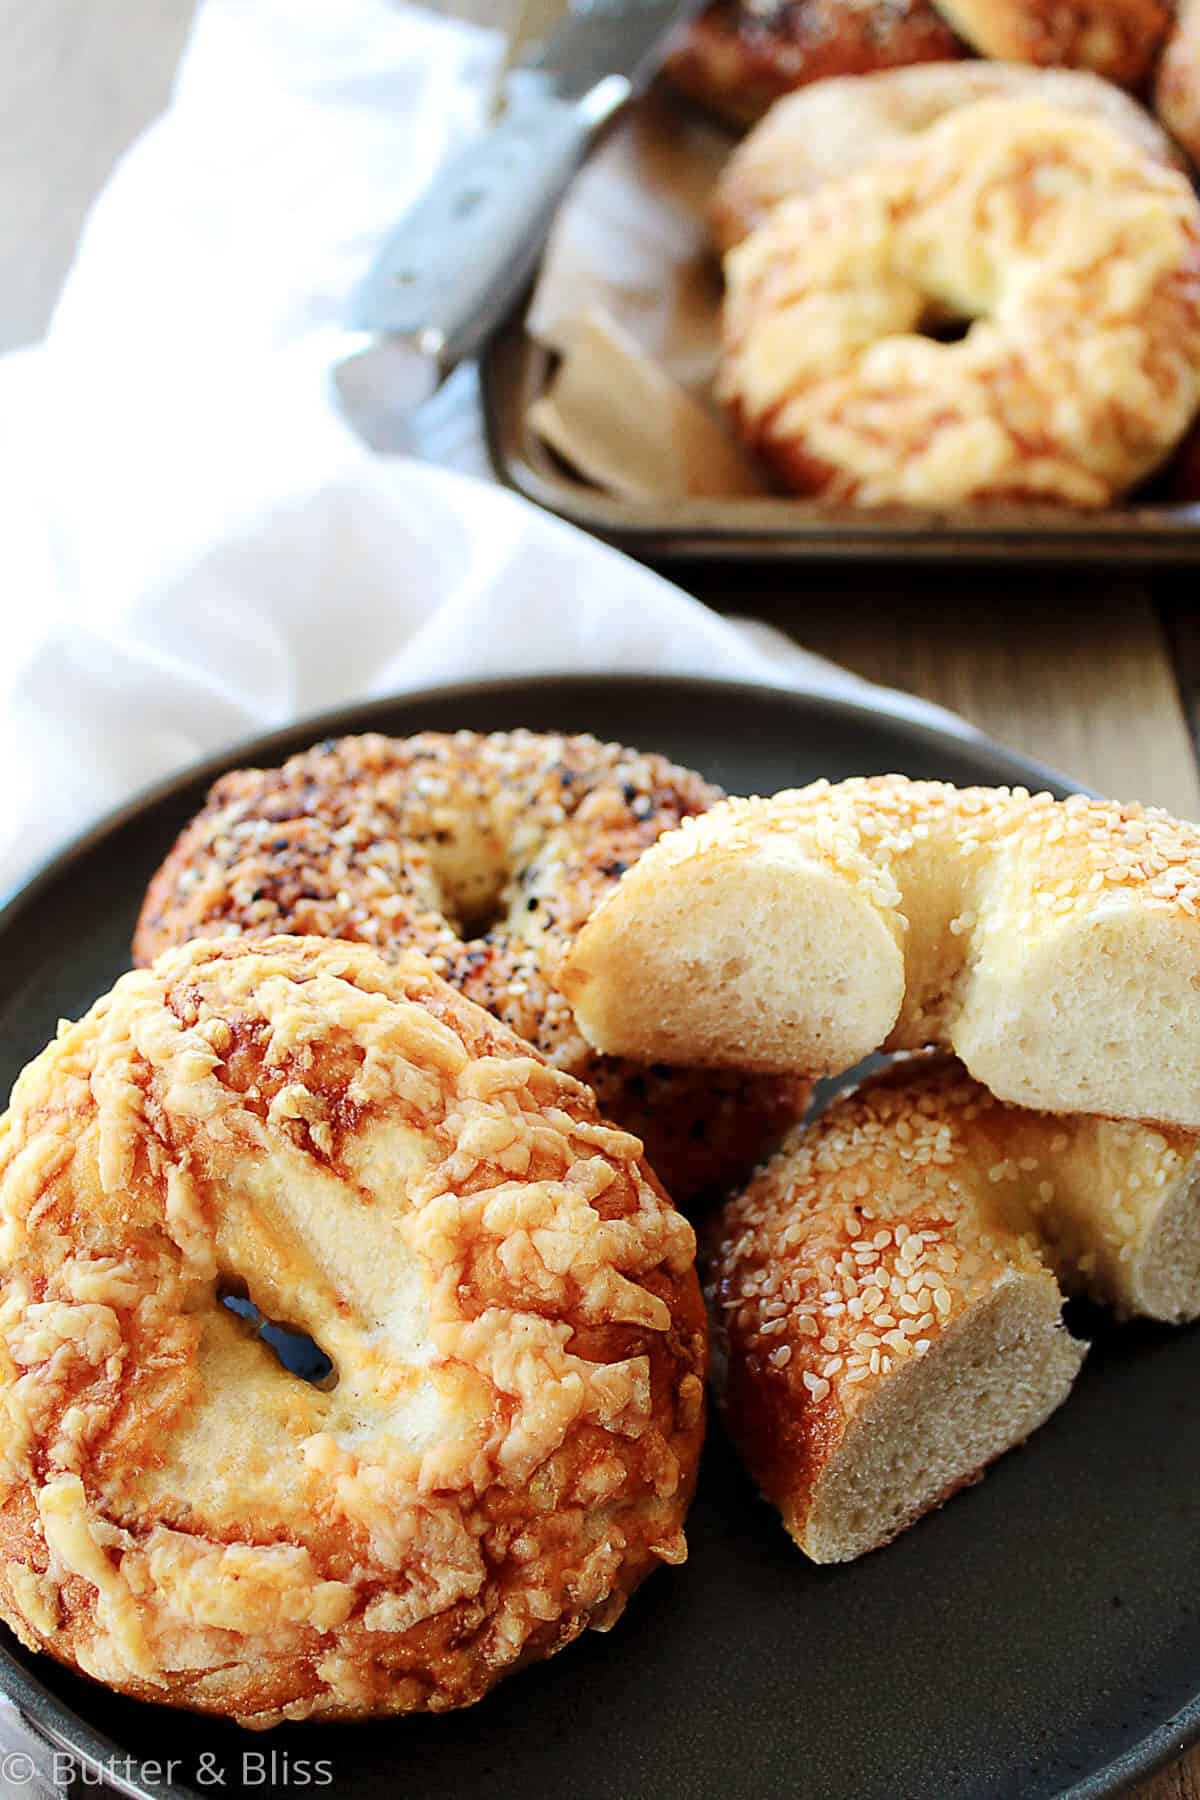
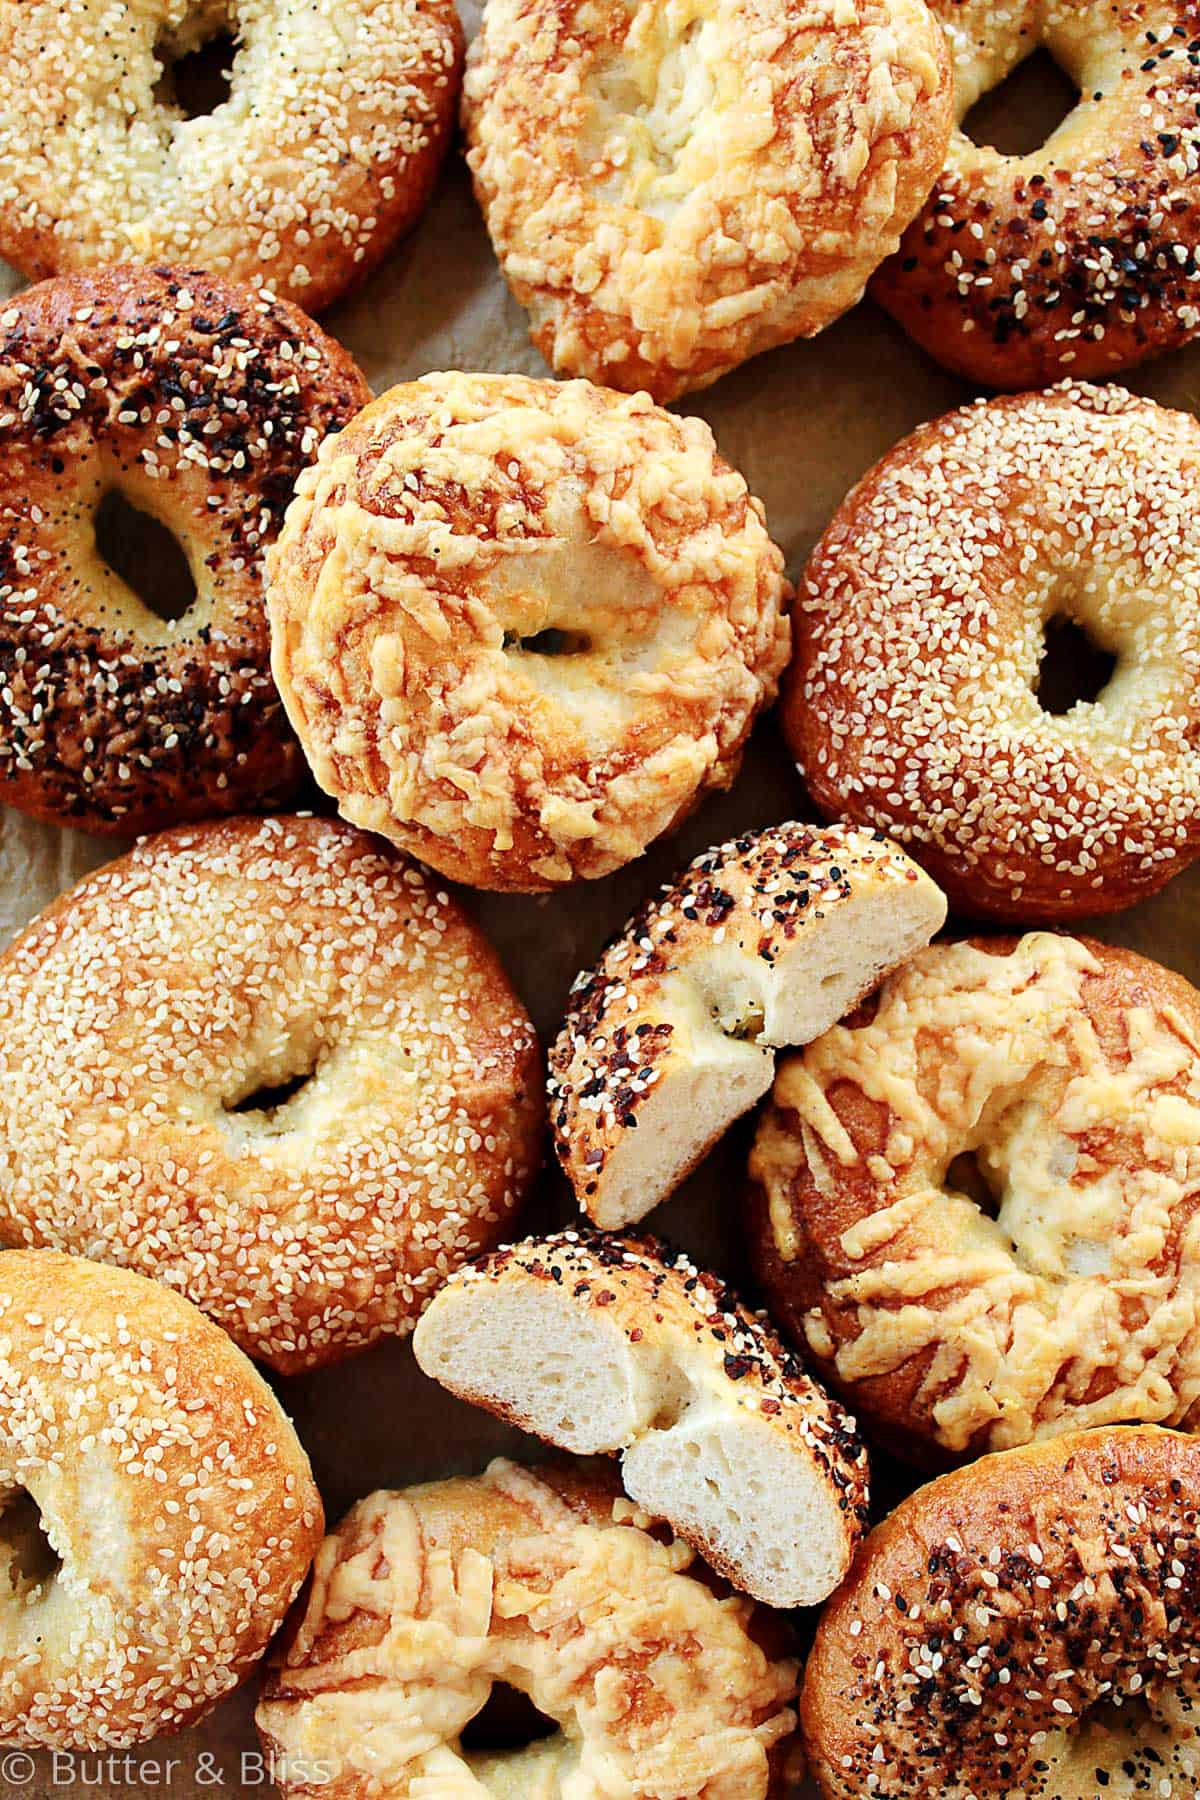
This recipe for How To Make Homemade Bagels is easy to master and produces a bagel that is chewy on the outside and super soft on the inside. Flavor the bagels with Everything Seasoning, Asiago Cheese, and Sesame, or create your own with your favorite seasoning!

Is It Hard To Make Homemade Bagels?
Making bagels at home is not as hard as you think – if you have a good recipe and a little patience. We rely on yeast to make these bagels, and dough made with yeast takes a little more time. But it’s worth it.
Like buttery homemade croissants and pinwheel Danish pastries, the dough needs time to rest. This gives the yeast time to feed on the sugar in the dough and create carbon dioxide – which promotes gluten development and makes the dough expand. It is also during this time that the delicious bagel flavor develops.
This recipe was originally adapted from the Bagels recipe in the Baking With Julia cookbook.
A Couple notes On The Ingredients
- Cornmeal – The cornmeal is used on the peel to keep the bagels from sticking to the baking sheet. Just like we do when making homemade pizza dough. All-purpose flour can be substituted.
- Egg – To brush on the bagels to make the toppings stick, and it adds a shiny exterior color.
- Toppings – Any topping you choose! Like Everything seasoning, grated cheese, salt, or sesame seeds. And once you’ve made a batch of savory bagels, you should try my easy kalamata olive small batch loaf!
Helpful Tips
- Use bread flour – I have tested the bagels with all-purpose flour, and while the flavor is still good, the texture is not what you would expect with a bagel. Bread flour has higher protein content which equals higher gluten, which equals a chewy, yet soft bagel.
- Flavor the dough AND the water bath – Adding brown sugar to the dough and boiling water is just another layer to impart flavor to the dough. It does not make the bagels sweet.
Side Note – Some pastry chefs choose barley malt syrup to flavor the dough and water bath. It’s similar to molasses. The drawback – it’s not easy to find, and if you do find it, you’re probably only using it to make homemade bagels. Brown sugar is a viable substitute because it adds sweetness and a hint of molasses flavor!
- When you knead by hand – Plan for 10 minutes to knead the dough by hand to achieve a smooth and elastic texture. A good indicator that you have kneaded long enough – is when you poke your fingers into the dough and the dough fills the holes back up.
- Plan for 1 to 2 hours for the dough to proof – However, the temperature of your kitchen, home, and outside can affect proofing time. Many recipes call for proofing at room temperature, but if your room temperature is below approximately 70F degrees, it may take longer. Conversely, if your room temperature is warmer, it may not take as long.
- Aim for consistent shapes and sizes when shaping the bagels – Don’t stress too much, but keep in mind we want similar sizes to bake evenly.
- Keep the bagels in the oven for an additional 5 minutes when they are done with the oven turned off – The residual heat finishes the cooking process without over-baking.
If you made these Homemade Bagels, I’d love to hear from you and how it went! Please leave a comment along with a star rating below. I appreciate your support!
Homemade Bagels
by Erin Cernich
Equipment
- Large Pot or Dutch Oven
Ingredients
Yeast Mix
- ¼ cup water, room temperature
- 2 ¼ teaspoons (1 packet) active dry yeast (high altitude adjustment: 2 teaspoons)
- 1 pinch granulated sugar
Bagels
- 1 ¼ cups water, room temperature
- 2 tablespoons brown sugar
- 1 tablespoon kosher salt
- 4 to 5 cups bread flour
- 1 tablespoon unsalted butter, melted and cooled slightly
- cornmeal (for dusting bagel 'peel'; flour can be substituted)
- 1 large egg, beaten
- optional toppings: everything seasoning, grated asiago cheese, sesame seeds, poppy seeds, sea salt
Water Bath
- 3 quarts water
- 2 tablespoons brown sugar
- 1 teaspoon baking soda
Instructions
- Read the entire recipe first before you start to make the bagels.
Yeast Mix
- In a liquid measuring cup, mix 1/4 cup of the water and the yeast, along with a pinch of sugar sprinkled over the top. Set aside for 5 to 10 minutes until the yeast turns foamy and creamy.1/4 cup water, room temperature, 2 ¼ teaspoons (1 packet) active dry yeast, 1 pinch granulated sugar
Bagels
- In a large mixing bowl, add the remaining water and stir in the brown sugar. Pour in the yeast mixture, 2 cups of flour, and the salt. Stir with a wooden spoon. Continue to add a 1/2 cup of flour at a time and stir until the dough starts to come together as a rough, sticky dough. Stirring the dough will require some 'elbow grease' but it will not take long to get the dough to the right consistency. You likely will not need all of the flour.1 ¼ cups water, room temperature, 2 tablespoons brown sugar, 1 tablespoon kosher salt, 4 to 5 cups bread flour
- Knead the Dough– Turn the dough out onto a floured surface, flour your hands and knead the dough for 7 to 10 minutes until you have a smooth, soft, and elastic dough. You will know you have kneaded the dough long enough when you stick your fingertips into the dough and the dough fills ups the holes.
- Brush a large bowl with the melted butter. Form the dough into a ball and place in the prepared bowl and brush the top of the dough with the melted butter as well. Cover the bowl with plastic wrap and a dry kitchen towel and set in a warm place to proof the dough for 1 to 2 hours, or until the dough has doubled in size.1 tablespoon unsalted butter, melted and cooled slightly
- Line 2 baking sheets with parchment paper. These will be used to bake the bagels. Take another baking sheet, turn upside down, and sprinkle with cornmeal. This will be used as the 'peel' to season the bagels before transferring to the baking sheets to bake. Note – If you don't have cornmeal, you can use flour.cornmeal
Water Bath
- When the dough has proofed, prepare the water bath and preheat the oven.
- Preheat the oven to 425F degrees. Adjust the oven racks to the top third and bottom third of the oven.
- Fill a large pot with 3 quarts of water and turn on high heat to bring to a boil. Once the water has started to boil, add the brown sugar and baking soda to the water.3 quarts water, 1 teaspoon baking soda, 2 tablespoons brown sugar
- While you wait for the water to boil, start to shape the bagels.
- Prepare the Dough to Shape – Punch the dough down to release air bubbles. Turn out onto a lightly floured surface and divide the dough into 8 pieces. Each piece does not have to be identical, but get as close as possible to the same size. Work with one piece of dough at a time and place a kitchen towel over the other pieces.
- Shape the Bagels – Pull up the sides of the dough from the bottom all around, pinching it all together at the top – to create a tightly packed ball with a pinched pleat at the top. Turn the pinched top over, so it is on top of your work surface, and poke your index finger into the middle of the dough ball to create the bagel hole. Make the hole bigger by twirling it around your finger with your other index finger. You will want it to be about 2 inches wide as the hole will shrink back slightly when boiled and baked.
- Place the shaped bagels on the prepared baking sheets.
- Plunge the bagels 2 at a time (or 3 if you have a larger, wider pot) into the boiling water and boil for 35 seconds on each side. The bagels should have enough room to float around and they will puff up, and their circular shape will set. Tip – Use a large slotted spoon to plunge and retrieve the bagels from the water.
- Remove the bagels from the water and place on the prepared 'peel' baking sheet. Brush the tops of each with the egg wash and sprinkle with your choice of seasoning. Move the seasoned bagels bake to the prepared baking sheet(s). Note – Using the baking 'peel' allows you to make a mess with the egg wash and seasoning and transfer to a clean baking sheet to bake. Otherwise, those messy drippings are likely to burn when baked!1 large egg, beaten, optional toppings: everything seasoning, grated asiago cheese, sesame seeds, poppy seeds, sea salt
- Bake for 20 minutes, or until the bagels are golden brown. If baking on two baking sheets rotate the sheets halfway through. Turn the oven off when the bagels are done and let sit in the oven with the door closed for another 5 minutes. Transfer to a wire rack to cool completely. Bagels are best enjoyed the day they are baked.
- Store the Bagels – I do not recommend refrigerating leftover bagels – they will probably dry out. The bagels can be stored at room temperature for up to 3 to 5 days in an airtight glass or metal container; a Ziploc bag (squeezing as much air out of the bag as possible); or rolled in a paper bag (all air removed).If you do not plan to eat the bagels in that time, I recommend freezing them the day they are baked after they have cooled completely. Wrap individually in aluminum foil then put in a Ziploc (all air removed) – leftover bagels can be frozen for up to 3 months.
Notes
- Flour – You can use all-purpose flour if you don’t have bread flour. The bagels may not be as chewy.
- Gluten Free Flour – I have not made gluten free bagels and do not have enough gluten free bread baking expertise to offer recommendations or substitutions.
- Brown Sugar – The brown sugar in the dough and water bath gives the bagels flavor. The bagels will not be sweet.
- Stand Mixer – You can mix the dough in a stand mixer fitted with the dough hook attachment. Mix the dough for about 2 to 3 minutes. You will still want to knead by hand on a floured surface for about 5 minutes after mixing so the dough does not get overworked, and you can feel once it has become smooth and elastic.
- Bread Machine – I have never used a bread machine. However, if you want to try to mix and knead the dough in a bread machine, I recommend following the manufacturer’s instructions.
- Flavor Mix-In’s – I have only made the bagels as written. However, if you would like to add mix-in’s into the dough (i.e. raisins), I recommend adding at the beginning of mixing – after you have added at least 2 cups of flour. This gives the mix-in’s something to mix with.
- Proofing the Dough – Proof the dough in a place where it is warm room temperature. If you have a colder home or it is a colder day, you will want to find a warmer place, like inside a cabinet or pantry. Or if you have a proof box or proof setting on your oven, that is even better!
- Baking Soda – The baking soda in the boiling water bath helps to make the bagels chewy. You can leave the bagels in the water bath for a few seconds longer if you prefer a chewier bagel.
- Cool the Bagels – Allow the bagels to cool completely before serving. They will taste better once they have had time to cool.
- High Altitude adjustment – Usually high altitude adjustments come into play at altitudes higher than 3,500 feet.
- Reduce the amount of yeast to 2 teaspoons in total. This will be less than what is in the yeast packet, so you will have leftovers that should be discarded. Or you can purchase yeast in small jars that are stored in the refrigerator.
- More water is used in high altitude adjustments. Which is why I start with all of the water and as much flour as needed to get to the right dough consistency. Which is a rough, sticky dough.
Nutrition Estimates
More Bread Recipes For Breakfast
After you have mastered making bagels at home, why not try a few more breakfast bread recipes to add to your recipe box – some are just a tad easier too!
TRY THESE SMALL BATCH RECIPES NEXT!


About the Author …
Hi, I’m Erin! With years of experience baking for two in my own small household, I know about the love for desserts without the leftovers. I’ve tested, written, and photographed every one of the 300+ recipes on my website. And even had some of my desserts featured on Taste of Home, The Spruce Eats, ELLE, Parade, and more! From traditional to gluten free desserts for two, I have the recipe for you.
Click here to learn more about me →
These are great bagels and very adaptable. I’ve experimented with a lot of different flavors and we love them! Thanks!
Thank you so much! So glad you enjoyed the bagels and thank you for trying the recipe!
I made these today and they were fantastic. They were crispy on the outside and chewy on the inside. This was my first go at making bagels and I found the recipe easy to follow and will be making them again and playing with add-ins/ons.
Yay! 🙂 So glad you enjoyed the bagels Tricia – thank you for trying the recipe!
Made these several times and they are very tasty bagels!
Thank you Kerrie – so glad you enjoyed them!
Do you have a recommendation for substituting the egg wash? I recently found out my son (who I’m nursing) is allergic to egg and dairy so I need to cut them out. Is there a good substitute or should I just omit it? I am excited to try this!
Hi Samm – I would just omit it. The egg wash just makes the bagel tops shiny and golden. Also helps to adhere the toppings. Though – if you wanted to try a substitute, I have seen recipes that use dairy-free milk or cream in lieu of the egg wash. Hope you enjoy them!
Hi! I was wondering if I could make the dough in my bread machine? There’s a King Arthur bagel recipe that allows for that and so I wanted to make sure I could do that with this recipe also. Sure would save time. 😊
Hi Amanda – I have never used a bread machine, so unfortunately I am not 100% certain. Though, I would say it would be worth trying and follow the instructions of the machine to mix the dough. And you can let me know if it works! 🙂
I just made some bagels today in my bread machine. I used the dough cycle and after that was done, I took the dough out and shaped them into balls to rise. Then, after they had risen, I made the hole in the center and baked them. They turned out great.
Thank you for trying the recipe Margaret – so glad you liked them!